
 Save it
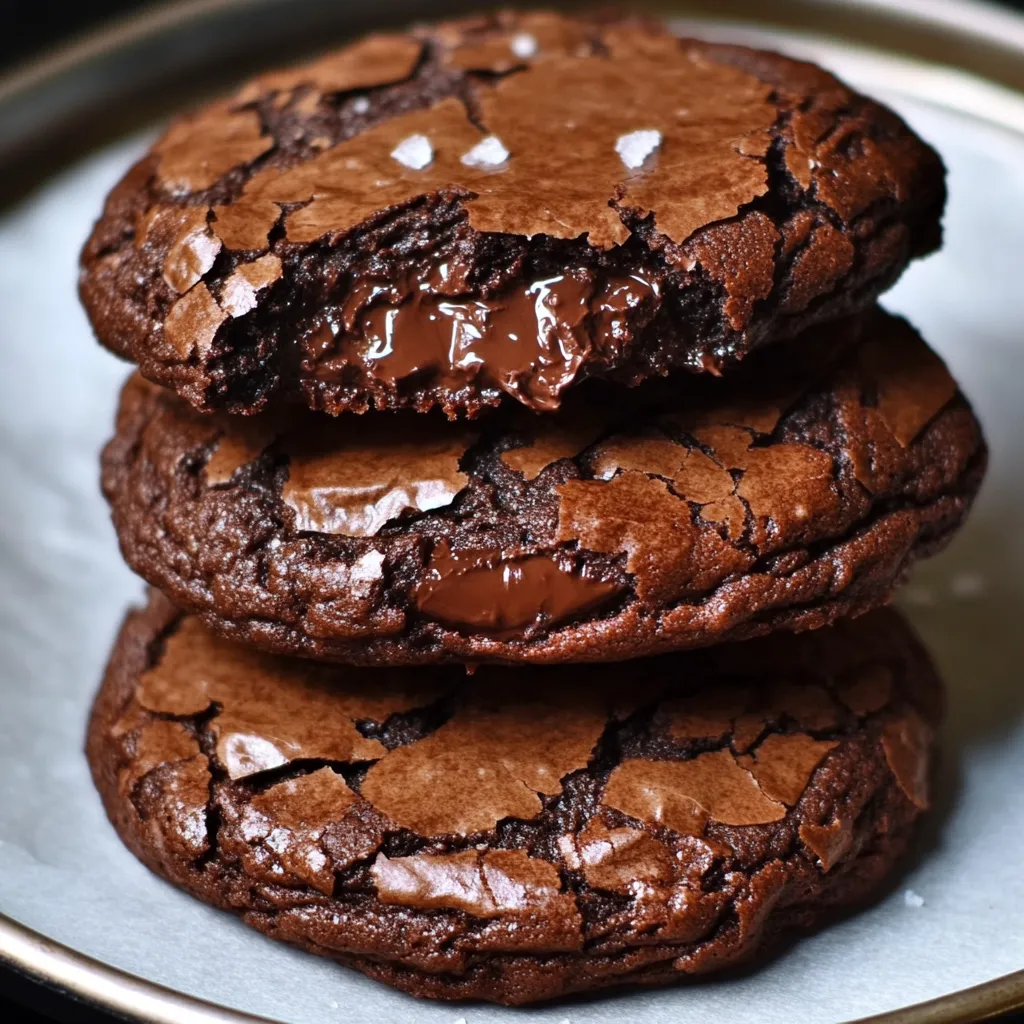
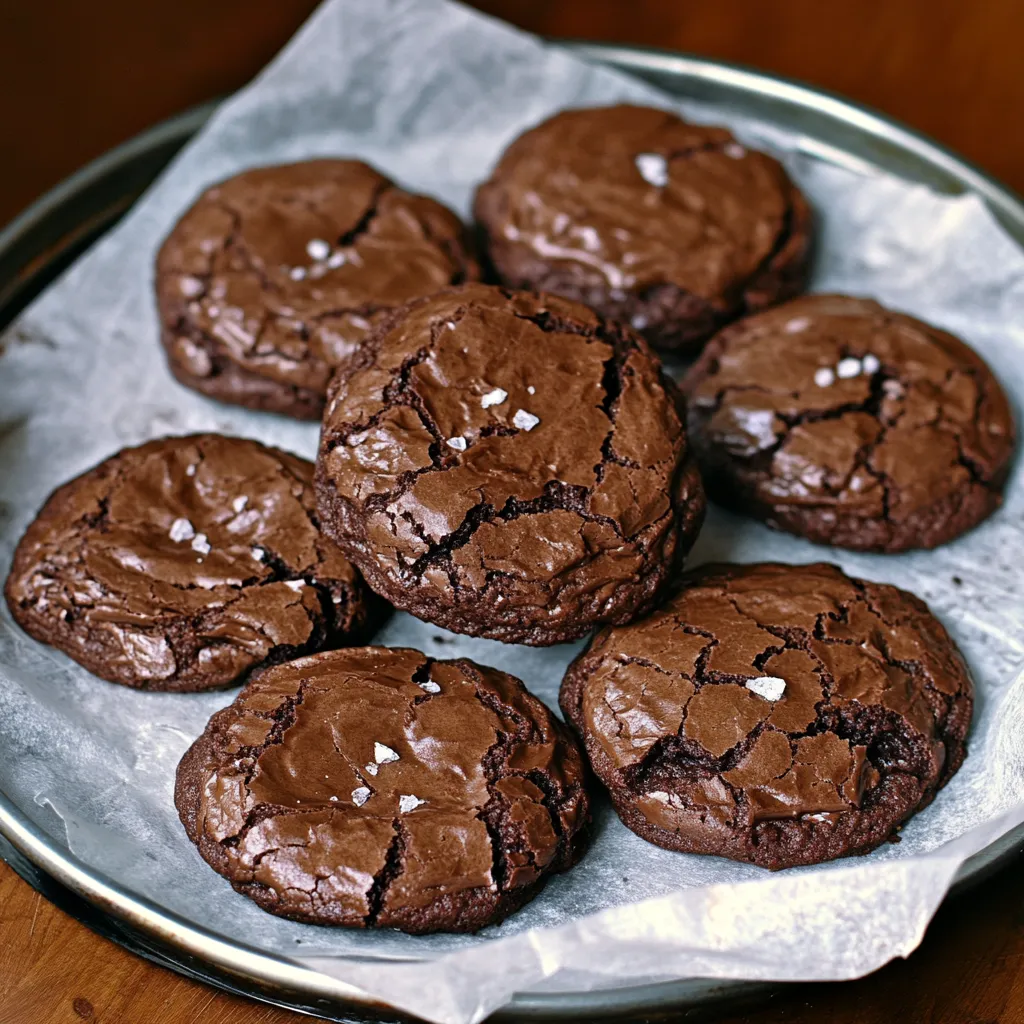
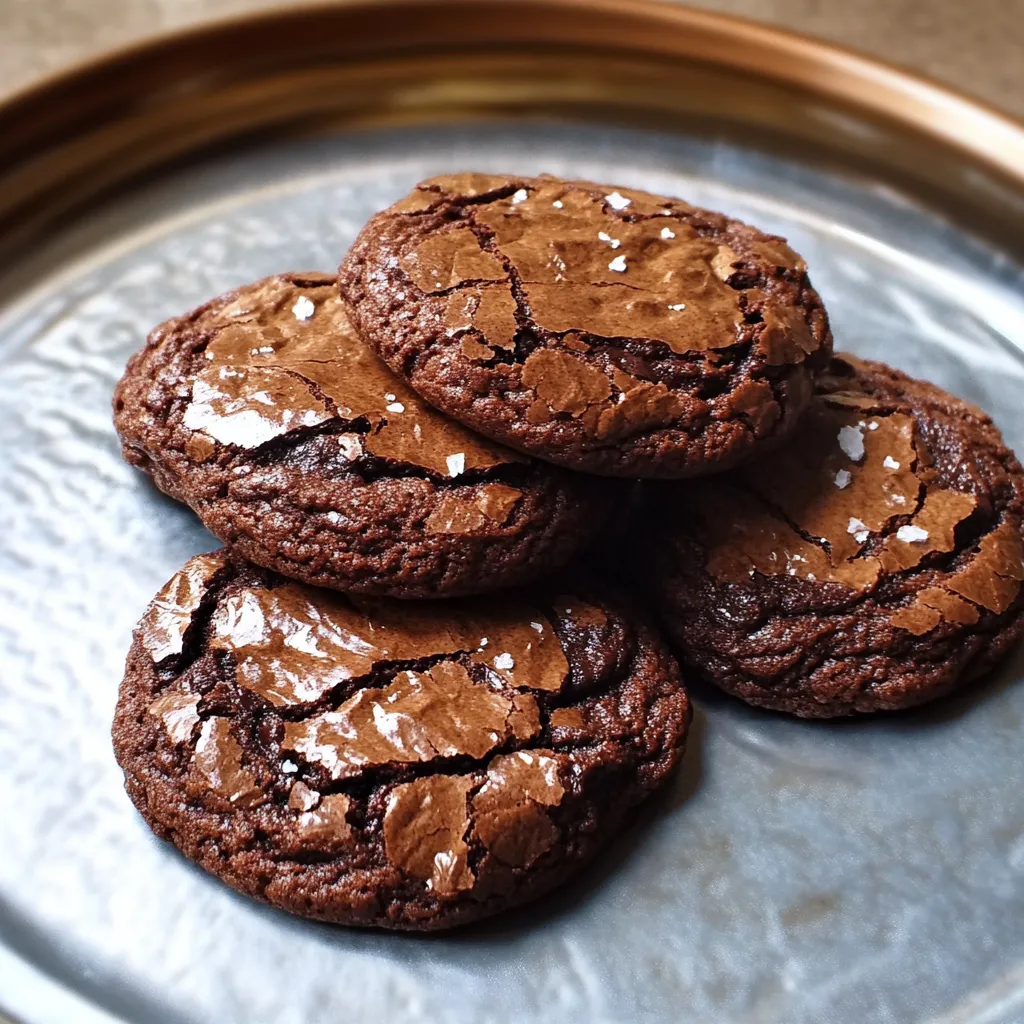
Blending brownies with cookies creates these mouthwatering Chewy Chocolate Crinkle Treats. Each mouthful offers that signature brownie softness surrounded by a thin, crackling exterior that's the hallmark of great cookies. These combo delights take the top features from both classics, making something that outshines the originals.
I stumbled on this recipe during a stormy day baking spree, and it's now my favorite chocolate treat. The way these goodies stay soft in the middle while getting crisp around the edges makes them totally addictive. Even my husband, who isn't big on chocolate sweets, always reaches for another.
Key Ingredients Breakdown
- Dark chocolate: Go for 70% cacao for rich, layered taste. Choose bars that break with a clean snap
- Unsalted butter: European types work best with their fuller flavor and better fat ratio
- Granulated sugar: Smaller crystals mix in more smoothly than rougher kinds
- Light brown sugar: Make sure it's soft and moist for proper wetness and toffee hints
- Eggs: Need to be at room temp for better mixing and texture
- All-purpose flour: Pick unbleached for good structure that stays soft
- Cocoa powder: Dutch-process gives deeper color and mellower taste
- Sea salt: Sprinkle flaky bits on top to boost chocolate intensity
Simple Cooking Instructions
- Getting Ready:
- Make space on your counter and set out everything you'll need. Warm eggs in a bowl of water (10 mins). Cut chocolate into same-sized bits so it melts evenly. Put parchment on your baking trays, not wax paper. Set your oven rack right in the middle.
- Melting Your Chocolate:
- Set up a pot with water simmering below a bowl. Throw in chocolate and butter together. Mix slowly with a rubber spatula. Take it off the heat while tiny chunks remain. Keep stirring until it's all smooth. Let it cool until barely warm.
- Working With Eggs:
- Whip eggs until they look foamy. Put in both sugars bit by bit. Keep beating the full 5 minutes. Look for a pattern that falls back like ribbons. Stay at medium speed to work in air properly.
- Putting It All Together:
- Pour chocolate mix in slowly while stirring. Fold gently to keep the air bubbles. Mix dry stuff together first. Add dry ingredients in three batches. Stop mixing once you can't see flour anymore.
- Getting Them Ready to Bake:
- Scoop with an ice cream dipper for same-sized cookies. Leave 2 inches between each one. Add sea salt flakes before they go in. Look for cracks forming on top. Pull them out when middles still look a bit soft.
 Save it
My teen daughter called these her "absolute favorites" after helping me try different versions. She loves how the crunchy edges and gooey centers remind her of the corner brownie pieces she always grabs first.
Getting That Gooey Middle
I've really learned about timing with these treats. You might want to cook them till they look done, but that extra minute can turn them from fudgy wonders to just regular chocolate cookies. Now I take them out when they still look a bit undone in the middle, knowing they'll finish up nicely as they cool down.
Keeping Them Fresh
After baking lots of batches, I've found these cookies actually get better overnight. They become more brownie-textured, and the chocolate taste gets deeper and richer. Put them in a sealed container with paper between the layers, and they'll stay good up to five days - though at my house, they never stick around that long!
Watch Your Temperature
Using room temp ingredients really helps get that awesome crackly top. I dunk my eggs in warm water for ten minutes before starting, and I make sure my butter isn't too hot when I mix it with chocolate. These little tricks give you that bakery-quality look every time.
Getting The Right Look
Using the same scoop size matters for even baking. I like a 1.5-tablespoon scoop, which makes the ideal cookie - not so big you feel bad having two, but big enough to fix a chocolate craving. Your dough should look shiny and thick, almost like you'd see with brownie mix.
Picking The Right Chocolate
The chocolate you pick really changes how they turn out. After trying lots of brands, I've found using good dark chocolate plus Dutch-processed cocoa powder gives the fullest flavor. I usually grab Ghirardelli for both when I'm shopping.
Seasonal Twists
At Christmas time, I sometimes add a little peppermint flavor and sprinkle crushed candy canes on top. For Valentine's Day, a bit of pink salt makes them look fancy. The basic recipe works great for changing up for any holiday.
 Save it
These brownie cookies have become my go-to chocolate dessert, always requested at family get-togethers and school fundraisers. They're so handy - fancy enough for special occasions but comfy enough for everyday snacking. What started as a kitchen experiment has turned into a family favorite that combines two classic treats. Their success comes down to respecting a few simple rules - don't rush the egg-beating step, use good chocolate, and don't leave them in the oven too long. Every batch reminds me why homemade sweets, made with care and good ingredients, create the best memories.
FAQ sur la recette
- → How does timing affect these cookies?
- The batter firms up fast, so scoop them all right after mixing to keep them perfect.
- → Can these cookies be prepped in advance?
- Absolutely! Store them for days in a sealed container or freeze to enjoy later.
- → Why do they need to cool before moving?
- They're fragile when hot and might break. Letting them set ensures they hold their shape.
- → What’s behind the shiny, crackled tops?
- Beating sugar and eggs for 5 minutes does the trick, giving that beautiful crust.
- → Can milk chocolate replace dark?
- Stick with 70% dark chocolate for the richest flavor and best consistency.