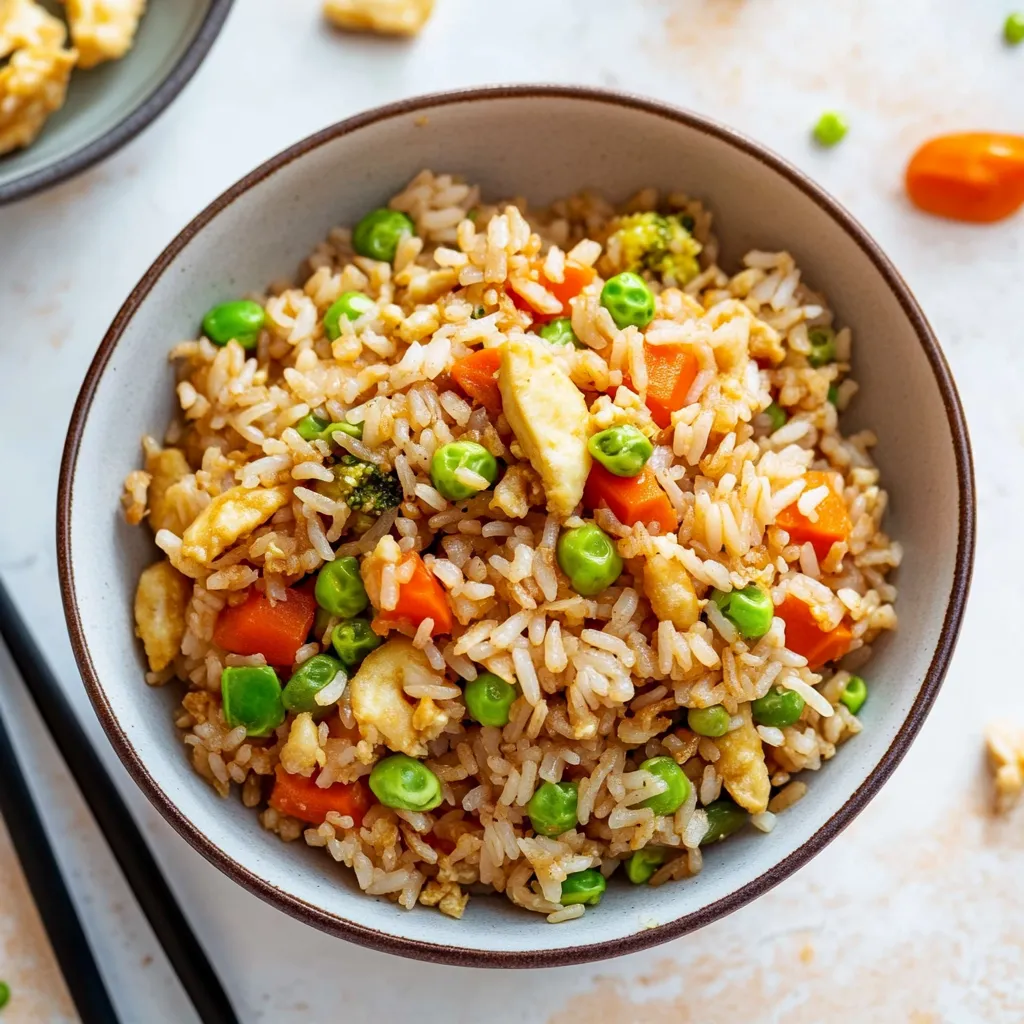
I've finally nailed a homemade gluten-free fried rice after years of trial and error that beats anything I've ordered out. This came from tons of kitchen testing and tweaking. What I love most is how it captures that takeout taste while staying completely gluten-free. It's perfect if you're cooking for someone who can't have gluten or just want a healthier spin on your favorite Chinese dish.
Handy Cooking Tricks
Let me tell you some tricks I've picked up along the way. If you're stuck using fresh rice, spread it out on a baking sheet and pop it in the fridge for half an hour. I've learned that getting your pan super hot before adding any oil stops everything from sticking and gives you that restaurant-quality sear. And here's my little secret: just a tiny bit of sesame oil right at the end takes the whole dish to another level.
Complete Cooking Instructions
I've made this dish so many times I could do it blindfolded. Trust me when I say the order you cook things makes a huge difference in how everything turns out.
Prep Work First
I always set up all my stuff before turning on any heat. This recipe moves fast once you start, so being ready matters. I cut my onions into tiny cubes - around 1/4 inch works great. I mince the garlic really fine, and I always chop more green onions than needed since everyone in my house fights over them as toppings.
Cooking The Eggs First
Get your pan really hot - I know it's ready when a water droplet dances across the surface. Pour in some oil and make sure it coats everything. Dump in your whisked eggs and keep them moving constantly. I prefer to let them barely set before breaking them into small chunks. Once they're just cooked but still shiny, take them out and set aside.
Building Your Flavor Foundation
Save itGluten-Free Fried Rice | kylierecipes.com
In the same pan, pour a little more oil and throw in your diced onions. Cook them until they just start turning clear - roughly 2 minutes. Then add your garlic, but keep an eye on it! I've ruined many batches by letting garlic burn. About 30 seconds is all you need to get that amazing smell going.
Making Rice Crispy and Delicious
Here comes the fun bit - adding your rice. Spread it across the whole pan and don't touch it for about half a minute. This creates those tasty crispy bits everybody loves. Then mix everything up, spread it again, and wait. Keep doing this for about 5-6 minutes total.
Getting The Sauce Just Right
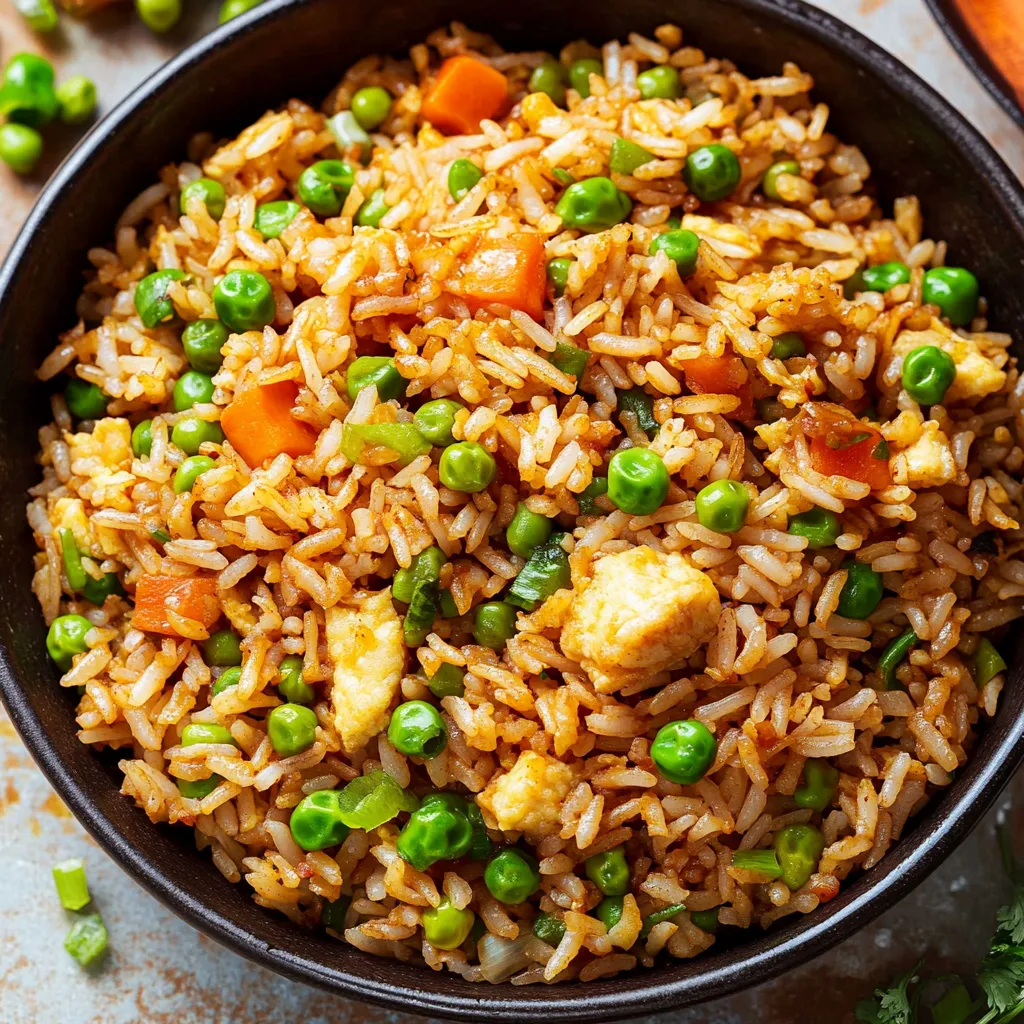
When your rice has some nice crispy spots, it's time for sauces. I always pour the gluten-free soy sauce around the edge of the pan first - you'll hear it sizzle and it starts to caramelize slightly. Then add your sesame oil. A trick my grandma taught me: tip the pan a bit when adding sauces so they spread out better.
Mixing Everything Together
Now for the best part! Put your eggs back in, breaking them into small pieces as you stir. Don't mix too roughly - you want those nice egg chunks to stay intact. This is when I throw in my defrosted veggies too, stirring until everything's hot and mixed well.
Last Steps For Amazing Rice
The final few minutes really count. Let everything cook together for 2-3 minutes, stirring now and then. This lets the rice soak up all the flavors. If I see any clumps, I break them up with my spatula. Sometimes I'll splash in a bit more soy sauce if needed, tasting as I go.
Keeping Leftovers Fresh
I've figured out the best way to keep leftover rice is in a sealed container, but here's my trick: let it cool all the way before putting it in your fridge. When you want to eat it again, add a tiny bit of water to your pan first - this makes steam that brings the rice back to life without drying it out.
Fixing Common Problems
If rice sticks to your pan, don't worry! I've found that adding a tiny bit of oil around the edges helps unstick everything. If your dish seems too dry, a little splash of soy sauce works wonders - just be careful and taste as you go since it adds salt too.
Just remember, nobody makes perfect fried rice on their first try - I sure didn't! With each batch, you'll get better at figuring out the right timing and heat for your stove. Keep at it!
Save itGluten-Free Fried Rice | kylierecipes.com
FAQ sur la recette
→ Can I prep some parts early?
You can refrigerate the custard for up to 48 hours. Bake and assemble the cake the same day for best flavor.
→ Why is bread flour better?
It creates a soft but strong texture in the cake, making it tender yet sturdy.
→ Can this cake be frozen?
It's not ideal since the custard doesn’t thaw nicely and may turn watery.
→ Why strain the cream filling?
This step removes lumps so your custard stays silky smooth.
→ How do I know the cake is ready?
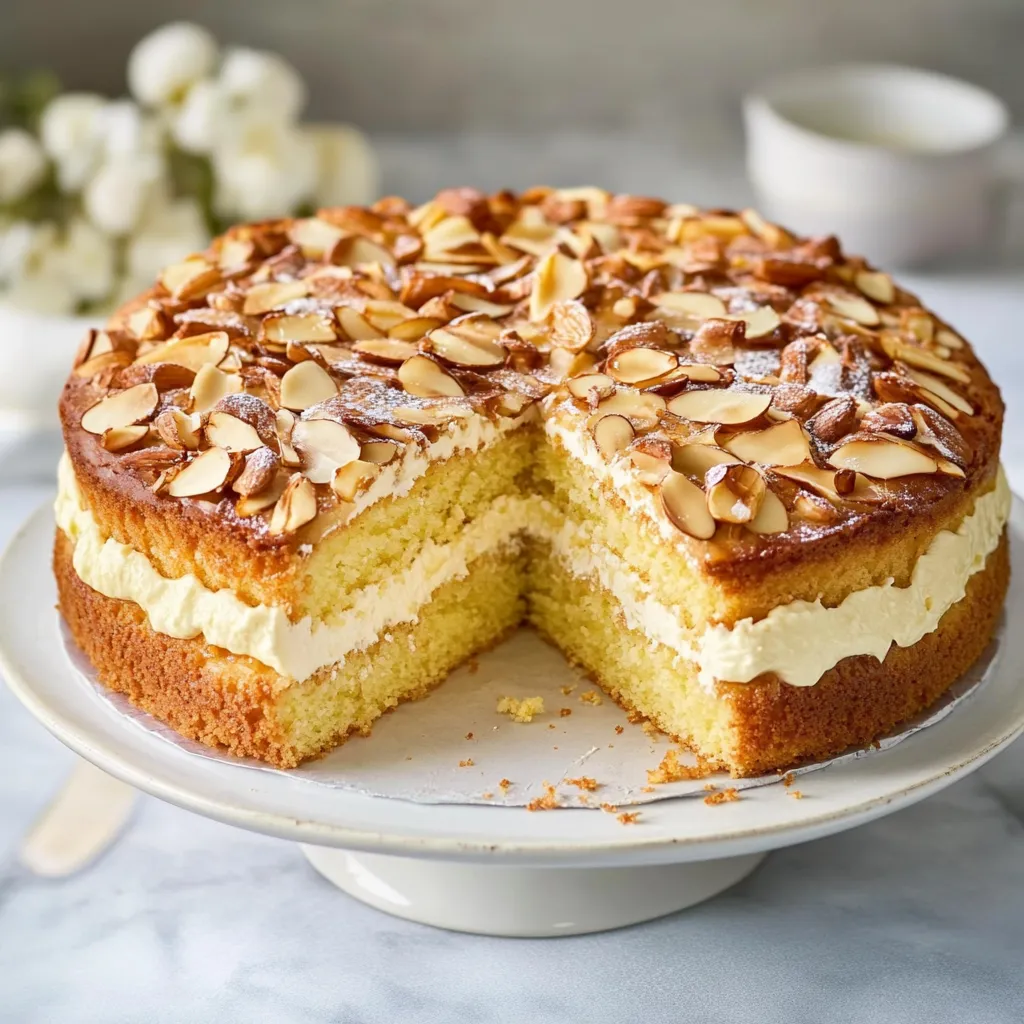
Look for a golden edge and bubbling almond topping after 25-30 minutes in the oven.
Almond Honey Custard Cake
Fluffy honey cake layered with velvety vanilla cream and topped with crisp, caramelized almonds.

 Save it
 Save it
 Save it