
 Save it
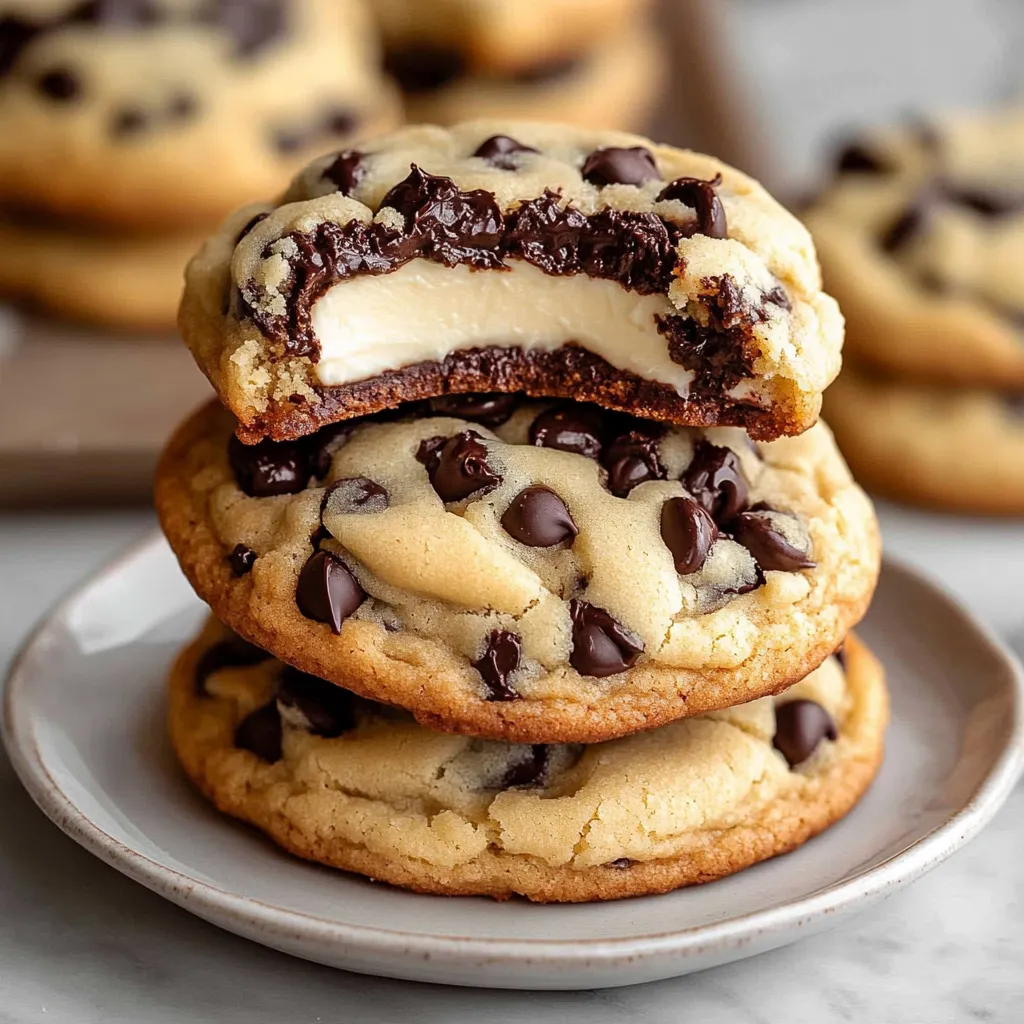
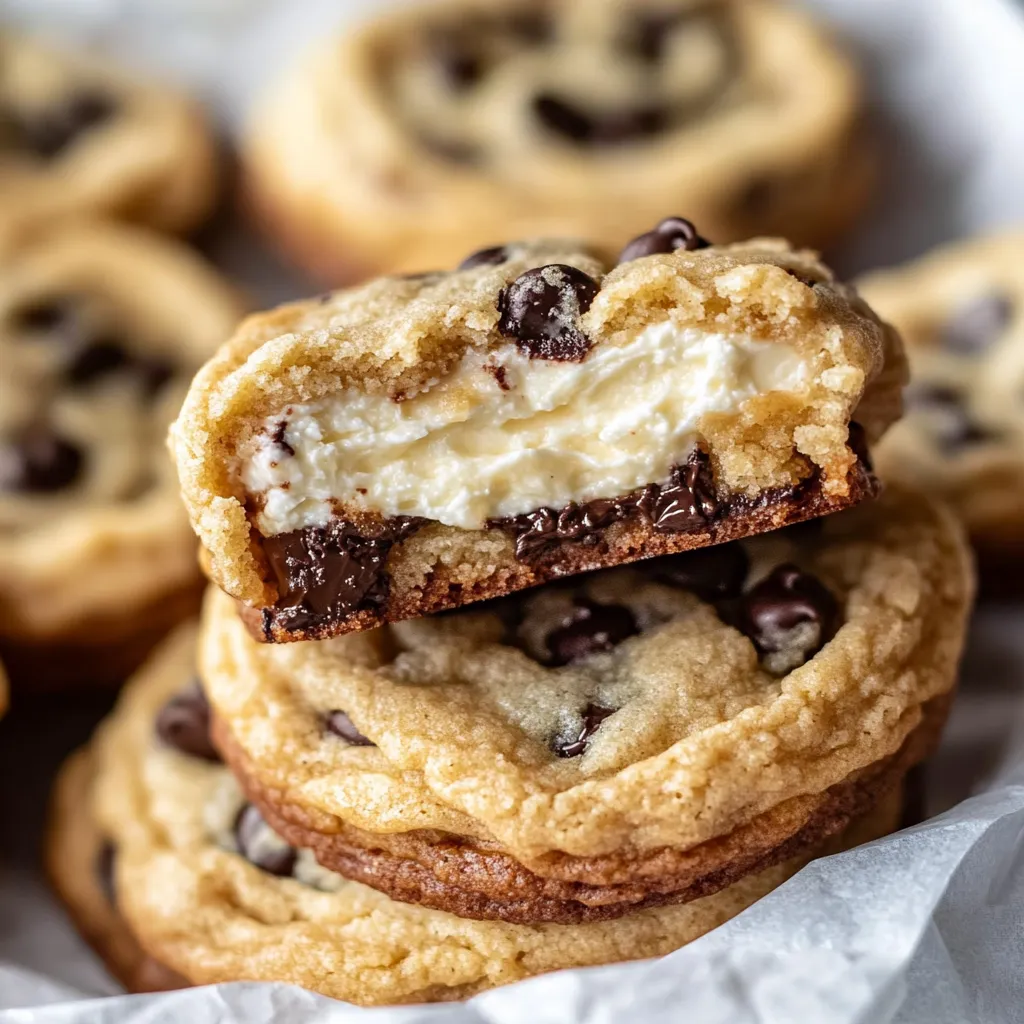
Rich chocolate chip cookies hiding a velvety cheesecake center create a mouthwatering mashup of two beloved treats. Each bite offers the perfect contrast between crisp edges and a soft middle, while the tangy cream cheese surprise inside delivers an unexpected flavor punch that'll keep you coming back for more.
The first time I brought these to our family potluck, they vanished so fast I had to bake another batch the very next day. My little nephew called them "the coolest cookies ever" and now he's my official helper, tucking the cheesecake filling inside each cookie and calling it our top-secret mission.
Key Components
- Cream Cheese: Go for full-fat and let it soften completely
- Butter: Pick unsalted so you can adjust the taste yourself
- Chocolate Chips: Splurge on good ones that'll melt properly
- Eggs: Take them out early so they're not cold
- Brown Sugar: Brings wetness and hints of caramel
- Vanilla Extract: The real stuff makes everything tastier
 Save it
Step-By-Step Guide
- Step 1:
- Make sure everything's properly warmed up for easier mixing.
- Step 2:
- Whip the cream cheese mixture until it's totally smooth.
- Step 3:
- Pop the filling in the fridge until it's stiff enough to handle.
- Step 4:
- Mix butter and sugars until they're super airy and pale.
- Step 5:
- Drop in eggs one at a time, mixing thoroughly between each.
- Step 6:
- Combine all dry stuff before adding to the wet mixture.
- Step 7:
- Stop mixing as soon as flour disappears into the dough.
- Step 8:
- Form cookie balls a bit bigger than you normally would.
- Step 9:
- Push a hole in each for the filling.
- Step 10:
- Close up all gaps to keep the filling from escaping.
My kid and I found out that warming these cookies just a tiny bit makes the centers go all gooey, just like a real slice of cheesecake. Now it's our favorite snack when she gets home from school, always with big glasses of cold milk on the side.
Getting Perfect Results
- Keep an eye on the edges turning golden
- Pull them out while middles still look soft
- Let them sit on the hot pan awhile
- Use a thin spatula to move them carefully
- Look underneath for the right amount of browning
When I was little, my grandma always told me good cookies need patience. "They'll show you when they're done," she'd say, watching for that perfect hint of gold around the edges.
Planning Ahead
- Mix up components and keep them apart
- Stick assembled raw cookies in the freezer
- Keep finished cookies separated by paper
- Heat them briefly before eating
- Refrigerate unused dough between batches
Wrapping and Sharing
- Use cute containers
- Tie with fancy strings
- Add notes about how to heat them
- Put parchment between rows
- Attach cards with storage advice
 Save it
Fixing Common Problems
- If filling escapes: Chill everything longer
- If cookies flatten too much: Check your oven's real temp
- If they're crumbly: Take them out sooner
- If baking unevenly: Turn the pans around
- If dough's too wet: Sprinkle in a bit more flour
These stuffed cookies have become the dessert everyone asks me to bring to every gathering and school fundraiser. They show how mixing two simple treats can create something way better than either one alone. Nothing beats watching someone's face light up when they bite in and find that creamy surprise center—that moment makes all the extra steps totally worth it.
FAQ sur la recette
- → What’s the reason for two flours?
- Mixing cake and bread flours helps achieve cookies that are both soft and chewy in texture.
- → Can I skip the dough chilling step?
- Nope, chilling keeps the cookies from spreading too much and makes the dough easier to handle when filling.
- → Is freezing these cookies possible?
- Absolutely! They stay fresh for 3 months if stored in a sealed container in the freezer.
- → Why is my cheesecake center leaking out?
- Check that you've completely closed the dough around the filling before baking.
- → Can smaller cookies be made?
- Sure thing! Just reduce the baking time and use less filling to keep things balanced.