
 Save it
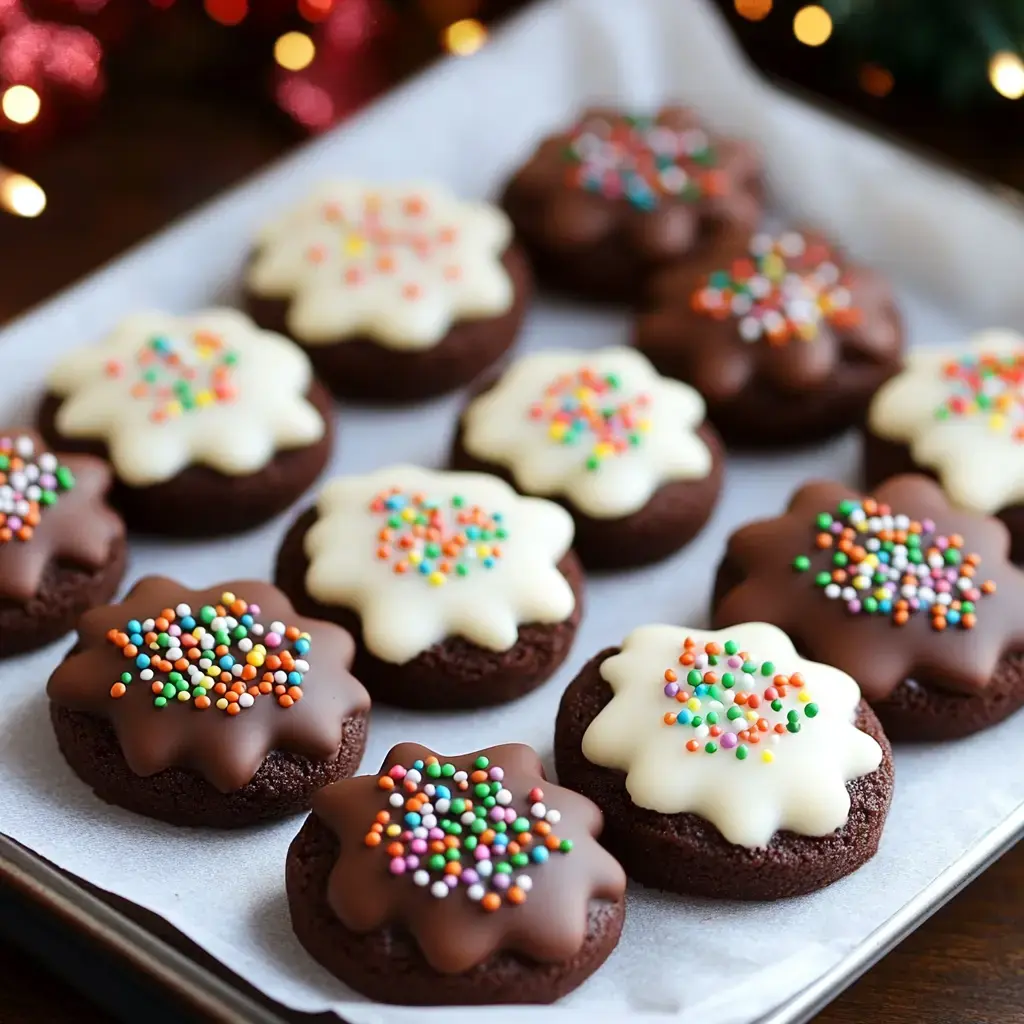
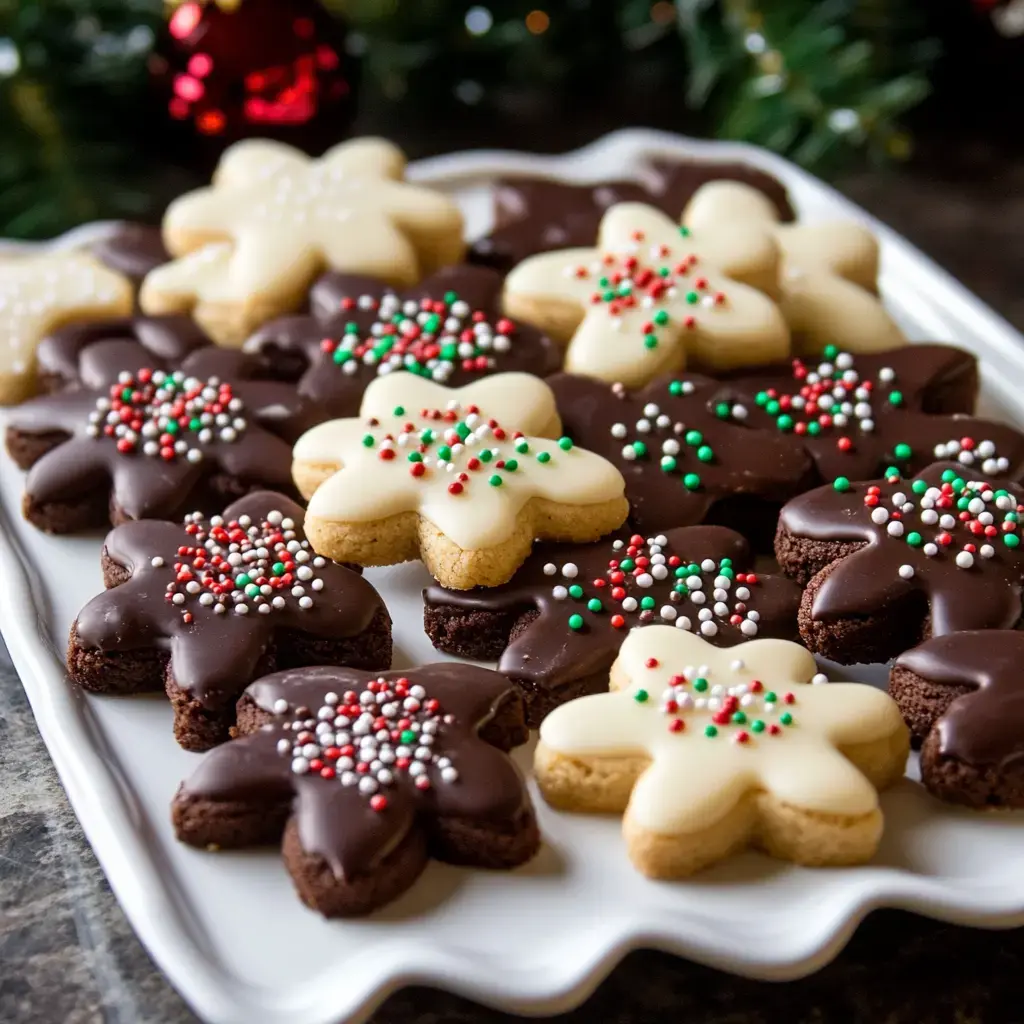
Gotta tell you about my go-to Christmas cookie that brings back the warmest feelings! These chocolate spritz treats have become a must-make in my home. Whenever I grab my cookie press, memories of baking with my grandma flood back. They've got this melt-in-your-mouth chocolate taste with fancy patterns that just screams holiday fun.
The Secret Touch That Wows Everyone
What's so awesome about these cookies? They don't just taste amazing—they look stunning too! Those fancy patterns grab attention right away, and when you throw on some holiday sprinkles, they turn into tiny masterpieces. And guess what? They're way simpler to make than they look. I always end up sharing this recipe at cookie swaps because everyone asks for it.
Your Shopping List
- Main Ingredients: - 1 cup butter at room temp, gotta be just right - 2/3 cup sugar for that perfect sweetness - 1 egg, fresh from the fridge for structure
- Taste Boosters: - 3/4 teaspoon vanilla, I always go for real stuff - 1/3 cup cocoa powder, splurge on quality here
- Dry Team: - 2 1/4 cups all-purpose flour, carefully measured - 1/4 teaspoon salt to cut the sweetness
- Decoration Magic: - 10 ounces candy melts, pick white or dark - Heaps of fun sprinkles to make them pop
Baking Time Begins
- Setting Up
- Warm your oven to 350°F and put parchment on your baking sheets. It's my foolproof trick.
- Creating Your Base
- Beat the butter and sugar till it's super fluffy. Mix your egg and vanilla next. Add your dry stuff just until mixed—don't go overboard!
- Getting Creative
- Load that cookie press and start making pretty shapes. Don't stress if the first few look weird—that's just practice!
- Baking Magic
- They only need around 5-7 minutes. Keep an eye out—they're done when barely set.
- Fancy Finishing
- After they're totally cool, dunk them in melted candy coating and shower with sprinkles. Now they're truly spectacular!
Insider Cookie Secrets
Wanna know how I nail these spritz cookies every time? Keep your dough at room temp—cold dough won't push through properly. Don't try to chill it thinking you're helping—it actually makes everything tougher! When melting candy coating, go with short microwave bursts and stir between each. Get all your sprinkles ready beforehand since they need to stick while the coating's still wet.
Storage Smarts
Here's how to keep them tasty, though at my place they vanish fast! Put them in an airtight container and they'll stay yummy for about five days. Need to work ahead? The plain cookies freeze great for up to three months. We love having them with hot chocolate during cold nights or adding them to holiday treat plates—they always get noticed first.
 Save it
Fun Cookie Background
Got an interesting fact for you—the name 'spritz' comes from 'spritzen' in German, which basically means to squirt out. That's exactly what we're doing with our cookie press! These treats have been making family memories during holidays for so many years, creating special moments in kitchens just like yours.
Getting Comfy With Your Press
Let me pass on what I've figured out about cookie presses over time! It's such a cool gadget once you get used to it. Think of it as a fancy cookie stamper with all those cool design discs. The trick is mixing your dough to that sweet spot—not mushy, not stiff. When I show friends how to use it, I tell them to practice on one side of the baking sheet until they get it just right!
Put Your Spin On Them
This is where you can really play around! Sometimes I add a tiny bit of peppermint flavor to the dough for a Christmas touch. Try mixing up your sprinkles—maybe gold and silver for New Year's or soft colors for spring. Once I mixed some edible shimmer into my white chocolate topping and boy, did those cookies shine!
The Universal Appeal
Know what makes everyone crazy about these cookies? They're fancy enough for holiday parties but so comforting they feel homemade. The way they just dissolve in your mouth with that deep chocolate flavor has everyone begging for your secret. And they look so impressive even though they aren't actually complicated once you learn a few tricks.
 Save it
Résumé
These chocolate cookies are packed with holiday spirit, blending deep cocoa goodness with vibrant decorations.Shape them with a cookie press, coat in candy melts, sprinkle with fun colors, and they’ll be the highlight of your seasonal dessert table!
FAQ sur la recette
- → Why won’t the dough stick to the pan?
- Skip the grease! The dough needs a dry surface to hold onto and release properly from the press.
- → Can these cookies go in the freezer?
- Freeze them plain before dipping in the candy coating. Once decorated, freezing isn’t ideal.
- → What can I use if I don’t have a cookie press?
- A strong piping bag with a large star tip can substitute. It’ll still look great!
- → My candy melts turned stiff. What now?
- A splash of vegetable oil can fix it. Heat gently in short bursts to avoid burning.
- → What’s the best way to store them?
- Use an airtight container at room temperature and lay some wax paper between stacked layers. Good for 3 days.