 Save it
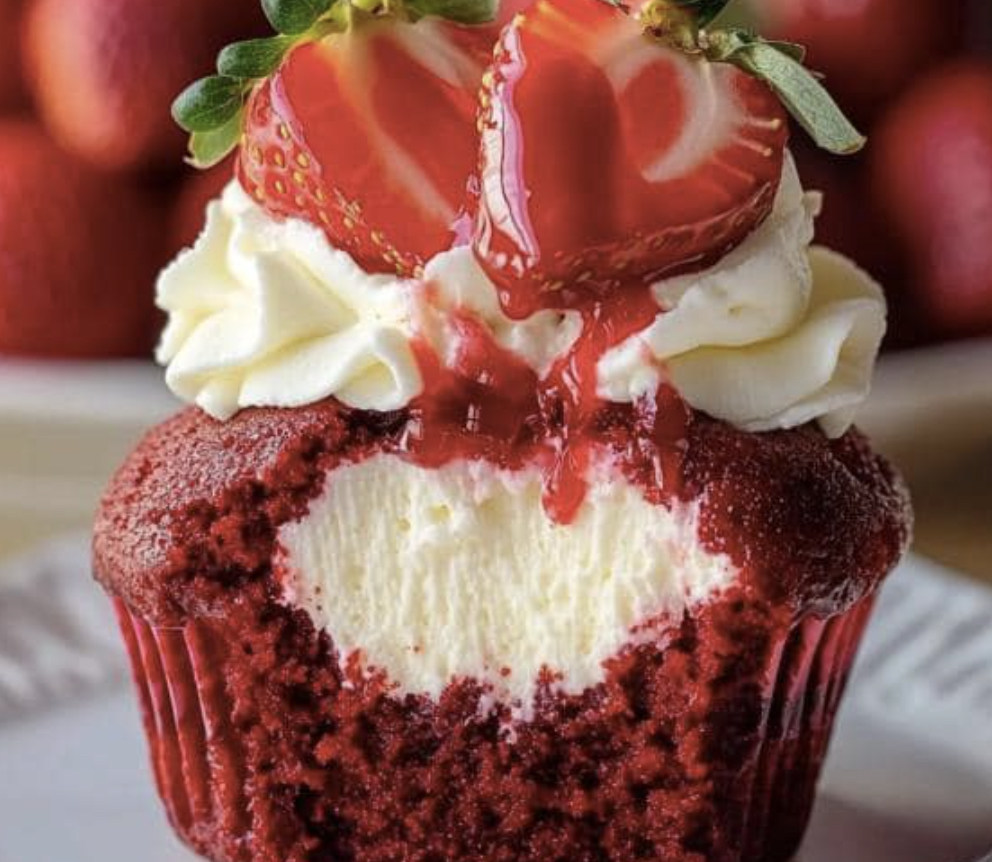
This luxurious triple-threat dessert fuses a rich red velvet base with a velvety cheesecake middle and finishes with airy whipped cream and juicy strawberries on top. The eye-catching layers create a mouthwatering treat that tastes just as amazing as it looks.
I whipped up these treats for my daughter's party years ago, and now we can't celebrate anything without them. Guests always gasp when they bite in and discover that hidden creamy center – it's become our family's signature sweet!
Ingredients
- All-purpose flour: Builds the main structure and gives our red velvet the right texture
- Cocoa powder: Brings that hint of chocolate flavor that makes true red velvet special
- Buttermilk: Makes the cake super soft and adds a nice tang
- Red food coloring: Creates that wow-factor color everyone loves
- Cream cheese: Must be full-fat and softened for the smoothest, creamiest filling
- Fresh strawberries: Add beautiful color and sweet fruity flavor
- Heavy cream: Turns into fluffy clouds of topping that cuts through the richness below
Step-by-Step Instructions
- Prepare the Cheesecake Filling:
- Whip the softened cream cheese until it's totally smooth. Mix in sugar and vanilla, then gently add the egg. Don't overmix – just blend until everything comes together. You want a filling that's thick but still easy to spoon.
- Create the Red Velvet Batter:
- Mix all your dry stuff first, making sure the cocoa spreads evenly. In another bowl, beat butter and sugar for about 3 minutes until it looks fluffy and lighter in color. This puts air in your batter so cupcakes rise nicely. Add your egg and vanilla, then mix in buttermilk, vinegar, and that bright red coloring. You'll see the magic happen as everything turns that famous red shade.
- Assemble with Care:
- Start by putting some red batter at the bottom of each liner. Drop a big spoonful of cheesecake mix right in the middle. Cover it up with more red batter without stirring things up. Fill each cup about three-quarters full so they have room to grow.
- Bake to Perfection:
- Stick them in your hot oven and don't peek for at least 15 minutes! They need steady heat to rise properly. Check if they're done by poking a toothpick near the edge, not the middle (you'll just hit the cheesecake part).
- Create Cloud-Like Topping:
- Beat your cold cream with powdered sugar and vanilla, starting slow and getting faster. Watch for the moment it forms stiff peaks but stop before it turns grainy. Your topping should stand up on its own when ready.
- Final Assembly:
- Add whipped cream to your completely cooled treats. Put half a strawberry on top at a cute angle. If you're using strawberry glaze, drizzle just a tiny bit for that fancy finish.
My first batch of these cupcakes went hilariously wrong when I stuffed in way too much filling. They bubbled over like tiny volcanos! We still laugh about those "erupting cupcakes" – everyone fought to eat them anyway because they tasted so good, even if they looked weird.
Make-Ahead Options
You can break up the work to fit your busy life. Bake the cupcakes without frosting a day early and keep them covered at room temp. Try to make the whipped topping close to serving time, though a stabilized version will stay good for a few hours in the fridge. For parties, you can put everything together except the strawberries, then add those fresh berries right before you bring them out.
Ingredient Substitutions
Got dietary needs? Try swapping regular flour with a good gluten-free blend – nobody will spot the difference. No buttermilk? Mix a tablespoon of lemon juice or white vinegar with regular milk and wait 5 minutes. Want to skip artificial colors? Beetroot powder can give a nice natural reddish color, though it won't be as bright as the store-bought stuff.
Serving Suggestions
Show off these fancy cupcakes on a multi-level cake stand at your next party. They look great alongside chocolate-dipped strawberries, with champagne for grown-ups or strawberry lemonade for kids. Trying to impress someone special? Serve one with a small scoop of vanilla ice cream for a date night dessert they won't forget.
Storage Tips
Keep your finished cupcakes in the fridge for up to three days in a container that won't smush the tops. They actually taste better on day two after the flavors mix together more. If you want to work ahead, freeze the plain cupcakes (without cream or berries) for up to a month by wrapping each one in plastic and putting them in a freezer bag. Let them thaw completely before adding the fresh toppings.
FAQ sur la recette
- → What keeps the cupcakes from drying out?
Adding buttermilk and softened butter in the mix keeps them moist. Don’t overbake to retain tenderness.
- → Can I prepare the cupcakes early?
Sure, you can bake them ahead and store them in a sealed container for up to two days. Add the topping and strawberries just before serving.
- → What can I swap for red food coloring?
Try natural options like beetroot powder or a touch of raspberry puree for a red shade without dyes.
- → How do I store leftover cupcakes?
Keep the leftovers in a sealed container in the fridge for up to three days. For the best flavor, let them sit at room temperature before serving.
- → What’s an alternative to the cream cheese filling?
You can switch to mascarpone cheese or thick custard for the filling, but expect a slight change in flavor and texture.
