
Choosing Your Perfect Chicken Half
Alright, folks, let’s talk chicken. Not just any chicken, but the perfect half that’ll make your taste buds do the hokey-pokey! Now, you might be scratching your head, wondering, “Organic or conventional? What’s the real scoop?” Let’s dive in, shall we? 🐔
The Flavor Profile Difference
First thing’s first—flavor. I’ve gotta say, anyone who tells you there’s no taste difference between organic and conventional chicken might just need their taste buds checked. Organic birds usually strut around with a richer, more pronounced flavor, and here’s why: they often lead the free-range life, nibbling on a smorgasbord of insects and greens. It’s like they’ve been pre-seasoned by Mother Nature herself! 😋
Understanding Labels and Certifications
Now, when you’re standing in that grocery aisle, you’ll see a bunch of labels—natural, free-range, no-antibiotics-ever—it’s like a dating profile for poultry. Here’s the lowdown: USDA Organic is the real deal certification. It means those birds were raised without synthetic fertilizers, and let’s just say, they’ve never met a steroid they liked.
Tips for selecting lean and plump poultry at the market
What to Look for in Freshness
Lean and plump, the Brad Pitt of poultry, am I right? Freshness is king, so peek at that sell-by date like it’s a secret message. The skin should be a nice, pastel-like color and spring back like a memory foam mattress when you press it. If it lingers like your in-law’s visit, steer clear, my friend.
Sizing Up the Ideal Half
And here’s a nugget of wisdom for ya: size matters—but not like you think. You want a half that’s balanced, like it’s been doing yoga—breast and thigh in perfect harmony. Too much breast and it’s like a bad ’80s rock band—top-heavy. Too much thigh, and you won’t get that nice, even roast we’re after.
So, we’ve chatted about the who’s who in the chicken world and how to snag the freshest fowl in the market. Stay tuned, ’cause next up, we’re talking about seasoning—arguably the best part, if you ask me. That’s where the magic happens, folks. We’re about to spice things up—literally! 😄🌶️
Essential Seasoning for Maximum Flavor
Ever wonder why your roast chicken wouldn’t win a flavor contest even if it was the only contestant? Let’s change that, shall we? First things first, let’s talk about your homemade rub. You don’t need a PhD in Spiceology to whip up something scrumptious. Just raid your pantry for the good stuff.
Herbs, Spices, and Umami Boosters
Your spice rack can be your best friend if you know how to use it. Think garlic powder, smoked paprika, a dash of cayenne for that kick – oh, and don’t forget the umami boosters like a pinch of MSG or a spoonful of nutritional yeast. These are the secret weapons that’ll make your taste buds do a happy dance.
The Role of Salt in Poultry Seasoning
And salt? It’s like the maestro of an orchestra, pulling all the flavors together. But it’s a fine line—too much, and you’re puckering up with every bite; too little, and it’s as bland as cardboard. Find your balance, and you’re golden.
Marinade Vs. Dry Rub: Enhancing taste before roasting
Now, to marinate or not to marinate – that is the question! Marinades are like a spa for your chicken, giving it that tender, juicy oomph. But hey, a good dry rub can give you flavor for days with less mess. And let’s not forget about brining – soaking your bird in saltwater may just be the ticket to succulence city, but it’s a bit of a time thief. So, what’s it gonna be? Well, it’s your call, chef!
To Brine or Not to Brine?
If you’ve got the time, a brine might just elevate your poultry game to legendary status. But if you’re in a rush, a rub with the right spices will still leave your guests begging for your secret recipe. Plus, you won’t have to explain why there’s a chicken taking a bath in your fridge.
Alright, you’ve got the flavor part down. But wait, there’s more! Let’s move on to getting that bird trussed up and ready to roast – it’s easier than tying your shoes, promise. And hey, no one wants a chicken flopping around the oven like it’s trying to make a break for it, right?
Pre-Roast Preparations for Poultry Perfection
So, you’ve picked out your prime poultry partner, and you’re ready to embark on the roasting odyssey. But hold your horses, chef! Before we shove that bird in the oven, let’s truss and trust in some prep work to get things just right. After all, nobody likes a lopsided chicken, am I right? 😂
The Art of Tying Poultry
First things first: trussing. It sounds fancy, but it’s basically just giving your chicken a good ol’ fashioned shoelace treatment. Why bother, you ask? Well, trussing helps cook the chicken evenly, and let’s be honest, it makes your bird look like it’s got its life together—ready for a close-up! To truss, simply tuck the wings under the body and tie the legs together with kitchen twine. It’s like a little poultry yoga pose. 🧘♂️
And here’s a nugget of wisdom: Do yourself a favor and don’t skimp on the twine. Get the good stuff, because the last thing you want is for your knots to turn into nots—know what I’m sayin’?
Cross-Contamination Prevention
- Keep it clean: Wash hands like you’re scrubbing in for surgery before and after handling the chicken. Cross-contamination is no joke, folks!
- Separate, don’t hate: Keep raw chicken away from other foods. Use a separate cutting board and tools, or at least wash them thoroughly before using them for anything else.
Now, armed with these tips, you’re practically a poultry-prepping Picasso! And before you go thinking we’re done, remember, we’ve only just begun. Next up, we’ll be talking oven settings and the magical world of cookware, because yes, it does make a difference. Stay tuned, and let’s keep that chicken love going! 🍗
Oven Settings and Tools of the Trade
Alright, folks, let’s talk turkey—or chicken, to be exact. Now, unless you’ve got a magic wand, your oven is gonna be your wand in the kitchen wizardry of roasting a chicken half. But it’s not enough to just crank up the heat and hope for the best; we need some strategy here!
Duration and Degrees—A Delicate Balance
First things first, let’s get those dials in check. Finding that sweet spot in temperature is key—too hot and your bird’s burnt to a crisp, too low and you’ll be waiting till next Thanksgiving for it to cook. I typically set the oven to a cozy 375°F (that’s 190°C for my metric friends). Now, if your oven’s temperamental, you might wanna get an oven thermometer to avoid any guesswork.
And how about timing? Well, we ain’t baking cookies here, so no setting and forgetting. A good rule of thumb is about 20-25 minutes per pound, but always check for an internal temp of 165°F. That’s when you know it’s done to perfection.
Material Matters in Heat Conduction
Choosing the right chariot for your chicken to roast in can make all the difference. Cast iron? Stainless steel? Non-stick wizardry? The answer is: it depends. If you want your poultry pal to have that crisp, golden suit of armor, go for a heavy-duty pan that can withstand high heat without flinching. A cast iron skillet is your friend here—it conducts heat like a champ and gives you that crispy skin we all drool over.
And don’t forget about space! Your chicken half needs some room to breathe, so pick a pan that allows air to circulate freely, ensuring even cooking and no soggy bottoms.
Stay tuned, as next up we’ll dive into the secrets of achieving that luscious golden goodness in your roast. Until then, keep your spices close and your roasting pan closer!
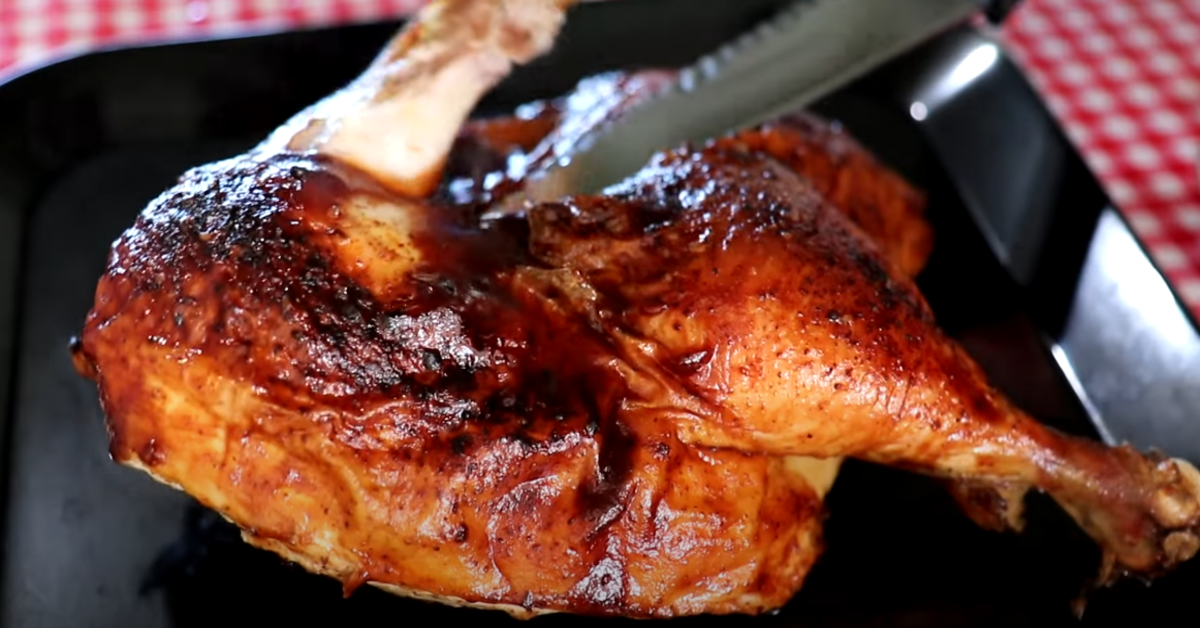
Roasting to Golden Goodness
Now that we’ve trussed and seasoned our soon-to-be sumptuous chicken half, let’s talk about turning that prepped bird into a golden feast that’ll have your neighbors peering over the fence with envy. Shall we?
Positioning Your Poultry
First things first, folks—where you plop that bird in the oven ain’t no trivial matter. You want the heat to cuddle up to every crevice evenly. So, here’s the deal: place your chicken half—skin side up, mind you—on a roasting rack inside the pan. This little elevator ticket ensures heat circulates all around, giving you that crispy skin that’s honestly why we’re all here, right?
Pro Tip: If you’re all out of a roasting rack, an improvised foil rack—crumpled and snake-like—will save your life.
Basting for Moisture and Flavor
- Why baste? Simple, keeping the chicken moist and flavor-infused is the basting game’s name.
- How often? Every 20 minutes, give or take. But hey, don’t be that obsessive door-opener; each peek lets precious steam escape.
- With what? Butter, oils, or those delicious drippings at the bottom of the pan – that’s liquid gold, buddy!
With your trusty baster or a good ol’ spoon, lavish your poultry in its own juices. It’s like giving a spa treatment to your chicken, and trust me, it’ll thank you with succulent bites.
| Weight | Temp (°F) | Time (Min) |
|---|---|---|
| 2 lbs | 375 | 50-60 |
| 3 lbs | 375 | 75-90 |
Lock in Juices, Lock in Delight
When yer timer dings and your kitchen smells like heaven’s diner, it’s time to yank that chicken half out. But hold your horses! Let that beauty rest for about 10 minutes. Why? ‘Cause rest time lets the juices redistribute, ensuring that every slice is as delectable as the last.
Remember, the chicken’s final act of resting is non-negotiable. It’s like the encore of a rock concert; the best is yet to come. Plus, it gives you just enough time to slip into something more comfortable—like oven mitts for carving.
And speaking of carving, up next, we’ll slice into creating perfect portions with style—no chainsaw necessary. On we go to the main event: Carving with confidence!
Complementary Sides and Pairings
Alright, folks – the moment we’ve been waiting for: Our clucker is almost done prancing around the oven and whaddaya know, it’s time to gab about what we’re gonna plate up alongside that golden-brown beaut. Not to toot my own horn, but I’ve got a knack for crafting a harmony of flavors that’ll make your tastebuds sing louder than a karaoke night at the Moose Lodge!
Vegetables That Shine with Chicken
Consider this: Roasted carrots, drizzled with a little honey and a sprinkle of thyme or rosemary. Oh, and brussels sprouts – those little green orbs of glory, crisped to perfection with a kiss of garlic and bacon bits, because let’s be real, bacon is the fairy dust of the food world. Seriously, these are side dishes that could make a grown man weep. And hey, if you’ve got spinach dip left over from last night’s shindig, you’ve got yourself a stellar addition!
Starchy Sides to Round Out the Meal
Now, let’s talk starch – I’m eyeballing you, delightful little mounds of mashed potatoes with just a teensy bit of garlic and some of that fancy-pants olive oil. Imagine, diving into a fluffy cloud of starchy goodness – that’s living the dream, right there. Or maybe you’re all about roasted sweet potatoes, those tasty taters that add a pop of color and a whole lotta soul to your dinner plate.
Picking the Perfect Pour
And what’s a grand feast without the libations to wash it down? You can’t just slosh down any ol’ swill. No siree, pair up that poultry with a nice white wine – a Chardonnay or maybe a Riesling for those with a sweet edge to their personality. And for my friends who go for the hops, a balanced pale ale will do ya just right. Remember, the aim is to complement, not compete with your chicken masterpiece.
So, with these tasty sides, your main dish is not merely eating – it’s a full-on experience, it’s a culinary cotillion, it’s… Whew, I’ve gotta sit down, getting all worked up over here! Anyway, before we mosey on over to the next topic, let’s make sure those plate partners are doing your perfectly roasted poultry justice. After all, even a star needs a solid supporting cast.
Repurposing Leftovers for Savory Sequels
Alright, folks, so you’ve roasted your chicken to golden perfection (and if you haven’t yet, what are you waiting for?) and you’ve done justice to that mouthwatering meal, but hey, don’t tell me you’re thinking about letting those leftovers go to waste? Not on my watch! Let’s turn those remaining morsels into tomorrow’s taste sensation.
From Salad Topping to Soup Star
First up, let’s jazz up that sad desk salad you’ve been meaning to ‘enhance’ for ages, shall we? Shred some of that leftover chicken, and voila, you’ve got yourself a high-protein topping that’s going to be the envy of the office. Here’s a pro tip: toss those shreds with a little lemon juice, olive oil, and a dash of honey before sprinkling it over your greens – talk about a flavor upgrade!
But wait, there’s more! Those shredded chicken leftovers can make a star appearance in a homemade soup that’s just perfect for that rainy day feel. Just simmer those chicken bits with veggies and stock – talk about comfort in a bowl. And if we’re feeling a little cheeky, why not throw in a pinch of chili flakes to spice things up?
Proper Methods to Preserve Freshness
Now, don’t let me catch you throwing that chicken on a plate and popping it into the fridge uncovered. Nope, we’re not doing that – we’re food savers! Keep those delicious leftovers fresh by storing them in airtight containers; you’ll thank me when you don’t have dry, tasteless chicken the next day.
By the way, did you know that chicken can play hide and seek in your fridge? Except when it hides for too long, nobody wins. So keep a note of when you store it and aim to use it within three days, max. That way, the leftovers will still be singing and not, well… let’s just say past their prime.
From Salad Topping to Soup Star
- Salad sensation: Revitalize your greens with shredded, zesty chicken.
- Soup-er star: Chicken soup’s not just for the soul but for making use of all your food!
…
FAQs About Roasting Half a Chicken
Hey there, fellow chicken enthusiasts! Been scratching your head over how to keep your roasted chicken from turning into a desert experience? Or maybe you’re like my buddy Tom, who once tried to carve his roast and ended up with something resembling a modern art sculpture. Fear not! I’ve got the answers to keep your bird as succulent as summer watermelon and as easy to carve as soft cheese. 😄🍗
Troubleshooting Dryness Concerns
Okay, let’s tackle the dreaded dryness dilemma. First off – don’t go blaming the bird. It’s not the chicken’s fault, I promise. The secret? Don’t overcook it! Seems obvious, right? But that’s where a trusty meat thermometer becomes your best pal. Aim for an internal temp of 165°F (Yep, I’m lookin’ at you, food safety regulations!). And remember, folks, let that beauty rest under foil before serving. It’s like a spa treatment for your chicken, locking in those mouthwatering juices.
Carving with Confidence
- Stay Sharp: Use a sharp knife or get ready for a carving calamity. No one likes to see a massacre when expecting a meal.
- Be Guided by Structure: Follow the natural lines and joints of the chicken. It’s like following a map to treasure—only the treasure is delicious chicken.
Ever found yourself sweaty-palmed with the carving knife in hand while all eyes at the dinner table are judging your poultry-slicing prowess? My friend, the key is all in the approach. Hesitate and it’s game over. Confidence, even if it’s faked, will see you through.
Time-Saving Tricks
I get it, we’re all running a rat race these days. No time to dilly-dally with kitchen affairs. Here’s a time-saver: prep the chicken ahead of time. Season it, truss it, and keep it in the fridge. When it’s go-time, just pop it in the oven.
Overall, roasting a chicken half isn’t rocket science, but it does ask for a bit of know-how and, yes, love. In closing, remember these tips next time you’re playing host, and bask in the limelight as the master carver! Thanks for tuning in, and as always, stay clucky, my friends! 🐔✨