
Sourcing Quality Deer Backstrap
Hunting vs. Buying: Best Practices
Alright, all you hunter-gatherers out there, if you’re bringing home the backstrap bacon yourself, knowing your game (pun intended) is key. The freshest cut? Straight from the source. But remember, with great power comes great responsibility—getting that perfect cut takes skill and know-how.
For the shopping savvy, fear not! Your local butcher or a trusted specialty store can hook you up. Just look for that twinkle in the butcher’s eye when they hand you the goods—it means you’re onto something special.
Spotting Freshness: What to Look For
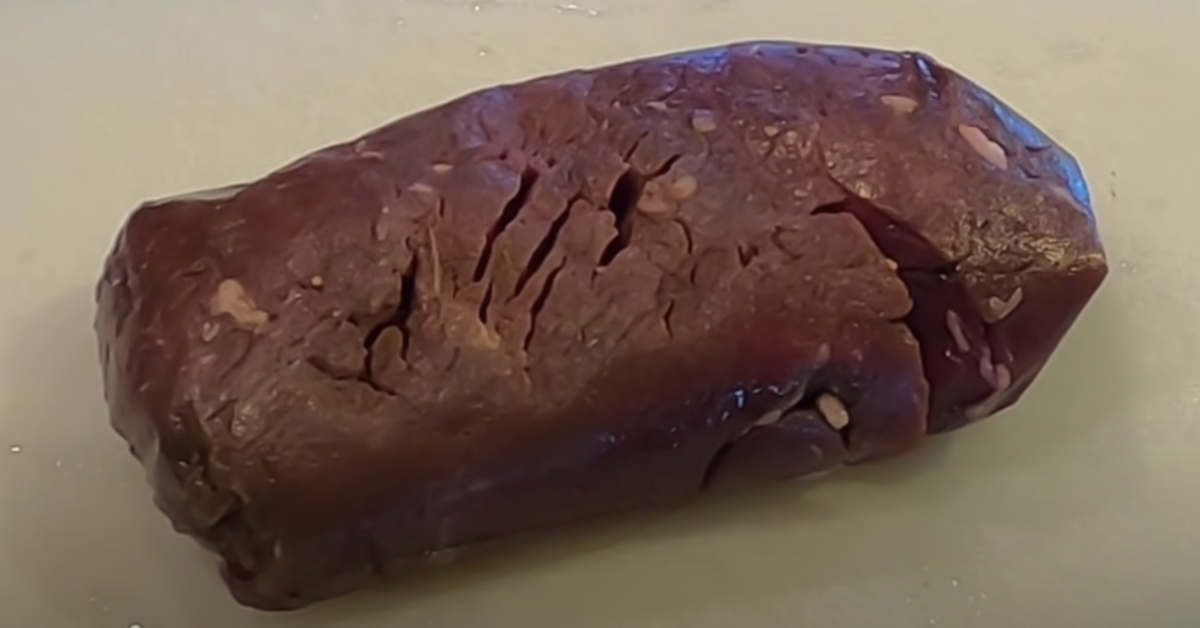
When selecting this primo cut, your peepers are your best pals. Freshness shines through like a beacon. It’ll practically wink at you, saying, “Pick me!” Look for a vivacious color, a clean scent, and a firm yet supple feel. If it looks like it could spring off the table, you’re on the money!
Marbling Magic: Importance in Deer Meat
Now, folks, marbling isn’t just for beef! Little whispers of fat through the backstrap are like little rivers of flavor—essential for that melt-in-your-mouth experience. Don’t go expecting Kobe-style marbling; deer are athletes, after all. But a bit o’ fat? That’s where the magic happens!
Alright, now that you’ve got the lowdown on snagging the best backstrap in the biz, it’s time to prep that beauty for the flavor fiesta it was born to be. Stay tuned as we delve into the essential pre-cooking rituals that’ll make your backstrap the belle of the ball!
Essential Prep Before Cooking
Alright, folks. Let’s get down to the nitty-gritty. Before we send our deer backstrap on a sizzling date with the oven, there’s a bit of prep work that needs doin’. Now, don’t skimp on these steps unless you fancy chewy meat that’s as flavorful as cardboard.
Trimming Techniques: Removing Silver Skin
First up, we’ve gotta deal with the silver skin. That pesky little sheath of connective tissue won’t do you any flavors—literally. Grab a sharp knife, slide it under the skin, and gently, gently, tease it away from the meat. Imagine you’re peeling a sticker off a rare comic book; that’s the level of care we’re shooting for here.
Crafting the Perfect Marinade
Next, let’s chat marinades. These bad boys are like a spa treatment for your backstrap, tenderizing and infusing it with whatever fantastic flavors you’ve picked. Go traditional with garlic, rosemary, and a glug of good ol’ olive oil, or get wild with something like a coffee-based concoction. The world’s your oyster—or, well, your backstrap in this case.
If you’re looking for inspiration, why not check out how we make venison breakfast sausage? Who knows, it might give you some zippy ideas for your marinade!
Marination Time Frames for Optimal Flavor
How long should you let it soak, you ask? Well, this ain’t a “set it and forget it” deal. A few hours in the fridge will do the trick, but if you’re planning ahead, letting it marinate overnight will turn that good piece of meat into a great one. Just remember, longer isn’t always better; too much time in the marinade jacuzzi can leave you with mushy meat, and nobody wants that.
Now that we’ve covered our bases on the pre-game show, let’s move on to the main event—Seasoning Like a Pro. Stay tuned for the next installment where we’ll teach you the spice whisperer’s ways to ensure your backstrap is nothing short of legendary.
Seasoning Like a Pro
Alright, fellow flavor hunters, let’s dive right into the spice of life—seasoning! Ever bite into a dish and think, “Holy smokes, did a chef sprinkle some magic in this?” Well, I’m here to tell ya, the secret’s all in the seasoning. Let’s break it down, shall we?
Selecting Seasonings: Best Combinations
First off, picking the right players for your spice team is crucial. You’ve got your classics like salt and pepper—they’re your dependable quarterback and wide receiver. But then, what about adding some flair with garlic powder or onion powder? Talk about a touchdown for your taste buds! And don’t even get me started on the aromatic herbs like thyme, rosemary, and sage. These guys are like the cheerleaders, making sure every bite is packed with pep and personality.
Rubs vs. Herb Pastes: A Flavor Duel
Now, when it comes to applying those seasonings, we’ve got a bit of a friendly duel: rubs versus herb pastes. Dry rubs are like a firm handshake—they introduce bold flavors right off the bat. But an herb paste? It’s like a hug from your grandma—full of love and depth. Both are great, so why not mix it up? Try a dry rub for a crispy crust or an herb paste for a moist and tender treat.
The Art of Seasoning: Balancing Flavors
And here’s the kicker: it’s all about balance. You don’t want one spice stealing the show like a diva. Nah, you want that ensemble cast where everyone plays their part to perfection. A pinch of this, a dash of that, and voilà—you’ve got a symphony in the making.
So, my dear gastronomes, once you’ve dressed that backstrap in its best spice outfit, it’s time to think about turning up the heat. And I’m not just talking about the spices. I mean literally—let’s get that oven fired up! But hey, that’s a tale for the next chapter in our culinary adventure where we talk Oven Settings and Cookware Choices. Stay tuned!
Oven Settings and Cookware Choices
Alrighty, foodie friends, we’re about to dive into the nitty-gritty of oven-roasted deer backstrap, and let me tell you, it’s not just about preheating your oven and hoping for the best. Oh no, it’s like finding the perfect temperature for a hot tub – not too hot, not too cold, just right. And the cookware, you ask? Well, that’s like choosing the right dance shoes for a salsa night!
Oven Temperatures: Finding the Sweet Spot
First off, let’s talk temperature. If your oven’s too hot, you’ll end up with charred dreams and broken promises. Too cool, and you’re in for a chewy marathon. Strike that balance – we’re aiming for a cozy 350°F (175°C) to start. It’s warm enough to welcome the backstrap but not so hot it shows it the door. Remember, consistency is key, so make sure your oven is properly calibrated.
Cookware Showdown: Cast Iron vs. Baking Dish
- Now, onto the arena of cookware. Cast iron skillets are the heavyweight champions of searing with their ability to retain heat like nobody’s business.
- But don’t discount the trusty baking dish – it’s your loyal friend, ensuring your backstrap has room to bask in its own glorious juices.
By the way, if you’re curious about the wonders of cast iron, check out our article on cooking with cast iron, where we dive into some smokin’ recipes.
Ensuring Even Cooking: Positioning and Technique
Lastly, let’s talk logistics. The way you position your backstrap in the oven isn’t just a matter of tossing it in. Place it in the middle rack to ensure an even cook – like a cozy nest for that tender meat.
And let’s not forget about the magic of frequent flipping. This isn’t a lazy river ride; we’re giving each side its fair share of the heat. So grab those tongs, and let’s get those backstraps tanned evenly!
Transitioning smoothly into the next chapter of our culinary journey, we’re about to take a deep dive into the art of the roast. So sharpen those knives and ready those forks, my friends, because we’re about to turn up the heat!
The Roasting Process Unveiled
Alright, gather ’round, my culinary comrades, as we embark on a delightful journey to roast-town! Once you’ve gotten your deer backstrap all cozy in its marinade, it’s showtime. Your oven is preheated, and the mood is set for some serious roasting action—Let’s make your kitchen smell like heaven, shall we?
Roasting Timelines: Rare to Well-Done
I know, I know, you want to dig in, but patience is a virtue, my friends. For a backstrap that’s as succulent as gossip at a high school reunion, timing is everything. Here’s a nifty table to keep you on track:
| Doneness | Temperature | Roasting Time |
|---|---|---|
| Rare | 125°F | 20-25 minutes |
| Medium Rare | 135°F | 25-30 minutes |
| Medium | 145°F | 30-35 minutes |
| Well-Done | 160°F+ | 40+ minutes |
And hey, if you’re looking at this chart thinking, “What, no medium-well?” Just find that comfy spot between medium and well-done—You got this!
Temperature Monitoring: Precision Matters
You’ve heard it before, but I’ll say it again—check that temp like you’re tracking a package you can’t wait to arrive. Why? Because no one likes chewy backstrap, that’s why. A tip straight from the pros: use a meat thermometer! When in doubt, stick it out… into the center of the roast, I mean.
Resting: The Key to Tenderness
After roasting, wrap that beauty in a cozy aluminum foil blanket and let it rest. Yeah, it needs a nap—about 10 minutes should do. Why? Because it lets the juices redistribute and seals the deal on tenderness. So resist the urge to slice, and give your meat some well-deserved R&R.
Pro Tip: Whisk up a gravy with the drippings while you’re waiting. Your taste buds will thank you.
Now that our roast is basking in the afterglow of the oven’s warmth, you’re about to throw down the most sublime side dishes ever. But we’ll talk about that next time, okay? For now, just bask in the glory of your roasting triumph.👨🍳✨
Perfect Pairings and Sides
Alright, party people, let’s not let that scrumptious oven-roasted deer backstrap fly solo—every rockstar needs a killer band, right? Side dishes are the unsung heroes that complete our culinary concert. So, when it comes to creating harmonious pairing for that deer delicacy, we’ve gotta think bold. Why go plain Jane when we can curate an experience?
Complementary Vegetables: A Symphony of Tastes
First up, vegetables. Think of ’em as the backup singers that could go solo any day. A medley of roasted root veggies, with their earthy notes, can mirror the gamey richness of deer like a dream. And for a pop of color? How about a dazzling side of blanched green beans glistening with a bit of garlic butter. Suddenly, your plate’s looking like a rainbow, and your taste buds are composing thank you notes.
Starch Staples: Potatoes, Rice, and Beyond
- A roasted garlic mashed potato that’s got more fluff than a poodle after a blowout pairs sublimely.
- Perhaps a wild rice pilaf jazzed up with some herbs? Ooh, classy!
- Or if you’re feelin’ adventurous, a scoop of creamy polenta could just be your all-access pass to Flavortown.
Each starch is like a different genre of music; pick one that vibes with your main act and watch the magic happen.
Wine and Backstrap: A Harmonious Affair
Now, for the crescendo: wine. Imagine swirling a glass of full-bodied, berry-bursting red that tangoes with the backstrap’s boldness – we’re talking a match made in heaven! Or, if you’re serving your backstrap more on the rare side, a lighter pinot noir can complement without overpowering the tender, earthy flavor of the meat.
So, as we prepare our stages – er, I mean tables – let’s remember that every note counts in this edible symphony. And now, moving onward, we grab our metaphorical conductor’s baton because it’s nearly showtime, my culinary compadres!
Savvy Serving Suggestions
Now, who’s ready to play dress-up with their food? Let’s ready our stage for a dinner that’s not just a meal but a Michelin-star shindig right in your dining room. Buckle up, folks, ’cause we’re diving into the art of serving in style.
First things first, the Carving Mastery. Here’s the scoop: slice thinly against the grain to make sure every mouthful is as tender as a love ballad. “Slice it nice and thin, folks; let the knife do the talking,” as my grandpa used to say.
- Cut with confidence – sharp knife, steady hand.
- Thin slices – they should almost whisper.
- Against the grain – it’s not just advice for rebels.
Now for the Garnishing for Glamour. Ain’t nothing like a bit of green to bring out the hunter’s pride in that backstrap. A sprig of rosemary or a handful of parsley? Oh, honey, it’s like putting a tuxedo on your meat!
- Chef’s kiss to fresh herbs – garnish generously.
- Edible flowers? Go on, get fancy.
- Zest it up with some citrus peel – flavor and flair in one.
Lastly, we’re picking out our Presentation Plates. Whether you go for rustic charm or sleek chic, remember that the plate is your canvas. Think about color contrast – that roasted brown needs a pop! White plates are your best bet; they’re basically the little black dress of tableware.
| Plate Style | Vibe |
|---|---|
| Classic White | Elegant, Timeless |
| Earthy Stoneware | Rustic, Homey |
Before you know it, your guests will be snapping pics faster than you can say ‘Bon appétit’. And hey, if anyone asks for your secret, just tell ’em it’s a family tradition 😉
As we wrap up this culinary fashion show, let’s not forget that the proof of the pudding—or in this case, the backstrap—is in the eating. So next up, we’ll take a gander at keeping things hot and tasty without burning down the barn. Stay tuned for those toasty tips that’ll keep your feast from turning into a frosty flop.
FAQs: Oven-Roasted Deer Backstrap
Alright, buckle up, buttercup, ’cause we’re about to tackle the nitty-gritty of roasting that majestic deer backstrap. Got questions? You betcha I’ve got answers that are hotter than a jalapeño on a summer day!
Optimal Internal Temperatures for Safety
First thing’s first: don’t play Russian roulette with your meat thermometer. When it comes to safety, you wanna hit that sweet spot of 145°F (63°C) for medium-rare magic. Remember, let that baby rest before serving ’cause the temp will rise a few extra degrees, ensuring your backstrap’s safety and deliciousness are on point! 😋
Addressing Common Cooking Conundrums
We’ve all been there – standing in the kitchen, scratching our heads wondering why the roast looks more like a hockey puck than dinner. Fear not, my culinary cohorts, the solution is simpler than my uncle’s fishing stories are long. Keep an eagle eye on that oven and make sure you ain’t overcooking it. For even cooking, rotate your pan halfway through, and make sure your meat is resting at room temperature before it dives into the oven.
Next-Day Delights: Reheating Without Sacrificing Quality
Now, let’s talk leftovers, because who isn’t excited about round two? When it comes to reheating, think low and slow – a gentle warm-up in the oven around 275°F (135°C) should bring it back to life. And don’t you dare zap it in the microwave unless you’re aiming for a chew toy!
- Use a moist heat method, like warming it up covered in foil with a splash of broth.
- Avoid high temps.
- Patience, padawan – reheating perfection takes a lil’ bit of time.
Overall, this whole backstrap biz isn’t rocket science, but a few pro tips surely make a difference between ‘meh’ and ‘more please!’ Thanks for sticking around, foodie friends – you’re now equipped to handle that backstrap with the finesse of a gourmet chef. Catch you on the flip side, and remember, keep it sizzlin’! 🔥