
Unveiling the Protein Chip Craze
So, you’ve heard the buzz and you’re probably wondering, “What’s the big deal with these protein chips, anyway?” Let me lay it down for you. In the epic battle of snack foods, protein chips have swooped in like the health-conscious cousin of those greasy potato chips we all guiltily adore. It’s like they’re saying, “Hey buddy, crunch on this, and skip the guilt trip.” 🥔➡️🥦
First off, let’s chew the fat about The Rise of Healthy Snacking. Gone are the days when munching on chips meant taking a detour from your wellness journey. These crunchy contenders are serving up protein like it’s their job – because it is. They’re the caped crusaders of the snacking world, turning what was once a cheat treat into an everyday eats. And let me tell you, they’re packing a flavorful punch while they’re at it!
- Less fat? Check.
- More muscle-making protein? Double-check.
- Flavor that kicks bland to the curb? Oh, you betcha!
Moving along to Protein Chips vs. Regular Chips. If you’re scratching your noggin wondering what’s the diff, here’s the scoop – protein chips trade in the spuds for stuff like pea protein, whey isolate, and other muscle-friendly ingredients. We’re talking about a snack that’s not just a crunchy delight but also a sidekick for your gains 💪 and your health. Pretty nifty, huh?
And don’t get me started on flavors. These bad boys come in more varieties than you can shake a seasoning bottle at. Barbecue, salt and vinegar, even exotic Thai chili – it’s like a flavor fiesta and your taste buds are the guests of honor. Who said eating well had to be bland?
Alright, now that your appetite for knowledge is as whetted as your appetite for snacking, let’s dive into the nitty-gritty. How do you turn these power-packed ingredients into delightful discs of deliciousness? Stay tuned, folks, ’cause in the next section, we’re gonna spill the beans on Essential Ingredients for Crafting Protein Chips. Grab your apron – it’s about to get tasty up in here!
Essential Ingredients for Crafting Protein Chips
So, you’ve decided to jump on the protein chip bandwagon, huh? Smart choice, my fellow snacker! Now, let’s talk about the building blocks of these crunchy marvels. Before we can even think about preheating the oven, we need to pick our protein posse. Take it from me, choosing the Right Protein Base is like picking your fantasy football team – it’s crucial to your snacking game.
- Pea Protein: This plant-based powerhouse is a fan favorite. It’s like the quarterback of protein bases, leading the team to tasty victory.
- Whey Protein: If you’re not vegan, whey protein is your linebacker – strong and reliable, ensuring that each chip packs a protein punch.
But, wait! We can’t just eat bland protein rectangles. No siree! Now’s the time to spice things up with some Flavor Infusion. Think about it – would you want to eat a chip that tastes like a cardboard cutout from your kid’s craft project? I didn’t think so.
- Herbs and spices: They’re the cheerleaders of the protein chip squad – bringing life and pep to the game. A little garlic powder here, a smidge of smoked paprika there, and boom! You’re in flavor town.
- Nutritional Yeast: This one’s like the secret playbook, giving a cheesy flavor without the dairy. It’s a game-changer, especially for those lactose-avoiding folks.
Now that we’ve got our MVPs lined up, let’s not forget about the tools of the trade. You’re gonna need more than just a good arm to toss these protein chips into success. But hey, let’s not spill all the beans here – stick around, and I’ll show you how to mix that protein dough like a pro in the next section. And if you’re curious about another kind of snack magic, check out how to make vegan pandan cookies for a sweet adventure. 😉
The Tools of the Trade
Alright, my fellow snack enthusiasts, let’s roll up our sleeves and talk about the nifty gizmos that’ll make your protein chip crafting adventure as smooth as guacamole. First off, you’re gonna need an oven or a dehydrator. Your oven is like the trusty old friend who never lets you down, ready to crisp up those chips to golden perfection. But hey, if you’re feeling fancy and you’ve got a dehydrator lounging around, that bad boy can take your chips to a whole new level of crunchiness without hogging all the energy.
Now, onto the mixing tools. We’re talking bowls big enough to mix a decent amount of dough without spilling over – because let’s face it, nobody likes cleaning up a protein powder snowstorm off their counters. And spatulas – not just any will do. You want a spatula that’s as sturdy as a bodybuilder’s resolve but as flexible as a yoga instructor, so you can scrape every last bit of dough from the bowl. It’s all about getting the bang for your buck, my friends.
- Utilizing Your Oven or Dehydrator: Both are fabulous options, just pick your fighter and get ready to rumble.
- Mixing Tools: Bowls and Spatulas: Size and flexibility matter – go for the gold with tools that won’t let you down.
Remember, folks, the right tools can mean the difference between a chip that’s a flop and a snack that makes you wanna dance around the kitchen. So, invest a little in these culinary sidekicks, and you’ll be whistling while you work – or at least humming along to the tune of your success.
Alright, now that we’ve got our toolkit sorted out, let’s stir things up a bit – quite literally. Next up, we’re mixing the perfect protein dough. And let me tell you, getting that dough right is as crucial as finding the perfect pair of jeans: it’s gotta be just the right fit. So, stick around and I’ll spill the beans on achieving the ideal consistency for your protein-packed snack dreams.
Mixing the Perfect Protein Dough
Alright, my health-conscious pals, let’s roll up those sleeves—it’s time to get doughy! Crafting the ultimate protein chip dough is like finding the holy grail of healthy snacking; it’s gotta have that perfect balance of chew and crunch. And trust me, it’s not as elusive as you might think.
Achieving the Ideal Consistency
First things first, consistency is king in the realm of protein chips. You want a dough that’s pliable yet firm enough to hold its shape when sliced and diced. Think of it as the Goldilocks of doughs—not too sticky, not too dry. A good rule of thumb is to start with a base of your favorite protein powder—pea protein, whey, or maybe rice protein—and then gradually mix in water until you hit the jackpot texture. Remember, you can always add more water, but you can’t take it out!
The Role of Binding Agents in Your Dough
Now, let’s chat about binding agents—they’re the unsung heroes that keep your chips from crumbling like ancient ruins. Psyllium husk, flaxseed meal, or even a bit of tapioca starch can be your best buds here. They’re like the glue that holds your snacking dreams together. A tablespoon or two should do the trick, but don’t go overboard, or you’ll end up with protein bricks instead of chips!
And for Pete’s sake, don’t forget to season your dough. A dash of salt here, a sprinkle of garlic powder there, it all comes together to give your chips that irresistible edge. Need some inspo? Check out this little gem on healthy oil options for cooking that complements your seasoning.
- Start with a solid protein base
- Add water incrementally for the right texture
- Use binding agents to prevent chip crumble catastrophe
- Season generously for flavor that sings
Once you’ve got your dough down, don’t just let it sit there like a bump on a log. Get your hands in there and show it some love! Knead it like it’s your job, at least for a few minutes, to make sure everything’s good and mixed.
So, you’ve got your dough looking smooth and tasting snazzy. What’s next? Well, stay tuned, chip aficionados—up ahead, we’re diving into the scintillating world of shaping and slicing. Get ready to transform that doughy blob into snackable works of art!
Sculpting Your Snacks: Shaping and Slicing
Alright, folks, let’s get our hands dough-y! You’ve got your protein-packed dough, and now it’s showtime – let’s talk about turning that pliable potential into the crunchiest, most satisfying protein chips you’ve ever chomped on. Remember, it’s not just what’s on the inside that counts; these chips gotta look the part, too. 😎
Cutting the Chips to Perfection
First thing’s first, ya gotta slice that dough into chip-sized dreams. But before you start hackin’ away, consider this – consistency is key! If you’ve got some sort of a mandoline slicer lying around, now’s the time to buddy up. If not, a sharp knife and a steady hand will do the trick.
- Pro Tip: ‘Freeze your dough just a tad’ – it’ll firm up and make slicing a breeze.
“Thin to win!” as my grandma used to say – you want these slices thin enough to crisp up but not so thin they’ll vanish in the oven’s heat like a ghost in the night.
Tricks for Even Thickness
Now, if you’re thinking, “Oh, a little thicker on one side, a little thinner on the other – who’ll know?” You will, my snack-savvy friend, once you end up with a batch of chips more uneven than a seesaw at a sumo wrestler convention. But don’t sweat it; here’s a nifty trick to keep your chips in check:
- Roll out the dough between two sheets of parchment paper.
- Plop a couple of chopsticks on either side of your dough before rolling.
- These bad boys act as guides to keep the rolling pin level – genius, right?
After you’ve mastered the mat, toss those perfectly sliced chips onto a baking tray but remember, no crowding – these chips are social distancing pros. They need their space or else they’ll end up a soggy mess, and nobody’s got time for that.
And there we have it, your chips are prepped and ready to dive into the flavor pool. But, wait! Don’t dash off to the oven just yet. We’re about to sprinkle these beauties with all sorts of zesty magic in the next installment: Seasoning Spectacular: Adding Zest to Your Chips. Stay tuned for that flavor fiesta, coming up right after these messages (or in your case, right after you stop drooling over the prospects of home-made chip heaven). 😉
Seasoning Spectacular: Adding Zest to Your Chips
Now, who’s ready to take a walk on the wild side of seasoning? When it comes to making your own protein chips, it’s not just about the crunch—flavor’s the name of the game! Let’s spice things up a bit, shall we? If you’ve made it this far in the protein chip recipe, you’ve got your dough all set and ready to transform into scrumptious bites. But hold your horses! They’re not chips until they dance through the fiesta of flavors waiting in your spice cabinet.
Balancing Flavors Like a Pro
First things first, ya gotta think about balance—like a tightrope walker, but tastier. Ever bite into something and pucker up like you’ve been kissin’ lemons? Or worse, felt like you’re chompin’ on a salt lick? We’ll dodge that bullet by getting the mix just right. It’s about combining herbs and spices that complement each other—think rosemary and thyme, paprika and cumin.
- Gather your herbs and give ’em a good chop—fresh is always best if you can snag ’em.
- Your spices? Toast ’em if you’re feeling fancy. It’s like giving them a pep talk before the big game.
- Salt and pepper are your best pals—sprinkle with love and keep ’em close.
The Best Techniques for Even Coating
Got your flavors decided? Great. Here comes the fun part: let’s get messy! Make sure all chips are coated evenly, we’re talkin’ no chip left behind:
- You want your spice blend finer than beach sand—no one needs a rogue spice boulder busting the vibe.
- Sprinkle from up high like you’re the fairy dusting everything with flavor. Uniformity is key—no favoritism in this shindig.
- A light spritz of oil can help those spices to stick like gossip in a small town—but just enough for a gentle hug, not a bear squeeze.
So, after you’ve played patty-cake with your herbs and spices and those chips are lookin’ irresistibly coated, it’s not time to call it quits yet! What’s next, you ask? Patience, my friend—patience. We’re headed to the oven, and I’ve got some tips that’ll make sure these chips come out so crispy, you’ll hear them in the next county. Stick around, because Oven 101 is about to be in session!
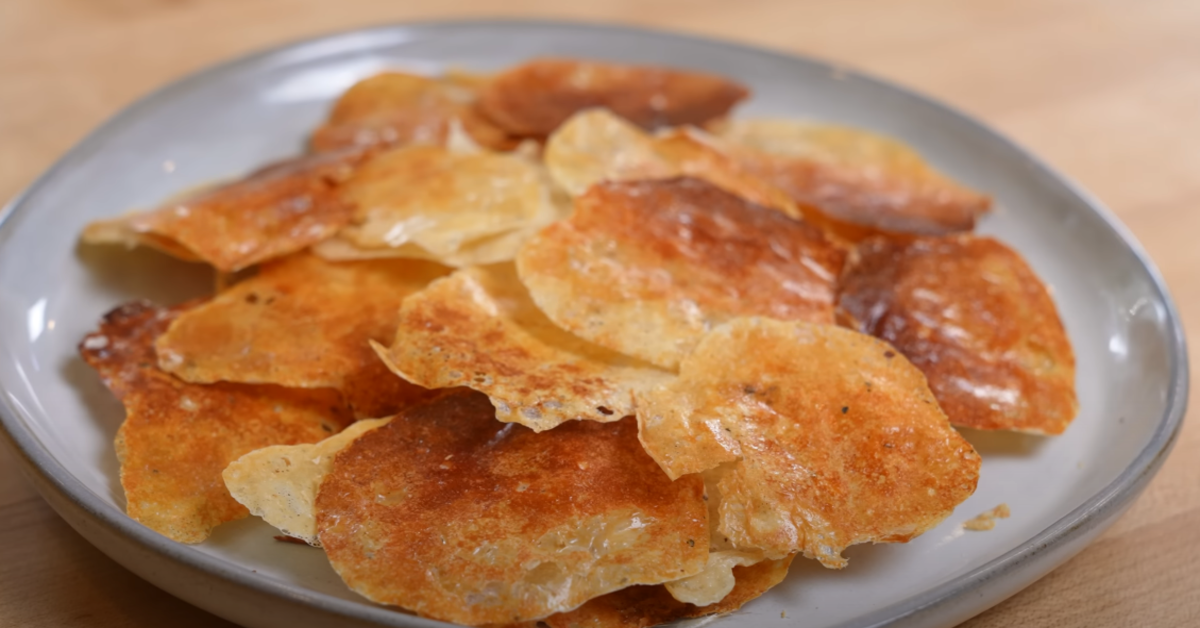
Baking Your Way to Crispy Delights
Hey there, fellow health nuts and crunch connoisseurs! I’m sure you’ve been following along with our protein chip escapade, and now it’s time to turn that dough into golden bites of joy. We’ve done the hard yards, my friends – mixing, shaping, and now we’re ready for the grand finale: baking.
First things first: finding the Optimal Baking Temperature. Like finding the perfect pair of jeans, this can be tricky. But don’t sweat it; I’ve torched a batch or two (or five) to save you the heartache. You want your oven preheated to that Goldilocks zone – not too hot and not too cold. Typically, 350°F (that’s about 180°C for our metric mates) does the trick. This temperature is hot enough to crisp those chips up without burning them to a crisp.
Now, some of you might wonder, “but why not just nuke ’em at a higher temp for less time?” Well, cupcake, we ain’t making charcoal biscuits here; we’re making a batch of protein-packed perfection.
- Pro Tip: Use an oven thermometer to confirm your oven’s actual temp, ’cause let’s face it – that dial is lying more than my ex.
Let’s chat about Timing is Everything: Avoiding Over-Baking. We’re aiming for crispiness, not a dental emergency, am I right? Depending on the thickness of your chips (let’s recall those tricks for even thickness), you’ll be baking for around 15-25 min. Your kitchen’s gonna smell amazing, but don’t give in to the temptation to open the oven door too often. We’re not on a sightseeing tour!
Keep your peepers peeled for those edges starting to darken, signaling it’s time to pull ’em out. Going from almost-done to overdone can happen faster than a toddler’s mood swing, so stay sharp.
Beyond the basic bake, let’s not forget the flavor fiesta waiting for us in the next chapter – Seasoning Spectacular. But let’s not put the cart before the horse. Right now, focus on that delightful crunch awaiting us in mere minutes. Bask in the glory of your soon-to-be-crisp protein marvels, and pat yourself on the back. You’re about to conquer the snack world, my friend, one protein chip at a time!
Hey there, chip aficionados! 🍪 Are you ready to jump on the protein chip bandwagon but feel like you’re walking on eggshells? Don’t you worry your pretty little head; I’ve got your back. Let’s tackle those pesky questions that might be poppin’ up in your noggin.
Tackling Common Protein Chip Challenges
- Q: “My chips are more limp than a wet noodle. What’s up with that?”
A: Oh, I feel ya. Here’s the scoop – it’s all about that moisture. Make sure you’re spreading your chips thinly and evenly, and don’t rush that baking time. Patience, my friend, is a virtue when it comes to crisping up those chips. - Q: “Why do my protein chips taste blander than cardboard?”
A: Ouch, that hurts! Let’s spice up your life – literally. Don’t skimp on the seasonings! Experiment with herbs, spices, and a little pinch of love. Remember, you’re the Picasso of flavor town; paint with all the colors!
Storing Chips for Maximum Freshness
- Pro Tip 1: Cool your chips completely before sealing them in an airtight container – unless you want to dive into a bag of chewy sadness.
- Pro Tip 2: Keep ‘em away from sunlight, like a vampire avoiding a tanning bed. Sunlight = enemy of freshness.
Are these tips helping you get out of the chip dip of confusion? Hope so! Remember, just like bad hair days and traffic jams, making perfect protein chips might take a few tries. But hey, that’s just an excuse to nibble on more trial batches, right? 😉
Overall, the journey to crunchy, munchy protein chip excellence can have a few bumps along the way. But hey, that’s life! Embrace the learning curve. Keep those taste buds adventurous and your oven mitts ready. You’re about to become the sensei of the snack drawer, my friend!
Thanks a ton for hangin’ with me! If you’ve enjoyed this little chit-chat, stay tuned for more. Until then, keep snackin’ and yackin’! 🌟