
Hey there, fellow future baker and golf enthusiast! You’re in for a treat ’cause we’re about to whip up something as exciting as a hole-in-one – a golf ball cake that’ll have your friends and family tee-ing up for seconds. But first things first, let’s chat about what’s going in your cart before you hit the checkout.
Essential Baking Components
Now, you wouldn’t tee off without your trusty set of clubs, right? Same goes for baking – you gotta have the right tools in your bag. Grab a bowl, mixer, and get ready to sift through the basics: flour, sugar, and eggs. Think of these as your fairway wood, iron, and putter – indispensable for a winning game.
The Role of Specialty Pan
Next up, you’re gonna need a specialty pan that shapes our cake like a golf ball. I mean, we’re not making just any cake – this is a golf ball cake, folks! It’s not like finding a lost ball in high weeds; just pop online, or swing by a baking store, and you’ll find the perfect mold. Trust me, it’s a game-changer.
Quality Ingredients for a Hole-in-One Cake
And let’s talk about what’s really gonna set your cake apart from the clubhouse standard – quality ingredients. You wouldn’t play with waterlogged balls fished out of the pond, right? Nope! So, don’t skimp on the good stuff. Free-range eggs, pure vanilla extract, and high-quality butter – that’s what’ll give your cake the luster of a brand new golf ball.
Before you know it, you’ve got all your ducks – or should I say, golf balls – in a row. With the cart loaded and your caddy by your side (or mixer, in this case), it’s time to get that batter smoother than the green on the 18th hole. Stay tuned as we dive into Perfect Swing: Preparing the Batter, where I’ll spill the beans on a secret ingredient that’s the golf whisperer of cake flavors!
Perfect Swing: Preparing the Batter
Alright, folks, let’s get down to the nitty-gritty, the heart of the cake – the batter. Ain’t nothin’ more satisfying than mixin’ up a batch that’s smoother than Fred Couples’ swing. So, grab your whisks and spatulas, and let’s get to it!
Achieving a Smooth Consistency
First things first, we want our batter as smooth as a baby’s bottom, right? You’ll want to mix your dry ingredients like they’re old friends catching up at a high school reunion. Once they’re acquainted, it’s time to introduce them to the wet ingredients. Now, this part is crucial – you gotta combine ’em gently, like you’re coaxing a birdie outta its nest. Overmixing is the bogeyman of the baking world, so let’s keep it at bay, shall we?
The Secret Ingredient Unveiled
Lean in close now, because I’m about to spill the beans on a secret ingredient that’ll have your guests teeing off for seconds – sour cream. Yep, you heard me. This little dollop of magic brings moisture and tang to the batter, ensuring your cake doesn’t end up drier than a sand trap on a hot day.
Flavor Variations to Suit Your Tee
Now, I’m a classic vanilla kinda guy, but hey, maybe you’re feeling a little adventurous? A dash of almond extract or even some citrus zest can jazz up your cake faster than you can say “fore!” And speaking of zest, why not take a swing at some vegan pandan cookies for a change of pace?
Remember, baking is like a friendly round of golf; take your time and enjoy the process. Once you’ve got your batter up to par, it’s time to move to the next hole, or in our case, pouring and baking. So, don your best apron because we’re about to preheat our ovens and get this golf ball rolling. Stay tuned for the next step where we’ll tackle the fairway, or should I say, designing your golf ball cake. It’s gonna be a hole-in-one, folks!
The Fairway: Designing Your Golf Ball Cake
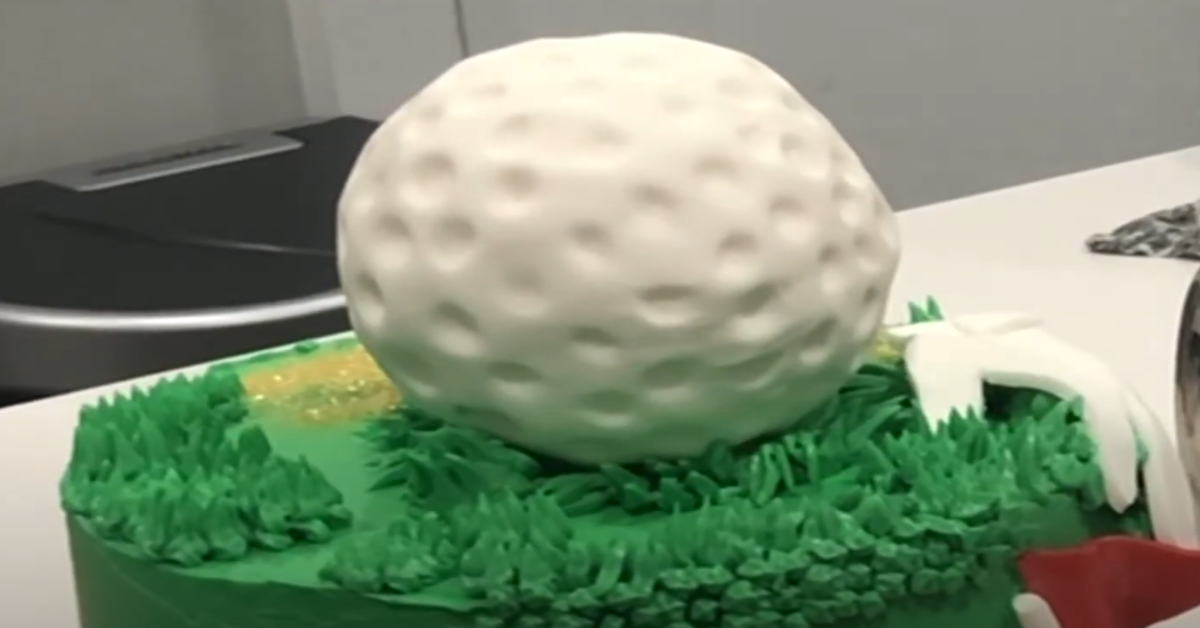
Alright, amigos, let’s get down to brass tacks – we’re shaping our golf ball cake and no, we’re not going to settle for a cake that just sits there looking like a lump of dough. This is where the magic happens, where the dimple meets the dough, you might say!
First up, choosing the Right Cake Mold. Sure, a round pan will give you the basic shape, but are we basic? No, sirree! We’re looking for that signature golf ball look. Opt for a specialty pan with dimple imprints, or get creative with a standard sphere pan—you’ll see how we add those dimples shortly.
Now, let’s talk about Creating the Dimples. If you’re using a basic sphere pan, grab a small spoon or a melon baller – yeah, the one you never thought you’d use – and gently press in the dimples. Keep ’em uniform, folks; we’re not making craters on the moon here. A steady hand and a sprinkle of patience will get you that iconic golf ball texture.
And here’s where it gets real – Adding Realistic Detailing. Once that cake is baked and cooled, it’s all about the fondant. Roll out a thin layer, and lay it over your cake, smoothing out the edges. Then, take a fondant tool or, heck, even the back of a knife, and reinforce those dimples. It’s all about the details; make sure each dimple is as crisp as a fresh dollar bill.
Now don’t go thinking we’re done yet! We’ve got our cake looking like a pro’s dream, but there’s more to come. Next, we’re stepping into the oven – and no, not literally. Stay tuned for some hot tips on baking your masterpiece to perfection. You’ll wanna make sure your oven mitts are close by because things are about to heat up – and I’m not just talking about the preheated oven, if you catch my drift!
Baking Your Masterpiece
Alright, folks – game faces on! It’s baking time, and we’re not just winging it; we’re aiming for that perfect shot right down the middle of the fairway. So, preheat your ovens and let’s get this cake onto the green, shall we?
Ideal Baking Temperature
First things first, the climate in your oven needs to be as controlled as the climate at the Masters. That means we’re talking about an oven preheated to a cozy 350 degrees Fahrenheit (that’s about 175 degrees Celsius for our friends across the pond). You don’t want a half-baked effort here, just like you don’t want a half-hearted swing!
How to Test for Doneness
Now, when it comes to checking if your cake is ready to come out of the oven, we’ve got options. The classic toothpick method – stick it in the center and if it comes out clean, you’re on the green! But hey, if you want to up your game, consider a cake tester. It’s like the difference between a putter and a driver – specialized tools for the job!
Preventing Common Baking Pitfalls
Here’s the deal: nobody wants a golf ball cake that’s more sand trap than hole-in-one. So, let’s dodge those pitfalls like a pro avoiding a water hazard. Keep that oven door closed to maintain steady heat, and rotate your cake halfway through if you know your oven’s got more hot spots than a summer day in Palm Springs.
And don’t forget, if you’re feeling unsure about your cake’s doneness, it’s better to be a stroke over par than undercooked. A slightly overbaked cake can be rescued with a bit of simple syrup or frosting, but a doughy center? That’s a mulligan you don’t want to take.
Remember, this isn’t the end – it’s just the beginning of the back nine. So, keep your oven mitts close and your frosting closer, because next up, we’re suiting up our golf ball cake with the Green Jacket of pastry arts – the frosting.
Frosting Your Cake: The Green Jacket of Pastry Arts
Well, Tiger Woods might have his Green Jacket, but we’ve got our spread and spatulas ready to bag the pastry equivalent, folks. I mean, let’s face it, the frosting on a cake is like the silk lining in a champion’s blazer – it’s gotta be smooth, gotta have that sheen, and oh baby, it’s what gets the crowd roaring. Now, who’s ready to frost like the Masters are watching?
Choosing Your Frosting
You slip on your apron with the flair of a golfer swinging out of a bunker – it’s go time. But hold your golf carts! Choosing the right frosting isn’t as simple as deciding between a 9-iron and a wedge. Are we going classic with a buttercream, avant-garde with a ganache, or full Augusta National with a cream cheese spread? Let your palate be the caddy on this one – just make sure it matches the flavor profile of your cake.
Applying a Smooth Coat
Enough chit-chat – it’s tee time. Take a dollop of frosting, and let’s start with the crumb coat. Picture it like laying down the fairway – that first even layer is what’s going to catch any rogue crumbs. Pro tip: use an offset spatula to spread the frosting, and keep it as even as your uncle’s putting stroke.
- Spread with care, no rush – this ain’t speed golf!
- Chill the cake between coats – patience, young Padawan.
- A rotating cake stand? It’s practically cheating – but totally endorsed.
Piping Techniques for Added Flair
Now for the piéce de résistance: those piping skills. Grab a piping bag with the finesse of a caddy handing you the winning club. Think of piping like sinking that final putt – it’s all precision and style. Go ahead, add some piped grass around the base or a snazzy border at the top. Remember – nobody hoists the trophy for playing it safe on the green.
And with that, our cake is looking more dapper than a Masters’ champion in his Sunday best. But hold on to your golf hats, because just like a good round, the excitement isn’t over after the 18th hole. We’re heading to the clubhouse next with Assembling the Course: Presentation Matters. So, stay tuned, and let’s say together – may the course be with you. 🍰🏌️♂️
Assembling the Course: Presentation Matters
You’ve prepped, whisked, baked, and frosted your golf ball cake with more precision than a pro golfer aiming for that last putt. But hey, we’re not just going to plop this beauty onto a plate and call it a day, right? Now, it’s all about the presentation – setting the stage to give your golf ball cake the grand unveiling it deserves.
Plating Like a Golf Pro
First things first, let’s talk seriously plating. You don’t need to go huntin’ for a green jacket, but a simple, chic platter can make your cake look as spectacular as sinking a birdie. Opt for a crisp, white dish. It’s like a golf tee; it showcases the ball, or in this case, cake, without competing for attention. Fancy a little slice of fun? Check out this article where we plate up deep-fried s’mores like champs – it’s a riot!
Garnishes to Elevate Your Cake
But wait – let’s take it up a notch. A sprinkling of “sand” made from crushed biscuit around your cake can work like the perfect bunker, and a sprig of mint? Well, that’s just the flag announcing a hole-in-one. Parade your cake with these little touches, and watch as your guests’ eyes widen with amusement… and a touch of envy.
Creating a Themed Display
Creating a scene that mirrors the tranquility of the fairway is the ‘par-fect’ complement to your dessert. Consider a touch of greenery, or maybe set the stage with golf-themed ornaments. Just remember to keep it subtle, let the cake be the star, much like the 18th hole – it’s what everyone’s been waiting for.
It’s nearly time for the big reveal. With your cake placed majestically on the serving platter, nestled amongst thematic garnishes, you’ve certainly set the stage for an unforgettable dessert experience. But that’s not all – there’s one more trick up your sleeve…
And now, what about the moment after the ‘oohs’ and ‘aahs’? When the slices are about to be served, we need to ensure that taste matches the elegance. Stick around as we delve into Golfer’s Delight: Serving and Storage Tips – think of it like the 19th hole where we get to relax and indulge in our triumphs.
Golfer’s Delight: Serving and Storage Tips
So, you’ve just pulled off the culinary equivalent of a hole-in-one with your stunning golf ball cake and now you’re wondering how in the world you’re going to keep it fresh until the nineteenth hole? Fear not, my fellow kitchen club swingers, I’ve got your back!
Best Practices for Cake Storage
First things first, let’s talk cake longevity. If you’re caught in a situation where there’s more cake than supporters at the Ryder Cup, you gotta know how to play the fridge game. Wrap up your masterpiece in some plastic wrap — think saran but without the clingy relationship. And pop it in the fridge. Now, remember, only unwrapped cake lasts about as long as my patience on a five-hour round – not very long.
- For frosted cakes, chill ’em till the frosting is hard, then cover loosely with foil.
- Unfrosted slices? Straight into an air-tight container. They’ll be as good as new, almost like you cheated on the back nine!
Complementary Drinks and Side Sweets
Let’s face it, the only thing better than cake is cake with a side of clutch pairings. You’ll wanna serve this baby with drinks and sides that complement its rich flavor. I’m talking ice-cold sweet tea, or for the adults, maybe a cheeky Arnold Palmer (the drink, not the legend himself!).
“Golf and cake go together like bogeys and backspin, but with the right drink, it’s all birdies and eagles!”
Slicing the Cake for Optimal Presentation
Oh, and another pro tip: when serving, slice with a hot knife (dip it in warm water and then dry it) to avoid tearing up the turf — I mean, the cake. You want slices as smooth as your putting stroke, right?
| Task | Pro Golf Tip |
|---|---|
| Slicing | Warm knife for clean cuts |
| Pairing | Match cake with refreshing drinks and sides |
| Storing | Keep it cool to maintain freshness |
Alright, so what do you say we get this golf ball cake on the social hour tee? We’ve covered the essential slice-and-serve etiquette, and how to keep your cake championship-ready in the off-season. Next, let’s drive into some couture cake complications that could make you the talk of the clubhouse, shall we? After all, in the game of cakes like golf, it’s all about playing the long game.
FAQs: Everything Golf Ball Cake
Okay, so you’re knee-deep in flour and you’ve hit a bit of a rough patch, huh? No, worries; it happens to the best of us! Whether your fondant is acting more stubborn than a golf ball in a sand trap or your icing is runnier than a water hazard, I’m here to get you back on the fairway. So, let’s tee off some Q&A that’ll save your game — cake game, that is!
Why’s my cake denser than a golf club?
- First rule of club—uh, Cake Club—don’t overmix! Keep a light hand, buddy. Overmixing develops gluten and that’s a big no-no unless you’re aiming for a bread-like texture!
Is there an easy way to make those dimples?
For sure! Grab yourself a fondant tool or the back of a teaspoon to gently press into your frosting. Remember, it’s gentle dents we’re after, not crater-sized holes. A little love goes a long way.
My cake’s stuck in the pan! Help!
- Did ya grease and flour your pan? It’s like sunscreen for cakes—prevents sticking disasters. If it’s too late for that tip, take a deep breath. Run a knife along the edges and give it a warm bath. I mean, place the bottom of the pan in hot water for a few minutes. It should slide out smoother than a pro’s putt.
Decorating disasters: the frosting edition. What now?
If your frosting is acting up, show it who’s boss. Too thin? Add more powdered sugar. Too thick? A splash of milk will loosen it up. If it’s curdling like it’s in fear of your golf swing, it might be too cold. Let it sit at room temp for a bit and beat it back into submission.
Got any pro tips for first-timers?
Absolutely! Cyndi Lauper said it best – “Girls Just Want to Have Fun,” but pro-tip, so do cakes! Enjoy yourself, don’t take it too seriously. And if all else fails, remember that any cake can be a practice round before you nail that hole-in-one.
In closing, remember, pals, even if your cake could use a mulligan, what matters is you gave it your best shot!
Thanks for swingin’ by my kitchen—it’s been slice.