
Alright, folks, settle in because we’re about to get into the nitty-gritty of selecting your frozen green beans. Now, lemme tell ya, this isn’t like picking out socks for your feet – nah, this is serious business. You don’t want to end up with a soggy, limp mess, do ya? Of course not!
Quality Check: Identifying Top-Notch Veggies
First things first, let’s talk quality. When you’re rummaging through that freezer aisle, look for bags that are more frost than bean – I’m kidding, don’t do that! You actually want the opposite. Peek through that plastic window and check out your beans. What you’re aiming for are plump, vibrant, and evenly frozen greens without any icebergs clinging to them like desperate shipmates. Those little ice crystals? They’re a no-go, they’ll turn your roasting dream into a soggy nightmare.
Storage Secrets: Ensuring Optimal Freshness
- Now, onto storage! You’re not just tossing these babies in with the ice cream and forgotten frozen pizzas. Nah, place ‘em in the coldest part of your freezer. Keep ‘em in the back where Jack Frost lives, to maintain their peak freshness.
- Oh, and don’t you go piling heavy stuff on top of them. Treat them like the delicate treasures they are; otherwise, you’ll bruise their little green souls.
Varieties and Flavors: The Best Batches for Baking
Let’s get into the fun part – varieties! Did you know there are more types of green beans than there are cousins at a family reunion? Haricots verts, classic cut, whole beans – the list goes on! If you’re looking for the perfect roast, pick the classic cut. They’re like the middle child – not too thick, not too thin, just right.
So you’ve got your perfect beans, stored like a pro, what’s next? Well, dear reader, you’re about to crank up that heat and get to roasting. But hey, don’t just sprint off to your oven yet! We’re gonna ease into Preheat to Perfection: Oven Setup next, and believe me, it’s gonna be hotter than a jalapeño on a summer’s day in the desert. Stay tuned!
Preheat to Perfection: Oven Setup
So, you’ve got your frozen green beans selected, and now you’re ready to jump into the roasting game—awesome! But hold your horses, we’ve gotta talk oven temps. Preheating your oven isn’t just some culinary hoop to jump through; it’s the cornerstone of cooking those veggies to crispy perfection. And the magic number? That’s 425°F (220°C) of pure roasting prowess.
Ideal Temperatures: Unlocking the Crunch
You might be tempted to just wing it, but trust me, setting your oven to the right temp is like finding the sweet spot on your favorite pillow. Want those beans crunchy on the outside and tender on the inside? Then 425°F (220°C) is your golden ticket.
Timing Is Everything: How Long to Preheat
Alright, let’s get down to brass tacks. How long should you preheat for? Give it around 10-15 minutes. Yes, you could probably scroll through social media or try to beat that impossible level on your game app in that time, but this is crucial for even cooking.
Oven Racks Positioning: Hot Spots for Even Cooking
Now, where you place those beans in the oven isn’t a game of hide and seek. You want to find that sweet spot, usually smack dab in the middle. So, adjust your racks accordingly before you start. Not too high, not too low—just right. Trust me, it’s a game-changer for even cooking.
- Preheat your oven and be patient; good things come to those who wait.
- Stay vigilant about your oven’s hot spots for the best results.
And hey, speaking of game-changers, ever wondered about baking up some vegan pandan cookies? Because let’s be real, who doesn’t love a good cookie? But that’s a story for another day.
So, you’ve got your oven heating up, your beans are jazzed to jump in, and we’re just getting started. Next up, we’re bringing the heat to the frozen tundra with some killer seasoning tips that’ll bring those beans to life. Get ready to rumble, folks—it’s about to get spicy!
From Icy to Spicy: Seasoning Your Beans
Alright folks, let’s talk transformation. You’ve got your beans; they’re chillin’ like a villain in the freezer, and now it’s time to spice up their lives (and yours) with some bold flavors. Because honestly, what’s life without a little zing? 😄
First things first, let’s get that olive oil flowing. But hold up – not just any oil will do. You want the good stuff, the oil that dreams are made of, because this is where the magic begins. A nice drizzle of extra virgin olive oil is like the golden ticket for your beans – it’s the base of the flavor and the secret to that crispy goodness.
Next up, we’re diving into the spice drawer. Garlic powder is the name of the game, friends. Is there anything garlic can’t do? It’s like the superhero of seasonings – a sprinkle here and there, and suddenly, your kitchen smells like heaven. And don’t be shy, give it a good shake – your taste buds will thank you.
But wait, we’re turning up the heat – literally. Red pepper flakes are coming in hot, and they’re not just here to play. They’re here to bring a subtle smack of warmth that’ll make your heart sing (or at least, make your mouth a little happy dance). Toss those flakes with a flick of the wrist, and you’ve got yourself a bean fiesta!
Now, the secret sauce – well, not sauce, but you get the picture – is in the coating. Gotta make sure each green bean is evenly dressed to impress. Give ’em a little toss in a bowl or shake ’em up in a bag – whatever it takes to get that oil and seasoning hugging every nook and cranny.
And just when you think you’re done, here’s a pro tip: add a dash of salt. It’s the perfect teammate for those other spices, bringing out their best features like a matchmaker at a green bean dance party.
Before you whisk them off to the oven, let’s set the scene for what’s next. You’re about to lay those beans out on the baking sheet, but not just any old way. We’re talking single layer, no bean left behind, ready for their moment in the spotlight. Stay tuned, because we’re about to arrange those beans like a pro!
Arranging Beans: The Art on a Baking Sheet
Okay folks, let’s talk shop about spreading out those green beans. It’s not just about plopping them on a tray – we’re creating a masterpiece here. And by masterpiece, I mean we’re setting these puppies up for success. They need their personal space, like teenagers or that one office coworker. Why? Because we want each bean to bask in the heat evenly, getting that perfect roast without any sogginess.
Baking Sheet Selection: Material Matters
First off, grab a baking sheet. But not just any old thing that’s been hiding in the back of your cabinet. We’re talking about a sheet that means business. If it’s too thin, it’ll warp faster than you can say ‘fire alarm.’ Go for a heavy-duty one, preferably aluminum or a non-stick surface if you want to make clean-up a breeze.
Non-Stick Tips: To Grease or Not to Grease
Next, to grease, or not to grease? That is the question! If you’re using a non-stick sheet, you might think you can skip this part, but let’s err on the side of caution. A little non-stick spray or a quick brush of oil can save you from the heartache of beans stuck to the tray like gum on a shoe.
Spacing Out: Preventing Bean Pile-Ups
Now, about that spacing. Lay those beans out like they’re sunbathing on a beach – not too close, but not so far away that they look lonely. You want them to have room to breathe, and here’s a pro tip: shake the tray a bit. If they roll around freely, you’ve got the spacing right. If they’re bumping into each other and starting a food fight, give ’em some elbow room.
- Give ’em space – crowded beans steam, and we want to roast!
- Shake it up – if they can dance around the tray, they’re good to go.
- Consistency – make sure they’re all about the same size for even cooking.
And remember, this ain’t the last step. These bad boys are just getting warmed up – literally. So, once they’re all cozy and spaced out, it’s time to slide them into the oven and let the heat work its magic. But don’t wander off too far; we’ll need to give ’em a flip later for that all-over tan. Stay tuned!
The Roasting Process: Timing and Tossing
Alright, my fellow kitchen adventurers, we’re at the heat of the moment – it’s roasting time for our frozen green sergeants! Now, you’ve got that oven roaring at 425°F, and your seasoned legume troops are lined up and ready to go. Picture this: the kitchen is filled with anticipation and the scent of spices – it’s almost showtime.
But wait! Ever heard of the ‘set it and forget it’ mentality? Toss that out the window like last year’s Thanksgiving leftovers. Roasting’s a little like babysitting—turn your back for too long and who knows what kind of mayhem you’ll come back to. Let’s get down to the nitty-gritty:
- Peek-a-Boo: At about the 10-minute mark, you’re gonna wanna take a quick gander. Don’t let all that precious heat escape, though! Just a fast peek to see how they’re crisping up. Remember, it’s a stealth mission – in and out.
- The Tossing Technique: Imagine you’re a DJ mixing beats, but instead, you’re remixing beans. Give them a gentle toss to ensure they get all-around color and crispness. Uniform cooking? That’s the golden ticket.
- Finishing Touch: 20-25 minutes should do the trick, folks. When their surfaces are as golden as a California tan and they’ve got a bit of a snap to ’em, that’s when you know – it’s time to roll out the red carpet and welcome them to your plate.
Now, nobody’s gonna call the food police if you decide to roast a minute or two longer because, hey, you know how you like your veggies. Just don’t blame me if the smoke detector throws a fit, alright?
Pro Tip:
I always say, “keep those oven mitts close, but your spatula closer.” You’re gonna need it for that tactical flipping action. And if you’re feeling fancy, toss in a few sliced garlic cloves halfway through – they’ll caramelize and take your beans to flavor town.
So, what’s next after these green beans are roasted to perfection? Grab your jazz hands, folks, because it’s time to garnish these beauties – but hey, I’m getting ahead of myself; that’s a story for the next section.
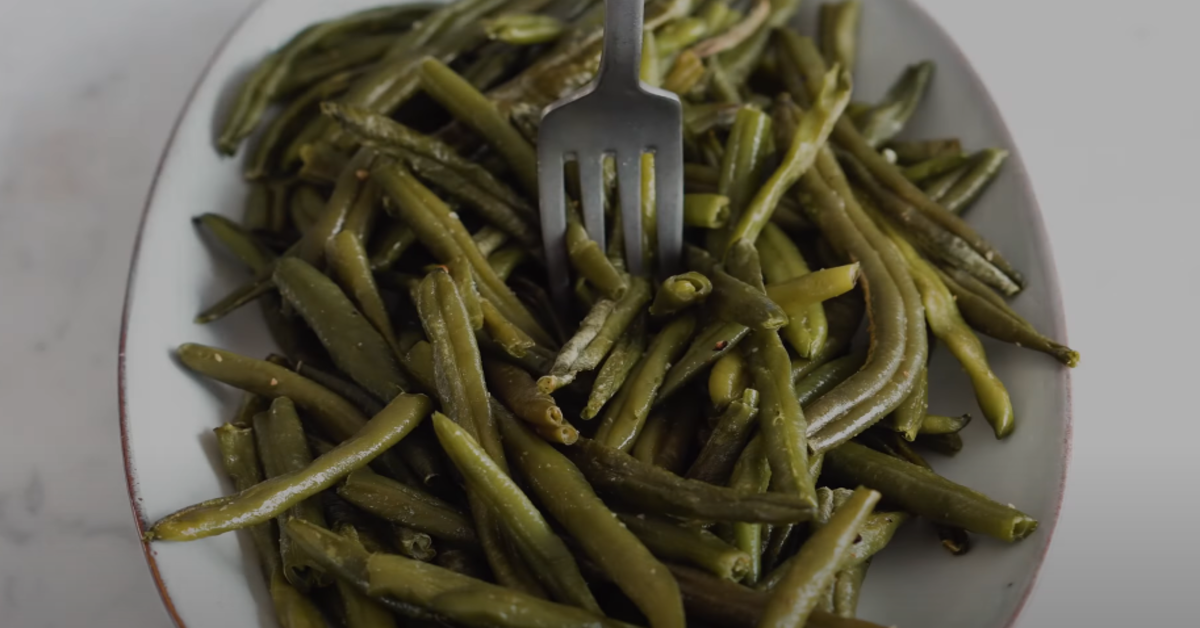
Adding Final Flourishes: Garnishes and Toppings
Just when you think your roasted green beans couldn’t get any better, let me tell you, a little garnish goes a long way. Honestly, it’s like putting the cherry on top – except it’s green beans, and we’re not using cherries. Anyway, let me spill the beans on elevating those verdant veggies into a masterpiece.
-
- Cheese Choices: Parmesan Vs. Others
First off, let’s chat cheese. Sprinkling on some Parmesan isn’t just a flavor kick; it’s a crispy, cheesy halo for your greens. But hey, if Parm doesn’t tickle your fancy, consider a milder mozzarella or a zesty Asiago. Each brings its own personality to the party!
-
- Citrus Zing: Leveraging Lemon
Next up, lemon zest. I mean, talk about a game changer! It’s like a splash of sunshine on a cloudy day. The zest gives a zing that cuts through the rich roasted flavor, adding a fresh pop that’ll have your tastebuds doing the tango.
-
- Crunch Factor: Nuts and Seeds for Texture
Now, for the pièce de résistance – nuts and seeds! A handful of toasted almonds or sunflower seeds can offer that satisfying crunch that takes your beans to a whole new level of nosh.
And here’s a little pro tip: match your garnish to your meal’s theme. Going Italian? Oregano and Parmesan. Asian flair? Sesame seeds and a drizzle of soy glaze. It’s like an around-the-world trip, but for your mouth.
So now, with your green beans gloriously garnished, you must be thinking, “What’s next?” Stick around, because in the next section we’re diving into Pairing and Serving Suggestions to truly seal the deal on your meal. Whether it’s a family dinner or impressing the in-laws, I’ve got the skinny on what dishes will sing in harmony with your green bean creation. Trust me, you’re about to become the bean queen (or king) of your kitchen!
Pairing and Serving Suggestions
Now that those gorgeous green beans are roasted to crispy perfection, it’s showtime! We’re curating an encounter with flavor, folks, and it’s not about simply tossing ’em onto a plate. Nah, we’re talking about crafting a meal that’ll have your taste buds singing a hallelujah chorus. So, what do we pair with these verdant victors?
- Proteins that Complement: Ever tried a juicy grilled chicken breast with a side of our roasted green beans? The slight char from the grill, mixed with the robust flavors of our well-seasoned beans, is enough to make any carnivore smile. Or, for my vegetarian pals, how about a scoop of herb-infused lentils? You’re looking for something that respects the bean’s flavor while adding a new dimension.
- Grains and Sides: Grains are the bean’s best buds. Mix your green side with a fluffy quinoa pilaf or some fragrant jasmine rice. These sides are like the perfect backup singers—supportive but never stealing the spotlight.
- Presentation Tips: Eat with your eyes first, right? A drizzle of balsamic glaze or some colorful pomegranate seeds can turn your dish into a feast for the eyes. Remember, we eat with our eyes first, so make it pop!
Every dish is a tale of fusion and friendship between ingredients. And with your roasted green beans, you’re starting with a suave, crunchy lead singer. Think of the rest of your meal as the groove-inducing band that creates a culinary symphony on the plate. Let’s get that concert started, shall we?
“Always keep your flavors in harmony, and your guests will always ask for an encore.” – Yours Truly, the backyard gourmet
Alrighty, time to move onto the show’s encore: FAQs about Roasting Frozen Green Beans. Stay tuned, and keep those spatulas ready!
FAQs about Roasting Frozen Green Beans
Alright, folks, buckle up ‘cause we’re about to clear up all those head-scratchers you’ve got about roasting frozen green beans. Who knew there’d be so much to ponder over these little green guys, right? Here we go!
To Thaw or Not to Thaw: A Roasting Debate
First up in our green bean saga – to thaw or not to thaw. Here’s the deal: skip the thaw. Seriously, it’s not like we’re defrosting a turkey here. Toss ’em straight from the freezer onto the pan. No mush, all crunch. This way, you get them sizzling without turning them into limp noodle impersonators.
Keeping Beans Crispy: Post-Roasting Tricks
So you’ve mastered the roast, but how do you hold onto that heavenly crisp? Easy peasy! Once out of the oven, spread ’em like you’re setting them free on a cool plate. Letting them chill out in a single layer means that the steam doesn’t get trapped. Steam is the arch-nemesis of crispiness, remember that.
Seasoning Swaps: Alternatives for Different Diets
Last but not least, let’s talk spice swaps. Got a pal who’s all “I’m doing the no-salt thing”? No problemo. Swap salt for a sprinkle of herbal magic like dried basil or oregano. Want a sugar-free glaze? How ’bout a balsamic reduction instead! For the heat-seekers, a dash of chili flakes might be their jam. Seriously, you can pretty much play mad scientist here, as long as it sprinkles.
- Don’t thaw those green icicles.
- Spread out roasted beans to keep ’em crispy.
- Seasoning is your playground – experiment.
In the end, remember: roasting frozen green beans ain’t rocket science, but it does come with its own little list of do’s and don’ts. Stick to these tips, and you’ll be a bean-roasting wizard in no time. Thanks for sticking around; now go make some bean magic happen! 🌟