
Well, butter my biscuits and call me a baker! Today, we’re diving into the deep end with a splash to talk about the most exhilarating dessert that’s swum onto the scene – the shark cake! Trust me, this isn’t your grandma’s bake sale pie – it’s a full-on ocean adventure on a plate, perfect for those birthday bashes or just about any shindig where you want to drop jaws faster than a great white snatches up lunch. 🦈
Choosing Your Shark Species: Inspiration from the Ocean
First up, let’s talk species! Are you vibing with the majestic Great White, or does the hammerhead’s unique noggin tickle your fancy? Maybe the sleek lines of a Mako shark are more your speed? Whichever watery predator you pick will steer the ship for your cake’s design. And don’t sweat it if you can’t tell a tiger shark from a nurse shark; a quick internet deep dive will have your inspiration tank overflowing!
Setting the Scene: Oceanic Cake Board and Background
Now, any seasoned cake decorator knows that a masterpiece needs a worthy stage. For our shark cake, we’re talking about an oceanic cake board that screams ‘Under the Sea’ more than Sebastian the crab. You’ve gotta set the scene right, ya know? Maybe toss in some ‘sand’ made from crushed biscuits or brown sugar around the base. Get creative – this is where your inner artist gets to play Marco Polo with your inner baker.
Gathering Your Baking Arsenal: Essential Tools and Supplies
- Rolling pin – for when you need to flatten the competition… I mean, fondant.
- Carving knife – precision’s the name of the game when you’re sculpting your shark.
- Fondant – it’s not just for covering up cake mishaps; it’s your oceanic clay!
- Food coloring – because the last time I checked, sharks aren’t beige.
Now, don’t think you need to spend a treasure chest worth of doubloons to get started. A lot of this stuff you’ve probably got lounging around in your kitchen drawers, just waiting for their moment in the spotlight.
Stick with me, folks, because in the next chapter of this undersea saga, we’re putting on our baking hats and prepping a cake base that’s sturdier than a submarine – and a whole lot tastier. So grab your aprons and let’s get ready to make some waves! 🌊
Crafting Your Cake Base
Alright folks, buckle up! It’s time to lay the groundwork for our oceanic opus: the shark cake. Choosing the right flavor is like picking the perfect bait – it’s gotta be irresistible! Whether you go with a classic vanilla or venture into the wild with a blue sea swirl, the taste of your cake is the ocean current that carries the whole experience.
Selecting Your Flavor Palette: From Classic Vanilla to Blue Sea Swirl
Now, don’t just paddle in the shallows – dive deep! Think about your audience; are they the adventurous type? Maybe a tangy lemon or a mysterious dark chocolate could tantalize their taste buds. Or perhaps stick to the ever-loved vanilla but add a splash of blueberry for a maritime twist. Mixing up these flavors is like the confectionery version of a sea shanty – it sets the tone for the adventure!
Mixing and Baking: Achieving the Perfect Sponge Consistency
Once you’ve chosen your flavor, it’s time to mix things up. Remember, we’re not just baking a cake; we’re creating a sturdy vessel to brave the high seas of our kitchen ovens. Follow that recipe to the letter, but feel free to throw in a pinch of creativity. When the baking’s done, make sure your sponge is as buoyant as a life raft – firm yet soft, much like the graceful balance of a dolphin in the surf.
Cake Structuring: Crafting Layers for Oceanic Depth
With your cake baked to golden perfection, think like a marine architect and start structuring those layers. Carving out the base is like mapping the ocean floor – it’s all about creating depth and dimension. Don’t forget to slather a generous amount of buttercream between those layers. It’s the glue that holds our underwater ecosystem together, much like the mysterious forces that bind the very oceans.
Now, before we set sail to the next phase, remember to check out how to make S’mores in the air fryer – because sometimes, even the most dedicated sea captains need a sweet treat while docked at the harbor!
Well, now that our base is as solid as an ancient sea rock, let’s gear up for the next stage – sculpting your shark. Get ready to bring your edible apex predator to life, ensuring it’s the center of attention at the feast of Neptune himself!
Sculpting Your Shark
Alright folks, let’s get our hands dirty – and by dirty, I mean covered in frosting and cake crumbs. Sculpting your shark isn’t just about hacking away at your cake base like a pirate in a treasure chest; it’s an art form, a dance with buttercream and sponge. So, let’s shimmy through this process step by step, shall we?
Carving Techniques: From Simple Slice to Sea Predator
- Start with a sketch – yup, even the most spontaneous of us need a plan. Picture your shark. Is it a great white leaping from the waves or a chill hammerhead just cruising the ocean floor?
- Chill your cake layers – because no one likes a crumbly mess. A firmer cake is your best buddy when it comes to carving.
- Grab that serrated knife and gently carve the outline. Remember, it’s easier to take more off than to put it back on, so take it slow.
Smoothing Surfaces: Frosting Your Shark to Perfection
Now, this part is smoother than a dolphin’s noggin. We’re going to cover our shark in a thin layer of frosting, also known as the crumb coat. Don’t worry about getting it perfect; this is just the primer before the real paint job. Let it set, and then you’re ready for the final coat – think of it as the shark’s sleek skin.
Anatomy of a Shark: Ensuring Proportional Realism
Okay, team, this is where things get real – we’re talking Discovery Channel real. You want your shark’s anatomy to be on point. The fins should be the right size, the tail should be the right shape, and please, for the love of the ocean, don’t forget the gills! A little attention to detail here and your shark will be ready to rule the dessert sea.
And just when you think you’ve nailed it, take a step back, squint your eyes – does it look like it could swim away? If yes, then you’re all set to dive into the next thrilling phase: Coloring Your Creation. Here, you’ll learn how to mix up a storm of oceanic colors to give your shark that just-emerged-from-the-abyss look. So stick around, because it’s about to get colorful!
Coloring Your Creation
Alrighty, folks! Let’s talk about turning your shark cake from a mere silhouette into a splashy spectacle. Now, I ain’t no marine biologist, but I do know that getting the colors right is what’ll make your guests go, “Wow, that’s jaw-some!” So, let’s dive in and get our hands a little blue – or a lot, depending on how ambitious we’re feeling.
Mixing Edible Colors: The Secrets of Oceanic Hues
First things first, the color palette. You’ll want to channel your inner artiste here. Think deep blues, teals, and maybe a smidge of green. But hey, it’s your ocean, so you do you! Grab those gel food colors; they’re the bees’ knees for getting vibrant colors without watering down your frosting.
Gradient Magic: Blending for Realistic Effect
- Start with a lighter shade at the belly of your beast and blend to a darker blue on top.
- Use a trusty palette knife or a spatula to smooth those transitions. This isn’t an ‘80s tie-dye shirt; we’re aiming for that subtle, “I just emerged from the Mariana Trench” vibe.
- And hey, if it doesn’t look perfect on the first pass, don’t sweat it! The ocean’s got layers, just like your cake – and ogres.
Finishing Touches: Airbrushing and Hand-Painting Details
If you’ve got an airbrush, now’s its time to shine. A few sweeps can add shadows and highlights that give your shark the depth it deserves. No airbrush? No problemo! A little vodka mixed with food color (yes, I said vodka – it evaporates quickly) makes a paint that’s perfect for detailing.
Remember, the devil’s in the details. Well, so is the dorsal fin, but you get my drift.
And just when you think you’re done, it’s time to look at your creation and ask, “Does this shark look like it’s seen things, things from the deep?” Add those final touches with a fine brush, and bam, you’ve got yourself a shark cake that’s ready to take a bite out of life!
With your shark now looking fit to swim the seven seas, let’s not forget what lies beneath. Next up, we’re gonna pair our masterpiece with the right edible sea critters – because what’s a shark without its entourage, right? Stick around as we dive into Adding Fins and Features, where we’ll tackle those razor-sharp teeth and the all-important, soul-piercing gaze.
Adding Fins and Features
Alright, my fellow baking buccaneers, you’ve got your shark cake base all shaped up and frosted, and now it’s time to dive into the devilish details that’ll really make your creation the apex of the party! 🎉 We’re talking fins, teeth, and those soul-piercing eyes that’ll have your guests wondering if they should admire your cake—or swim away from it!
Creating Fins: Tricks for Sturdy, Stand-Out Structures
First things first, let’s talk fins. You want these bad boys to be as sturdy as a lifeguard’s gaze. Use gum paste or a mix of fondant with tylose powder—the secret ingredient that turns your ordinary fondant into super-fondant, capable of holding up under the weight of your guests’ awestruck stares.
- Roll out your gum paste to the desired thickness.
- Cut out fin shapes using a template or just freestyle it if you’re feeling gutsy.
- Insert small skewers or toothpicks—if yer not afraid of a little pirate play—and let them dry.
- Once they’re as rigid as the captain’s orders, stick ’em onto your shark for that three-dimensional oomph.
Pro Tip: If ya fin-d yourself in troubled waters, don’t hesitate to use some edible glue or a dab of melted chocolate to really anchor those fins in place!
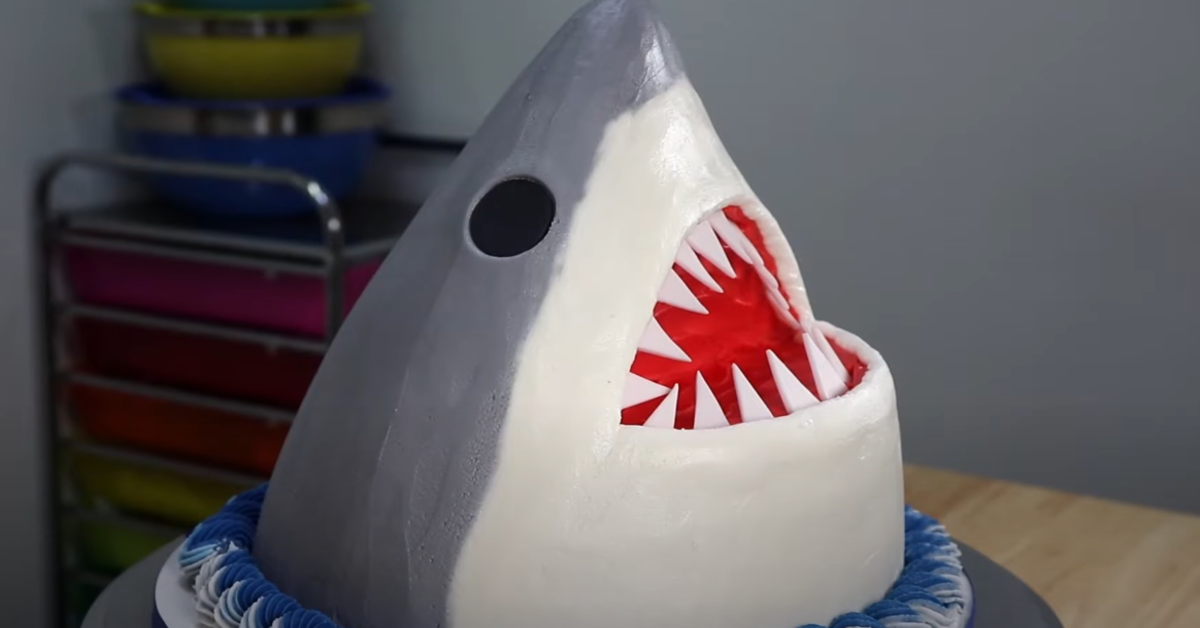
Terrifying Teeth: Crafting Edible Pearly Whites
No shark cake’s worth its saltwater without a menacing grill. And guess what? Making these terrifying chompers is easier than fishing in a barrel!
- Roll out some white fondant nice and thin.
- Cut out those pointy teeth with a precision only a sea-surgeon could envy.
- Attach ’em to the mouth with a smidge of frosting—not too much, or it’ll look like your shark’s foaming at the mouth!
And voilà, yer cake’s got a bite worse than its bark!
Eyes for the Ocean: Instilling Life with a Gaze
Last but not least, the peepers. It’s all in the eyes, folks. Give your shark those deep sea windows to the soul with some well-placed fondant circles—or better yet, get your hands on some edible eyes from the store. A little highlight with an edible food pen, and your shark won’t just be staring—it’ll be glaring.
| Feature | Material | Tips |
|---|---|---|
| Fins | Gum paste | Let dry completely before attaching |
| Teeth | White fondant | Attach with a tiny bit of frosting |
| Eyes | Edible eyes or fondant | Add a dot of white for a lifelike sparkle |
So let’s wrap this up—soon your shark cake will be looking sharp with fins, teeth, and a gaze to rock the boat! Next up, we’ll be crafting accents and adornments to turn your cake from a lone predator into a bona fide underwater spectacle. Stay tuned, cake sculptors; we’ve got some sweet underwater landscaping coming your way! 🌊🍰
Crafting Accents and Adornments
Alrighty, let’s dive into the briny deep with our cake decorating journey, shall we? Now that you’ve finessed your shark with fondant finesse, it’s time to give ’em some friends – and not just any friends, but adorable edible ones! We’re talkin’ a full-blown under-the-sea shindig on top of your cake. 🐠✨
Edible Ecosystem: Fashioning Fondant Flora and Fauna
First off, ya gotta set the stage. Whip out that fondant and let’s get to crafting an edible ecosystem. You can start simple with sea stars and work your way up to the more intricate coral and anemones. The key here is variety in shapes and colors – we want this underwater fiesta to be as lively as a school of clownfish dodging an overly enthusiastic diver.
- Roll out various shades of greens and blues to mimic seaweed and coral reefs.
- Use a sharp knife or pastry wheel – watch those fingers! – to carve out delicate sea plants and funky-looking coral.
Bountiful Seabed: Making Sugar Sand and Seashells
Now, let’s sprinkle some magic onto that ocean floor with sugar sand. A simple mix of graham cracker crumbs and brown sugar does the trick. Oh, and throw in a pinch of cinnamon for that speckled sand look. Scatter it gently around the base, like you’re seasoning a five-star dish.
As for the seashells, there’s no need to raid the beach – fondant shells are a breeze. Mold them with those crafty fingers or use a silicone mold if you’re aiming for that uncanny realism. With a dusting of pearl luster, these treasures will glint like they’re freshly plucked from Poseidon’s own collection.
Sweet Schools: Adding Candy Fish for Movement
Here’s where the fun bubbles up! Adding candy fish is akin to inviting guests to a party – they bring the movement. Snag some gummy fish from your local store, or if you’re feeling adventurous, fashion your own with colored gelatin. Arrange them around the cake so it looks like they’re darting through the water, barely escaping Jaws Jr. over there.
That leftover crawfish from last weekend’s boil? Well, let’s turn ’em into a fondant sidekick for our shark. Trust me, everyone will get a kick out of seeing a crustacean comrade riding along.
And there you have it! Now let’s move on and preserve this masterpiece, ensuring it looks just as jaw-dropping on the dessert table as it does in your kitchen. After all, what good is an underwater utopia if it doesn’t last until the first slice is served?
Preserving Your Edible Art
Alrighty folks, let’s talk keeping that shark cake looking fierce until the big reveal – because nobody wants a soggy sea predator, am I right? It’s game time, and I’m about to dish out the MVP moves for cake conservancy. 🍰
Storage Solutions: Keeping Your Cake Fresh and Intact
Here’s the scoop: your delicious shark needs a cool, dry spot to chill out. Think of it like sending your cake on a little spa day – it’s gotta be pampered in the right environment. A refrigerator could work, but beware! If that air in there is drier than a comedian’s wit, you might end up with fondant that’s more cracked than my grandpa’s old fishing boat. Moisture is key, but not too much – it’s a balancing act, like trying to walk after a day on the waves.
- Pro Tip: Tuck your finned friend into a cake box before it hits the fridge. It’ll keep the moisture level just right and ward off those pesky food odors.
Timing is Key: When to Assemble Your Aquatic Showstopper
Now, let’s talk strategy. Timing is everything – like catching the perfect wave, you want to ride the crest of cake assembly. Put those fins on too early, and they might droop like they’re melting in the sun. So, you gotta ask yourself, ‘Do I feel lucky?’ Well, do ya? Aim for final assembly no more than a few hours before the big reveal. Keep those decorations on standby, ready to pop onto the scene like a surfer’s unexpected backflip.
Transportation Tips: Safely Moving Your Marine Marvel
Okay hotshot, you’re almost there. Moving your shark without turning it into chum? That’s the next level. Here’s the lowdown: a sturdy base is your BFF, and non-slip mats are the unsung heroes of cake transit. Secure your cake like it’s a treasure chest on a pirate ship, because we’re aiming for no cake overboard situations here! And hey, if you’ve got to slam the brakes, you want your shark looking like Jaws, not jaws-of-life material.
- Non-slip mat underneath? Check. 🚗
- Clear, obstacle-free path to the vehicle? Check. 🛣️
- Gentle turns and easy stops? Double-check! 👌
So buckle up buttercream, we’re about to dive into the next treasure trove of knowledge: next stop, the FAQs about Shark Cake Creation – because even seasoned captains need a map now and then.
FAQs about Shark Cake Creation
So, you’re ready to dive into the fin-tastic world of making a shark cake, huh? 🦈 Well, buckle up, buttercream, ’cause I’ve got answers to those head-scratching questions that might pop up along the way. Trust me, I’ve dodged more cake disasters than a sea turtle dodging shark jaws!
Overcoming Challenges: Top Troubleshooting Tips
First off, let’s tackle those pesky cake-tastrophes. If your shark resembles a sad blob fish rather than a jaw-dropping Jaws, don’t flip your fins! It’s often as simple as chilling your cake before carving to keep those crumbs at bay. And hey, if your frosting ends up looking like ocean spray instead of a smooth sea? A hot knife will smooth things out quicker than you can say “Great White”. Remember, imperfections add character or… scary scars? 😉
Ingredient Alternatives: Catering to Dietary Restrictions
Got a guest with a gluten grudge or a dairy dilemma? Don’t sweat it, I’ve swapped out flour and milk more times than I’ve changed my mind about the scariest shark movie. Use almond flour for a nutty, gluten-free twist, and creamy coconut milk to dodge the dairy without losing moisture. Your pals will be too busy admiring your work to notice the switcheroo!
Party Planning: How to Time Your Cake for Event Success
- Start early: Don’t wait till the tide’s high! Sharks might be fast, but great cakes take time. Begin crafting your masterpiece a day or two in advance.
- Cool storage: Keep your sea predator in a cool, dry place. Heat waves and frosting sharks? Not the combo you’re lookin’ for.
- Set a Schedule: Set up a step-by-step timeline along with your shark movie marathon, so you’re not rushed.
Remember, making a shark cake is like doing a sea dance – unpredictable but a whole lotta fun. You’ve got this! In the meantime, can you believe some sharks can have up to 30,000 teeth in a lifetime? Talk about a dental dilemma!
In closing, keep your cool when the baking waters get choppy, swap out those ingredients like a pro, and plan like you’re the captain of the ship. Need more help? Drop me a line – I’m always up for a good cake yarn or a witty ocean pun 😄. Thanks for riding the waves with me – ’till next tide!