
Ever stumbled upon a dish so vibrant, it looks like a unicorn decided to throw a party on your plate? Yeah, I’m talking about the ridiculously fun and totally Instagrammable rainbow rice! Now, before you start thinking this is some sort of sorcery reserved for gourmet chefs or trendy food bloggers – hang on to your hats, folks, because I’m about to spill the beans (or should I say rice?) on how anyone with a pot and a penchant for pizzazz can whip up this colorful concoction. 😎🌈
Choosing the Right Rice Variety
Listen up, Picasso of the pantry! The canvas for your edible masterpiece? Rice, of course. But not just any rice – you’ll want something that’s a little sticky, but not too clingy, like that ex who keeps texting you. Sushi rice works like a charm, but if you’re fresh out, basmati or jasmine rice can step up to the plate. The goal is to get those grains to hold hands with the color, not go swimming in it.
Significance of Food Coloring Selection
Now, let’s talk rainbows. They’re not just pretty; they’re a symbol of hope, joy, and all things magical. To recreate that spectrum, you’ll need quality food coloring. And let me tell you, not all food dyes are created equal. You want vibrant, vivacious colors that’ll turn your rice into the Northern Lights of nosh. Go for gel or paste colorants – they’re like the VIPs of food coloring, and they won’t water down your rice.
The Role of Vinegar or Alcohol
Here’s a pro tip to keep up your sleeve: a smidge of vinegar or alcohol can work wonders. They aren’t just for pickles and parties, my friends. A dash of vinegar, or a splash of vodka (if you’re feeling frisky), can help the colors cling to the rice like gossip in a small town. But remember, we’re not pickling or partying; we’re painting with food, so use a light hand.
Alright, now that we’ve got our rice picked out, our colors on deck, and our secret ingredients ready to roll, what’s next? Stay tuned as we gear up to gather all the bits and bobs you’ll need to turn that plain ol’ rice into a rainbow riot. And trust me, it’s easier than folding a fitted sheet!
Gathering the Essentials for Your Palette
Alright, folks—before we jump into the kaleidoscope kitchen action, let’s chat about setting ourselves up for success. Think of it like prepping for a grand painting session, but instead of canvas and oils, we’ve got rice and dyes! 🎨
First things first: the inventory. You’re gonna need a fine mesh strainer to rinse that rice, a few mixing bowls (unless you plan on dyeing your countertop – not recommended), and spray bottles or droppers for those food color squirts. And hey, don’t skimp on the plastic gloves unless you want to explain to your boss why your hands look like a tie-dye shirt!
- Strainer: To rinse the rice and ensure it’s free from starchy betrayal.
- Mixing bowls: For separating and coloring the rice without causing a kitchen color war.
- Spray bottles/droppers: For precise color application—this is art, not a free-for-all!
Next up, food dyes. Sure, you could go with the standard red, blue, and yellow, but why not jazz it up a bit? There’s a whole spectrum out there, and I mean, have you seen ube? That purple could really pop in our palette!
And here’s a little pro tip: grab some white vinegar or alcohol (the rubbing kind, not your leftover margarita), as they help the colors cling to the rice grains like bees to honey.
Shopping for Food Dyes
Look for food dyes that say “vivid,” “neon,” or “electric”—words that scream “I’m not here to play it safe.” And of course, let’s keep it friendly for all tummies and go for non-toxic, allergy-friendly options. They exist and are absolutely worth it, trust me.
Supplementary Ingredients for Enhanced Vibrancy
Now, don’t you worry about bland hues; we’ve got a secret weapon. A pinch of salt can enhance colors, and a smidge of sugar can add a subtle sheen. Just remember, a little goes a long way!
With your arsenal ready, you’re all set to march into the rainbow battleground. And once your rice is cooked to perfection (that’s coming up next, so hang tight!), it’ll be prime time to let those colors fly. 🌈 On to the cooking!
Preparing Your Canvas with Perfectly Cooked Rice
So, you’ve decided to jump on the color train and jazz up your next meal with rainbow rice, huh? Let’s get this party started! I mean, who wouldn’t want their dinner to look like a unicorn parading across the plate? But hold your horses—before we start throwing a Mardi Gras in our rice pot, we gotta talk about the right foundation.
Now, I’m not gonna sugarcoat it—nailing the perfect rice consistency is like finding a parking spot at the mall on Black Friday. It’s tricky, but oh-so rewarding once you get it. Listen up, because getting this bit down is half the battle in our quest for vibrant rice glory.
Tips for Ideal Rice Consistency
- Water is your frenemy: Too much and you’re swimming in rice porridge; too little and you’re chowing down on what feels like pebbles. The trick is to follow the package instructions to a T. And when in doubt, remember: It’s better to err on the side of less water. You can always add a splash if needed.
- Rice is not pasta: Resist the urge to stir it like a mad scientist. Let it do its thing and fluff it only after it’s done. Over-stirring while cooking? That’s a recipe for a starchy mess.
- Al dente is key: Firm, yet tender grains are what we’re aiming for. This way, when we hit the coloring stage, our rice won’t turn into a sad, squishy rainbow.
Cooling Techniques Pre-Coloring
After you’ve cooked it to perfection, the last thing you want is to rush. Give your rice some chill time—literally. Spread it out on a baking sheet or a wide dish and let it cool down. This stops the cooking process and helps keep each grain in prime condition for its upcoming dye job.
Best Practices for Avoiding Soggy Results
Here’s a pro tip for you: patience, my friend, patience. Let the rice cool completely before you even think about diving into the color pool. This ensures that the colors will stick without turning your rice into a mushy rainbow swamp. And remember, no lid! We want steam to escape, not to get locked in a sauna with the rice.
Alrighty, now that we’ve got our perfectly cooked and cooled rice, we’re all set to create some magic. But don’t go splashing color around just yet! In the next section, we’ll dive into the exciting world of Mixing Your Own Edible Pigments. Time to channel your inner artist and get those creative juices flowing—stay tuned!
Mixing Your Own Edible Pigments
Alright, folks, buckle up ’cause we’re about to get a little Jackson Pollock in the kitchen—minus the mess, I promise! Now, don’t just stand there like a bump on a log; grab those food colorings, because we’re about to mix up some seriously vibrant shades for our rainbow rice project. And hey, no licking the “paint” off your fingers, alright?
Combining Colors for Custom Shades
First thing’s first: make sure you’ve got a rainbow’s worth of food coloring. We’re not playing with the Crayola box of eight here—we’re going full 64-pack, my friends. Now, remember when your kindergarten teacher taught you about primary colors? Well, it’s time to put that knowledge to good use. Mix red and blue; boom, you’ve got purple. Blue and yellow? Hello, green! And if you want that perfect shade of orange, red and yellow will be your best pals. It’s like magic, but you can eat it. 🌈
Adjusting Intensity of Food Colorings
When it comes to your palette, intensity is key. Want your rice to whisper colors? Go easy on the dye. But if you’re aiming for rice that shouts from the rooftops, then amp up those drops! Just remember, it’s easier to add more than to take away—this isn’t a sweater you can just shrink in the wash.
Safe Mixing Practices
Now, let’s chat safety—because no one wants a side of “oops” with their rice. Always mix colors in a clean, separate bowl; this ain’t a free-for-all. Use different spoons or sticks for each color to avoid cross-contamination—unless you were going for brown rice, but like, the unexpected kind. Take a peek at “What to do with leftover crawfish” for some inspiration on how to turn your rainbow rice into a full-on fiesta!
Once you’ve gotten your colors all nice and ready, make sure you’ve got your game face on for the next step. You’re gonna be folding colors into the rice like you’re folding laundry—except this is way more fun and doesn’t require fabric softener. So, keep your eyes peeled, stay tuned, and let’s turn this rice into a technicolor dream!
Tinting Grains with Artful Precision
Hey there, fellow culinary artists! Let’s get our hands colorful – it’s time to jazz up our rice with some pizzazz. Whipping up a rainbow in the kitchen? Sounds like the perfect plan to me, and you gotta trust me, I’m practically a Picasso with a pot and a pantry 🎨! But let’s not get our colors all muddled up – nobody’s after brown rice, unless we’re talking whole grain, am I right?
The Technique of Gentle Folding
Alright, here’s the scoop: to keep your lovely colors from getting all moody, think of folding like you’re tucking a baby into bed – gentle but firm. Plop a section of rice into your food coloring, and practice your “fold and turn”, making sure each grain is coated yet free from bruising. Just imagine you’re giving the rice a nice, comfy blanket of color.
- Grab a spatula and treat it like a paintbrush – be an artist!
- Rotate your bowl as you go for even coverage.
Sectioning Rice for Distinct Colors
Before you dive into the technicolor pool, divvy up your rice into smaller crowds. Why? Well, ‘cause it’s easier to manage and avoids the overzealous mixing that results in a dreary hue. It’s a bit like giving each color its own stage to shine – a solo performance if you will.
“Treat each color like a solo in a symphony – let ’em shine on their own before coming together for the grand finale.”
Averting Muddy Color Mixtures
No one wants a swampy mess on their plate. To stop those colors from throwing a wild party and combining into an unappetizing brown, give ’em space! Tint one batch at a time, and keep ’em separate until they’ve had time to ‘settle in’, like new neighbors getting comfy before the block party.
Pro tip: use zip-top bags to shake it up – rice goes in, dye follows, seal, and do the rice shake. Less mess, bright colors, and hey, a bonus arm workout 🏋️♂️!
And remember, the key here is patience, folks. Let’s not rush; good food is like fine art – it takes time. Next up, we’ll chat about the drying stage, ’cause nothing’s sadder than a clumpy rainbow. Stick around to learn how to keep those colors strutting their stuff!
Drying for the Quintessential Rainbow Effect
So, you’ve just given your rice a technicolor makeover, and you’re probably thinking, “Now what?” Real talk, my friends: drying is where the magic truly happens. It’s like watching paint dry, but way more appetizing, believe me!
First off, you’ve gotta spread your rice out on some parchment paper or a fancy silicone baking mat if you’re feeling bougie – and who isn’t now and then? Trust me, you don’t want these little colored critters cozying up too close or you’ll get a tie-dye effect. And while tie-dye shirts are a hoot, tie-dye rice… not so much. Aim for a thin, even layer to let each grain strut its stuff.
Next up, finding those ideal drying conditions. If it’s sunny, use Mother Nature’s own drying machine – the great outdoors. But if it’s lookin’ a bit gloomy, or you’re an indoorsy type, a well-ventilated room will do the trick. Turn up the ceiling fan and let it whirl! Just remember, no heat; we’re not baking a cake here, we’re crafting art.
As for timing, we’re playing a waiting game, and patience is the name of the game. You’ll want to check on it, like when you can’t stop peeking at your phone waiting for a text back. But give it time – usually a few hours will suffice. If you notice some spots are throwing a little more shade than you’d like, a gentle nudge or a delicate stir might just save the day.
- Spread rice thinly for even drying
- Use a well-ventilated area or some good ol’ sunshine
- Be patient – good drying takes time
- Occasionally adjust undried patches
And if you’re wondering, “What’s next after my rice is all pretty and dry?” Hold onto your aprons, because we’re diving into an ocean of creative uses for your rainbow rice. Ever thought about jazzing up that sushi you love so much? Oh, just you wait. And hey, maybe your kiddos will even munch without fuss! Speaking of sushi, have you seen our take on making sushi at home? Anyway, don’t put those color bottles away just yet; we’re about to get even more inventive with our bright, cheery grains. Let’s roll!
Hey, fellow food art aficionados! So you’ve got your rice all jazzed up in every color of the rainbow, and it’s sitting pretty on your countertop (ain’t she a beaut?), now what? Pull up a chair ’cause it’s showtime for that vibrant rice art.
Creative Uses for Your Rainbow Rice
Put on your party hats, y’all, because this is where the fun really starts. Whether you’re laying out a spread that screams Instagram gold or just wanna spruce up a Wednesday night dinner, rainbow rice is your go-to confetti.
Inspiring Party Presentation Ideas
- Imagine a backyard bash where the rice is the centerpiece, not just some side dish.
- Ooze sophistication with a tricolor mound adorning a plate like a mini edible mountain – plant a little parsley flag at the summit for kicks 😉.
- Table scatter who? Sprinkle some of that rice among the centerpieces; even the flowers will get a teensy bit jealous!
Remember, peeps, in the world of colorful rice digits, less is more. So keep it classy, not clash-y!
Incorporating into Sushi and Rolls
Why not take sushi night up a notch? 🍣 Replace the plain ol’ white rice with your spectrum of sticky, and boom – you’ve got a sushi rainbow that might just break the internet.
“Sushi’s so bland,” said no one ever with rainbow sushi rolls!
Educative Playtime for Children
If you’ve got knee-high sous chefs in your kitchen, here’s a fab idea. Set up a rice play station with their toy pots and pretend they’re world-renowned chefs. It’s a blast, and they’re learning colors and cooking. Pizza Play-Doh, you’ve met your match. 😉
Right, keep your aprons on, chefs. We’re not done yet! In our next culinary adventure, we’re gonna tackle some FAQs to help you turn that rainbow rice chronicle into epic kitchen lore. What’s that saying? Knowledge is flavor? No? Well, it should be.
Hey there, rainbow chefs! 🌈 I’ve gotta spill the beans—or should I say rice? 🍚 — on some hot tips for keeping that gorgeous rainbow rice of yours as vibrant as a leprechaun’s wardrobe. Ready to become a rice Picasso? Let’s dive into the wonderful world of FAQ-mania!
FAQs About Crafting Spectacular Rainbow Rice
You’ve asked, and I’m here to answer—no need to be shy now. So, what’s cookin’ in the Q&A kitchen today?
Best Practices for Long-Lasting Color
Worried about your rice colors fading faster than your summer tan? Fear not! The secret’s all in the seal. Lock those tints down with a teensy splash of vinegar in your dye mix. Too much can be a buzzkill for taste buds, though, so keep it on the down-low. Another hot tip: store your rainbowlicious rice in an airtight container in the fridge to keep those colors strutting their stuff longer.
Allergy-Conscious Food Coloring Options
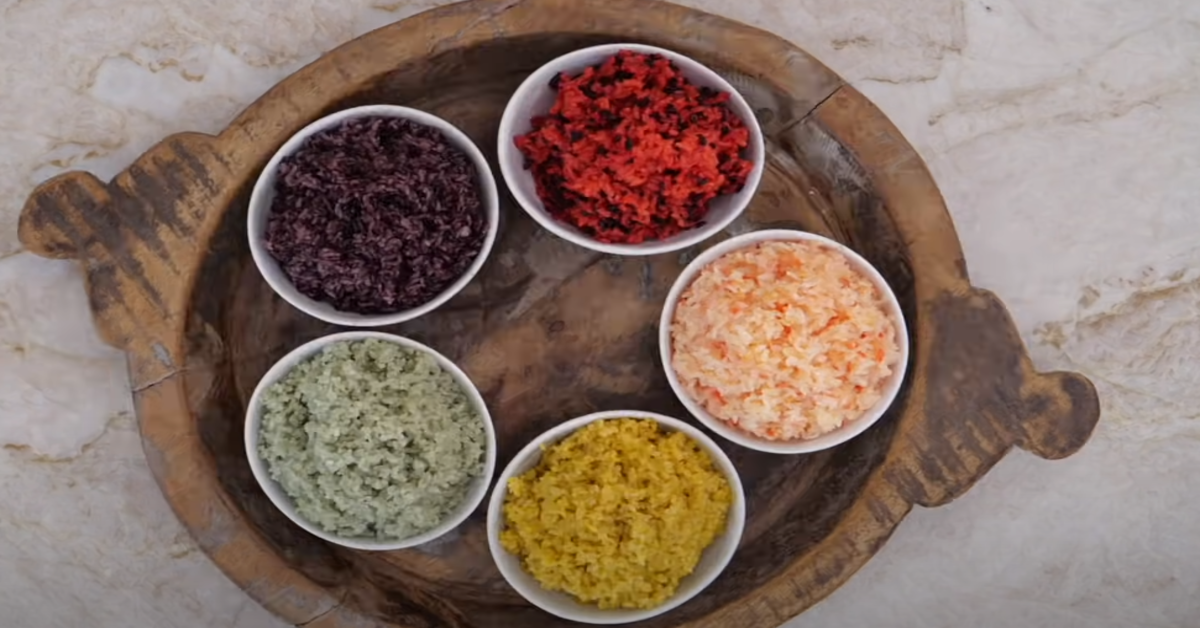
Oh, allergies. They’re like that uninvited guest at your BBQ. But hey, we can still party! Opt for natural dyes like beet juice, turmeric, or spinach water. Bonus: they’re like a wellness retreat for your insides. Ta-da! Allergy-friendly and healthy. Who knew, right?
Storage Techniques for Future Feasts
- Wait till your rice masterpiece cools off before attempting the big chill. Too much steam can mean a mushy, color-bleeding mess. No bueno!
- Remember, moisture is the enemy—a little dessicant pack in your storage container can fend off the dreaded rice mush.
- Got leftovers? Lay ’em flat in a freezer bag, and you’re golden for up to a month!
There you have it, culinary comrades—your very own pot o’ gold when it comes to keeping that rainbow rice glowing like Vegas. Got more questions? Toss ’em my way. I live for this stuff, kiddos.
Well, paint me green and call me a zucchini, but it looks like we’ve hit the end, pals. Thanks for sticking around, and don’t forget, when life gives you rice… make it rainbow! ✌️