
Alright, folks, strap in because I’m about to take y’all on a wild ride through the thrilling world of turkey-leg selection. We’re not just picking any ol’ drumsticks; we’re after the crème de la crème for our next slow-cooked extravaganza. So, grab your notepads, and let’s gobble up some knowledge! 🦃
Eyeing the Quality: What to Look For
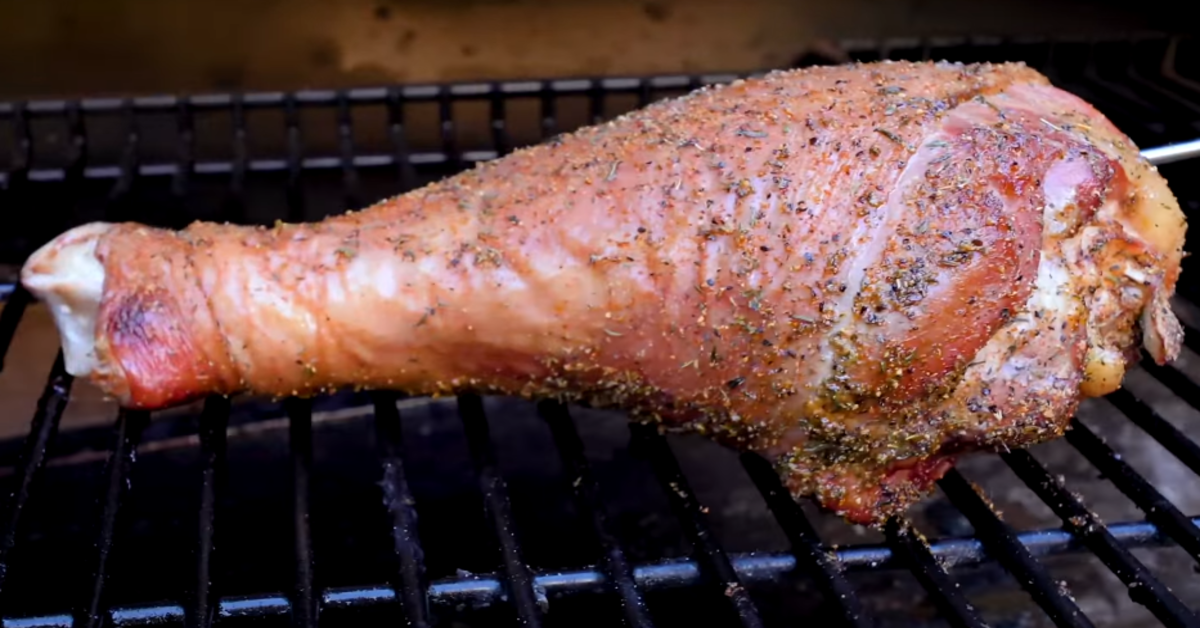
You know how you can spot a seasoned beachgoer? They’ve got that perfect tan and not a single sunburn. Well, picking turkey legs is sorta like that – you gotta know what perfection looks like. First things first, check out the color of the skin. You’re lookin’ for a nice, even tan – nothing too pale or, heaven forbid, a shade that screams “I’ve seen better days.” Next, give that leg a little poke. If it bounces back, congrats, you’ve got yourself a fresh one! But if your finger leaves a dent like a memory foam mattress, better steer clear. 🤔
Organic vs Conventional: Making the Choice
Now, let’s chat about whether to go organic or stick with conventional. I get it, you might be thinking, “Hey, they all look like turkey legs, what’s the diff?” But let me tell ya, with organic, you can strut your stuff knowing those birds lived the high life – no antibiotics or unnatural feed. Plus, they’re often more flavorful. But, your wallet might feel the pinch a bit more with organic. Conventional, on the other hand, is easier on the pocketbook, and hey, still delicious. It’s like choosing between a fancy microbrew or a classic lager – both will quench your thirst, but it’s about the experience you’re after. 🍗
- Freshness: The fresher, the better – just like your high school yearbook photo.
- Texture: Firmer is the name of the game; we’re not making turkey Jell-O here.
- Color: Aim for golden brown, not “left in the sun too long.”
And there you have it, the scoop on picking the prime turkey legs that’ll have your dinner guests thinking you’ve got a Michelin star hidden up your sleeve. Stick around because next up, we’re gonna delve into the mystical realm of crock pots. It’s gonna be hotter than a jalapeño in a sauna, folks – you won’t want to miss it! 🌶️🔥
The Essentials: Crock Pot Readiness
Alright folks, let’s huddle up and talk shop about the MVP of your kitchen – the crock pot. Now, before you dive into the slow-cookin’ rodeo, you gotta make sure your trusty sidekick is ready to lasso in some serious flavor. Ain’t nobody got time for a kitchen misadventure, am I right?
Size Matters: Picking the Right Crock Pot
First off, size totally matters, and don’t let anyone tell you different. You’re eyeing those prime turkey legs and dreaming of them falling off the bone, so you need a pot that’s gonna fit them snug as a bug. Too small and you’re squishing the stars of the show; too big and they’re swimming in space. Who wants that? You want a crock pot that lets your turkey legs cozy up but still have room to breathe – typically, a 6-quart pot is your golden ticket.
Pre-heating Procedure: A Crucial Move
Next, we’re talking pre-heating. This ain’t your oven, but trust me, giving your pot a lil’ warm-up session is a game-changer. Why, you ask? Well, it’s like giving your turkey legs a warm embrace before they start that long, slow journey to Flavor Town. So, crank it up to high for about 15 minutes while you get the other bits ready. It’s all about showin’ love to your meal from the get-go.
- Plug it in and set it on high
- Let it heat up while you prep the legs
- Save time and enhance flavor – that’s a win-win!
Now, don’t just stand there while your pot’s getting all hot and bothered! Use this time to pat yourself on the back for being such a savvy prepper. Oh, and maybe get those turkey legs ready for their spa day in the crock pot marinade – but hey, that’s a story for another section, right?
Alrighty, with your crock pot all jazzed up and ready to go, let’s shimmy on over to the next step – marinating magic. Stay tuned, ’cause that’s where the real flavor party kicks off!
Marinating Magic: Flavor Infusion
Alright, folks – let’s talk turkey. And not just any turkey, but turkey legs that have been transformed by the wonderous powers of marination. Now, you might be thinking, “Marination is just soaking meat in sauce, right?” Oh, but it’s so much more. Let’s dive into the craft of creating a marinade that’s gonna knock your socks off. 🧦💥
Crafting Your Marinade Blend
First things first, the blend. You wanna whisk together a concoction that’ll make those taste buds do the cha-cha. Start with some olive oil – the good stuff. Then, pick your acid; could be vinegar, lemon juice, or a splash of your favorite citrus. These ingredients are not just pals; they’re the dynamic duo that tenderizes the turkey to perfection.
Now, the fun part: seasonings. You gotta bring the pizzazz with garlic, onions, a smidgen of brown sugar for sweetness, and let’s not forget the herbs! Rosemary, thyme, and oregano are like the Three Musketeers of flavor town. And don’t shy away from a little heat – a pinch of cayenne or a dollop of Sriracha will do the trick.
It’s not just about mixing stuff together willy-nilly, though. You’ve gotta balance the flavors. Like a tightrope walker, you’re aiming for equilibrium. Sweet, salty, acidic, and umami – when they join forces, you’re golden. 🌟
Marination Time Frames for Perfection
Timing is everything, right? Marinating those turkey legs isn’t a race against the clock, but more like a slow dance. Give ’em a good 4 to 24 hours to get cozy with the marinade. Short on time? Even a quick 30-minute sit-down in the marinade can be beneficial – just don’t expect the flavors to have moved in and redecorated.
The thing is, marination is like a good night’s sleep for your meat; it needs enough time to be effective. So, if you can, let those legs lounge overnight in the fridge. They’ll absorb all the goodness and come out ready to dazzle in the crock pot. Plus, it gives you an excuse to raid the fridge at midnight, pretending to check on them – we’ve all been there.
Remember, friends, it’s all about laying the groundwork for a flavor-packed feast. Now that your turkey legs are marinating, you can almost taste the victory, can’t you? But hold your horses, we’re not quite done. Next up, we’ll be arranging the crock pot ensemble, and let me tell you, it’s like setting the stage for an opera of deliciousness. So, stick around! 🍗🎶
Arranging the Crock Pot Ensemble
Alright, folks, let’s dive into the heart of the matter – laying down a rock-solid foundation in that crock pot of yours. I mean, we’re not just tossing turkey legs into the abyss and hoping for the best, are we? No siree! We’re crafting a culinary masterpiece, layer by layer.
Supporting Veggies for Enhanced Flavor
First up, let’s talk veggies. These guys are like the back-up singers to your lead vocalist (the turkey legs, in case you lost track). You’re gonna want to start with a mirepoix—fancy, I know. That’s just a fancy term for chopped onions, carrots, and celery. These three musketeers release aromatic flavors that soak into the meat, making it sing with taste.
But hey, don’t stop there! Throw in some garlic cloves for a punch, and maybe a sprig of rosemary or thyme if you’re feeling herby. And here’s a pro tip: give those veggies a quick sauté before they hit the pot. You’ll thank me later when your kitchen spells like heaven on a Saturday morning.
Spacing & Placement Techniques
On to spacing and placement – trust me, it’s not as boring as it sounds. You gotta place those turkey legs in just the right spot for even cooking. Think of it like arranging furniture in your living room for the best TV view. You don’t want one leg hogging all the heat, right? Make sure the meaty parts are nestled close but not stacked on top of each other – personal space is a thing, even in crock pots.
Now, if your crock pot is the size of a small car, you’ll have plenty of room. But let’s be real, most of us are working with something a bit more modest. So, just keep it cozy, not cramped. And remember, those veggies are the cushion, so layer them underneath and around the turkey legs for that full-on flavor embrace.
Got all that? Great! Because once you’ve got your crock pot ensemble arranged like a boss, you’re ready to move on to the slow-cooking symphony – but that’s a story for another section.
Mastering the Slow-Cook Technique
Hey friends, let’s cut to the chase – we’re here to turn that crock pot into a love nest for turkey legs. Now, I know what you’re thinking, “Can’t we just throw ’em in and forget about it?” Sure, you can, but if you want turkey legs that are so tender they practically fall off the bone and into your heart? Stick with me, folks.
Ideal Cooking Times for Divine Texture
I’m talking about making your house smell like heaven and having meat so tender, it’s like it went to a spa day… for hours. First up, you gotta nail the cooking times. Typically, we’re lookin’ at about 4 hours on high, or 8 hours on low if you’re aiming for that “slow jam” of tender juiciness. But hey, each crock pot’s got its own personality; some might be hotter than mid-July in Texas, while others are chill like Alaskan summers. Get to know yours – it’s a relationship worth investing in!
- Pro Tip: Jot down the texture at different intervals. Noting these details is like turkey whispering – it’ll pay off big time.
Temperature Twists for Optimal Cooking
Now, about that heat. We’ve gotta chat about the low ‘n’ slow “Turkey Tango”. It ain’t a race, it’s a marathon. The low setting is your golden ticket to Flavor Town. But listen up, because here’s where it gets interesting – giving it a burst of high heat in the beginning could lead to a flavor explosion. Maybe start it on high for an hour, and then let it coast on low.
Just like how mama used to say “too many cooks spoil the broth”, too many peeks spoil the cook! Keep that lid on. You lift it, and whoosh! There goes your precious heat. Beefing up the time? You betcha. For every lid lift, slap on an additional 15 minutes of cook time.
And with that, you’re well on your way. Up next, though, we’re gonna dive into the creative world of basting and flipping. Stay tuned, ’cause together, we’re gonna keep those legs as moisturized as a skincare infomercial! And remember, folks, this ain’t just cooking; it’s an act of love.❤️
Crafty Basting and Flipping
Alright folks, buckle up ‘cause we’re about to dive headfirst into the ocean of moist deliciousness with some secrets on basting and flipping your turkey legs to perfection. Now, don’t go thinkin’ this is some mundane task – oh no, it’s the ballet of cooking, the waltz of the crock pot! 🍗✨
Basting Intervals for Moisture Maintenance
So you’ve got those turkey legs cookin’ and the aroma is starting to make your mouth water – what’s next? Basting, my friends, is like sending your turkey legs to a spa; it keeps ‘em hydrated and happy. But here’s the deal – you gotta stick to a strategy.
- Timing is Everything: Every hour on the hour, give those gams a generous bath with the juices. It’s like sunscreen reapplication at the beach – forget and you’ll pay!
- Don’t Drown ‘Em: Use a baster or a spoon, but remember, we’re not swimming here, just a nice coating will do the trick.
Keep in mind, if you baste too often, you’ll lose heat from the crock pot – and nobody wants that. So restrain yourself and stick to the intervals for the juiciest results.🕒
Flipping Strategies for Even Cooking
Now, let’s gab about flipping. It’s not just turning; it’s an art, ensuring each side gets equal tan time in that crock pot paradise.
- Halfway Heaven: A simple flip at the halfway mark ensures an even cook without constant lid lifting – we’re not making an elevator here!
- Use the Tools: Tongs are your best bud here – keep those hands safe and that meat off the crock pot’s floor.
Remember, flipping’ ain’t just flippin’. It requires the grace of a ballroom dancer and the timing of a comedian – snappy but smooth!
And there you have it, enthusiast of exquisite eats, follow these tips and those turkey legs will be so juicy, you might just see a tear of joy trickle down your dinner guests’ cheeks. But wait, before you go running off to baste and flip to your heart’s content, don’t forget about those sides to accompany your turkey triumph! Stick around as we’ll be talking about what to pair with these sublime legs for the ultimate feast. You’re gonna need those stretchy pants, my friend – ‘cause we’re going all out! 😋👖
Sides to Accompany Your Turkey Triumph
So, you’ve got your turkey legs slow-cooking to perfection, and you’re probably wondering, “What on earth do I serve with these majestic meaty beauties?” Fret not, my fine foodie friends, because I’ve got the skinny on the sides that’ll turn your turkey dinner from monotonous to harmonious! 🍽️
Starch Selections for a Balanced Meal
Let’s talk taters, shall we? A creamy mound of mashed potatoes can be 😘 *chef’s kiss* with turkey. But hey, why not jazz it up a bit? Throw in some roasted garlic or chives; maybe get wild with a scoop of horseradish if you’re feeling spicy, right?
Or perhaps you’re all about that rice life? Well, brown butter rice is a game-changer, folks. It’s nutty, it’s rich, and it’ll be like a warm hug for your turkey legs. Lastly, for my bread bunnies out there, picture this: freshly baked cornbread, dripping with honey butter. Drooling yet?
- Pro Tip: For extra flair, toss some herbs into your starches – rosemary potatoes or parsley rice can take things up a notch!
Colorful Veggie Contours for Plate Appeal
We eat with our eyes first, am I right or am I right? Gotta make that plate pop! How about some lemony asparagus? Or maybe some honey-glazed carrots? They’re like little sticks of sunshine, adding both color and a subtly sweet contrast to your rich turkey.
Don’t overlook the power of greens! A sautéed spinach or kale salad with a vinaigrette can cut through the richness of the turkey like a champ, balancing that palate like you wouldn’t believe.
Remember, folks: Variety is the spice of life—and dinner. Mix those colors and flavors, and your plate will be nothing short of a masterpiece.
| Side | Prep Style | Flavor Profile |
|---|---|---|
| Mashed Potatoes | Creamy, Garlic-Infused | Buttery & Smooth |
| Honey-Glazed Carrots | Roasted to Perfection | Sweet with a Hint of Earthiness |
| Kale Salad | Fresh & Crunchy | Tangy with a Peppery Kick |
Don’t just stop there though—next up, let’s slice into those burning questions you’ve got about carving and presenting your turkey legs. Because, after all, what’s a showstopper main without the fanfare of a proper entrance?
FAQs: Unraveling Crock Pot Turkey Mysteries
Hey there, fellow food fanatics! So, you’ve mastered the ancient art of crock pot turkey leg cookery – but wait! There’s more. 😄 Let’s slice into some juicy deets that might have you scratching your noggin’. You’ve got questions; I’ve got answers – and I’m not just talkin’ turkey.
Carving Conundrums: Slicing for Success
Okay folks, the nitty-gritty of turkey carving. We’re aiming for those magazine-worthy slices that’ll make your in-laws green with envy. First things, first: gotta let that bird rest before you dive in. Ten minutes should do the trick – it’s like a post-cook sauna for the meat.
- Step one: Anchor that turkey leg, and remember, it’s not running away.
- Step two: Grab a sharp knife – we’re cuttin’, not sawing.
- Slice close to the bone and follow its curvature like you’re on a racetrack. Vroom, vroom, baby!
Don’t go all samurai; slow and steady wins the race. Keep it cool, and those slices will look as good as they taste.
Leftovers Lowdown: Storing and Reheating
Now, if you’ve got leftovers – and let’s be real, you will because you made enough for an army – here’s how to keep ’em just as scrumptious for round two.
- Let the leftovers cool down but for Pete’s sake, don’t leave ‘em out too long, or you’ll be playing host to some unwanted bacteria party guests.
- Stash your bounty in airtight containers. If you’re feeling extra, label ‘em with the date. You’ll thank me later.
- Ready for a reheat? Forget the microwave. Go for the oven or the stovetop – gentler on the meat fibers.
Remember, it’s like a spa re-treat for your turkey: 325°F (that’s about 163°C for my metric folks) until it’s warmed through. Easy peasy.
Alright, peeps, hope I’ve brightened your kitchen quests with this down-to-earth turkey talk. Keep those tummies happy and those crock pots bubbling! 🍗 And hey, thanks for stickin’ with me – you guys really are the gravy to my mashed potatoes 🥔.
In closing, carving ain’t hard when you’ve got the know-how, and leftovers are just seconds waiting to dazzle again. Ain’t no mystery too tough for us to crack – especially not when it comes to turkey! Happy feasting!