
Choosing the Right Skillet for Sizzle
Alright, my grill-savvy friends, let’s chat about one crucial piece of the puzzle when it comes to sizzling up those frozen burgers – the skillet. Ever stood in the kitchen aisle, scratching your head over whether to grab a cast iron or non-stick pan? Yeah, me too.
Cast Iron Versus Non-Stick Pans
You’re looking at that cast iron skillet, and you’re thinking, “Heck, that’s heavy-duty… But will it treat my burgers right?” The answer is a resounding yes! Cast iron is the Arnold Schwarzenegger of pans – it’s tough, it’s reliable, and boy does it know how to give your burgers a sear that’d make a chef weep. But, remember, it’s a bit high-maintenance, kind of like that sports car you wish you hadn’t bought in your midlife crisis phase. 😉 You need to season it and keep it dry to avoid rust.
Now, non-stick pans, they’re the easy-going type. Nothing sticks (duh), and they’re a breeze to clean. But watch out – they’re not fans of high heat, and they scratch easier than a DJ’s record. So, if you’re going for that perfect crust on your burger, cast iron is your pal. If convenience is your jam, non-stick will do the trick!
The Size Matters: Picking the Perfect Skillet
When it comes to size, think about your appetite, or those you’re feeding. Are we talking solo dinner or a family shindig? A 12-inch skillet usually works like a charm for a few burgers, but if you’re hosting a backyard bonanza, you might want to size up. Just remember: more surface area equals more room for flipping those patties without launching one onto the floor (been there, done that).
Maintenance: Preparing Your Pan for Cooking
Let’s get down to brass tacks – or should I say, cast iron tacks? 😂 Before you even think about tossing that burger onto the skillet, you gotta prep it. A well-seasoned cast iron pan is non-stick’s older, wiser sibling; it just gets better with age. Rub it down with some oil, heat it up slowly, and let it build that natural, slick coating that’ll make your burgers slide right off the pan into bun paradise.
For those non-stick aficionados, keep the metal utensils away from your pan – they’re like kryptonite to its sleek surface. Use wooden or silicone tools to keep it in tip-top shape, and your burgers will thank you by being scrumptiously unscathed.
Now that we’ve got our skillets sorted, what’s next? Ah, the art of thawing your patties. But let’s save that juicy topic for the next chapter, shall we?
The Art of Thawing: Prep Your Patties
Okay folks, let’s rap about the big thaw – the pre-game show for your burger extravaganza. You’ve got your frozen patties stacked up like a meaty treasure trove in the freezer, now what? Well, you could slap ’em straight onto the skillet and pray for the best, but we’re not about that life. We’re aiming for perfection here, right?
First off, the age-old question: To thaw or not to thaw? Here’s the juicy scoop – thawing gives you more even cooking and better texture. So, unless you’re in a bigger rush than a kid on Christmas morning, let’s do this the right way.
Quick-Thaw Techniques
Now, we’ve all been there – hangry with no time to spare. So, how do you fast-track your burger from ice block to grill-ready? Easy peasy! The trick is cold water. Yup, dunk those frozen patties in a zip-lock bag and float ’em in cold water. Make sure to change the water every 30 minutes, and voila, you’ll have thawed patties quicker than you can say “Where’s the ketchup?”
Health and Safety Considerations
Remember, though, folks – safety first! Don’t go leaving those patties out on the counter to thaw; unless you’re looking to invite bacteria to your barbecue. Also, once thawed, don’t refreeze. I mean, who likes a burger that’s been given the cold shoulder twice?
Alright, now that you’re buddies with your burger, it’s time to amp things up a notch. Next up, we’re diving into the world of spices and marinades to give your burger that chef’s kiss of flavor. Stay tuned, grillmasters, ’cause we’re just getting heated!
Seasoning Secrets: Boosting Flavor
Alright, folks, let’s dive into the juicy world of burger flavor – and I ain’t just talkin’ ’bout ketchup and mustard here. We’re getting into the nitty-gritty of seasoning that can transform your stovetop frozen burger from bland to grand!
Custom Spice Blends for Burgers
Ever wondered why some burgers taste like they’ve been kissed by the flavor gods? Well, lemme tell ya, it’s all in the spices. Mixin’ up your own blend – think paprika, onion powder, a little brown sugar, and a pinch of cayenne for kick – can set your patties apart from the pack. Don’t be shy; experiment and find your signature mix!
Oil and Herbs: Enhancing Taste
Now, here’s a tip straight from my granny’s kitchen – a lil’ brush of olive oil mixed with crushed garlic and finely chopped herbs can work wonders. As that patty sizzles, it’ll soak up all those aromatic flavors, and oh boy, your taste buds will be dancin’! 🌿
Marinades: Introducing Deep Flavors
And let’s not forget about marinades. Sure, we’re dealin’ with frozen burgers, but who says you can’t give ’em a quick bath in some flavor-town goodness? A simple marinade of Worcestershire sauce, soy sauce, and a squidge of Dijon mustard can make all the difference. Just let those patties sit in the marinade while they thaw a bit – trust me, you’ll thank me later.
With all these seasoning tips, you’re well on your way to crafting a burger that’s buzz-worthy. And remember, these are just the basics – feel free to go wild. Your skillet is your canvas, your spices are your paint – so create that masterpiece, my burger-loving friends! And now, as we’ve got our burgers tastin’ like a million bucks, let’s move on to Mastering Over Heat: Flame Control, because no one likes a charred patty, right? Stay tuned for how to keep that flavor locked in without setting off the smoke alarm.
Mastery Over Heat: Flame Control
Alright, buckle up, folks! Now that we’re zooming past the preliminaries, let’s turn up the heat – literally. We’re gonna dive headfirst into the sizzling world of flame control. Now, don’t get me wrong; I love a good char as much as the next guy, but keepin’ an eye on that fire can mean the difference between a burger that’s the bomb and a patty that’s, well, bombed.
The Importance of Even Heating
Ever found yourself in a spat with a skillet that just won’t behave? One side of your burger is channeling its inner volcano, while the other side is barely warmed up? Yeah, been there, done that. The key, my friends, is even heating. Cast iron skillets are the heavyweight champs here, distributing the heat like a boss. Or if you’re in a pinch, a heavy-bottomed pan will also do the trick. Just remember, steady as she goes – keep that flame consistent for a cookout that’s top-notch!
Adjusting Temperatures for Juiciness
- Start with a medium-high flame to sear the outside of the burger, locking in those savory juices.
- Once you’ve got that gorgeous crust, lower the heat slightly so the inside can catch up without turning into a hockey puck.
And hey, don’t be shy about lifting the edge with your spatula to take a peek. We’re cookin’ here, not painting the Mona Lisa – it doesn’t need to be perfect!
Avoiding Overcooking: When to Flip
Timing is everything, isn’t it? Flip too soon, and you’ll miss that sear we talked about. Wait too long, and you might need to check your smoke alarm’s batteries. So here’s the scoop: you’ll wanna flip when you see juices bubbling up to the top of the burger. That’s nature’s way of saying, “Hey buddy, it’s time for a flip!”
Oh, and don’t be a serial flipper. Flip once, maybe twice if you’re feeling adventurous. Any more than that and you’re just giving your burger a workout, not cooking it.
So, as we sizzle our way to burger paradise, remember – even heat, watch the temperature, and flip wisely. Those patties will be so juicy, your taste buds will throw a party in your mouth. Now, let’s talk Flipping Fundamentals because mastering the flip is like nailing the perfect high-five – it just feels right.
Flipping Fundamentals: Burger Acrobatics
So, you’ve got your patties sizzling on the skillet, and that smell is wafting through the kitchen—got you drooling yet? Now, let’s talk about the high-flying action of flipping burgers. It’s not just tossing a patty willy-nilly; it’s an art form, my friend. Getting the perfect crust on both sides? It’s all in the flip.
The Perfect Flip: Timing and Technique
Imagine this: You’re front and center at the grill, spatula in hand like Thor’s hammer—well, kinda. But when do you unleash the flip? Wait ‘til you see those juices pooling on top of the patty. That’s your patty’s way of whispering, “I’m ready!”
Pro Tip: Looking for a golden crust? Give it about 3-4 minutes on each side before you flip—that’s the sweet spot!
Flip with confidence, but for Pete’s sake, don’t slap it down like it owes you money. A gentle laydown is what we’re aiming for. Keep it smooth and steady, so you’ve got less chance of breaking the burger or splattering hot oil. And remember, just one flip should do the trick! Over-flipping is a no-go zone; it’s like pressing an elevator button repeatedly—unnecessary and annoying.
Tools of the Trade: Spatula Selection
Now, not all spatulas are created equal. You want one that’s sturdy but flexible—a stainless-steel one is your best bet. It should slide under the burger like it’s asking it out on a date, smooth and suave.
Quote of the day: “A good spatula is like a good friend – always there when you need it and doesn’t let you down!” – Anonymous Grill Master
Signs of Readiness: Visual Cues
Even seasoned burger flippers need some hints. Look for the edges to crisp up and darken. Flip when you peek underneath and see a seared, mouth-watering crust. Do the juices run clear? If your answer is a resounding “heck yes!”, you’re on the right track. And those grill marks? Make‘em proud badges of your culinary feat.
Let’s not forget about those show-stopping toppings coming up next. After all, what’s a burger without its bling? Get ready to crown your creation with fresh, crisp veggies, tangy sauces, and all that cheese we’ll be melting to perfection. But that’s a sizzling story for another time—stay tuned!
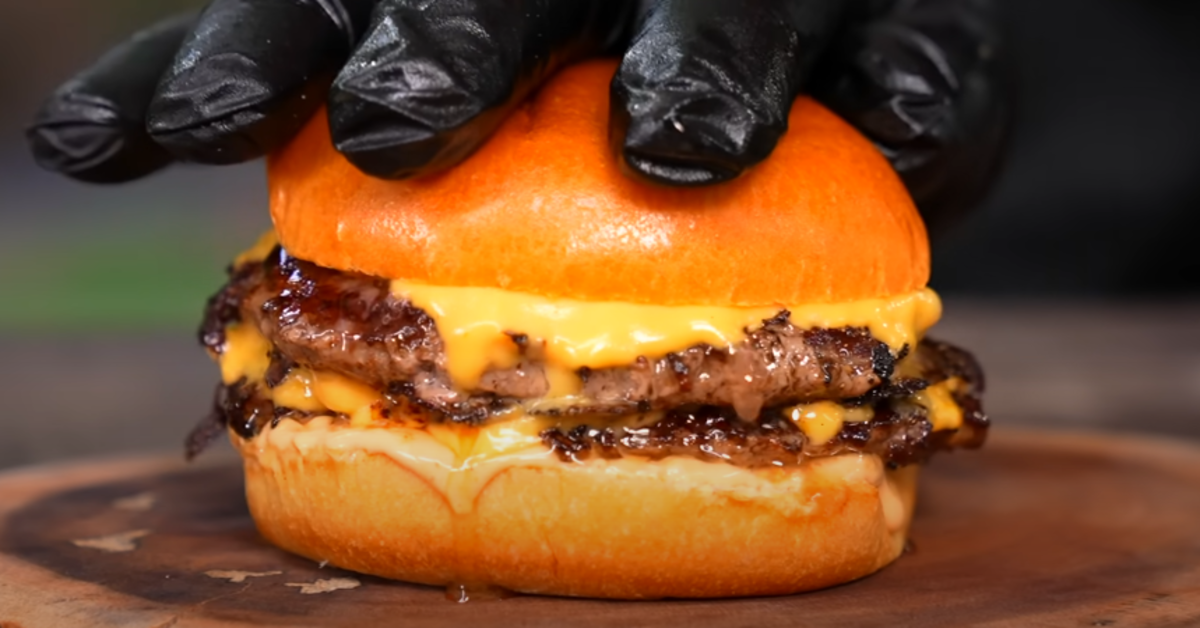
Cheese Melting Mastery
Alright, folks, let’s talk about the magic that turns a good ol’ burger into a culinary masterpiece: cheese melting! Now, I know you’ve been there—you’re at the grill, cooking up a storm, and you slap a slice of cheese on that patty, only to end up with a firm square staring back at you instead of that ooey-gooey meltiness we all crave. So, let’s dive into how to achieve that perfect, Instagram-worthy cheese melt every single time.
Best Cheeses for a Gooey Melt
Okay, first things first, you’ve gotta pick the right cheese, and not all cheeses are created equal when it comes to melting. 🧀 American cheese, for instance, is like the go-to prom date of burger cheeses—it just never lets you down with its meltability. Cheddar is another great option but make sure it’s medium cheddar; too sharp and it won’t melt as well. And let’s not forget about Pepper Jack, who brings a lil’ kick to the party!
Timing the Cheese for Optimal Melt
Now, timing is everything, my friends. You don’t want to jump the gun and add your cheese too early or you’ll be chomping on charcoal. Wait until the last minute or two of cooking—that way, you’ll get melty perfection without turning your burger into a hockey puck.
Covering Your Burger: Trapping Heat
Lastly, if you’re really looking to get that melt-in-your-mouth experience, you’ve gotta trap some heat. So, once your cheese is atop that juicy patty, go ahead and cover that skillet for a hot minute. This steams up the cheese, making it perfectly pliable. Don’t have a cover? No worries—just use a pot lid or a foil tent. It’s like building a lil’ cheese sauna.
Once you’ve mastered the art of cheese melting, your stovetop burgers will be the toast of the town. Seriously, your taste buds will be singing and your pals will be begging for your secrets. But remember, don’t get too ahead of yourself; we’ve still got some burger-building tips coming up next, like the art of stacking your creations high with Accompaniments and Toppings Galore. So, keep that cheese confidence high, and let’s keep on trucking!
Accompaniments and Toppings Galore
Alright folks, let’s get real – a burger without its fixin’s is like a hug without the squeeze! Now, I’m no rabbit, but I can tell ya, the fresh stuff is crucial. 🥬 When you’re picking out your lettuce, tomato, and onions, think “crisp.” Nobody wants a limp leaf moonlighting as a blanket for their burger – no sirree!
Freshness Counts: Selecting Veggie Toppings
Let’s dive into the veggie vault. Iceberg lettuce gets a bad rap, but that crunch? Unbeatable. And for tomatoes, think summer love – bright, juicy, and just a little messy. Onions, well, they’re like that guest who might overstay their welcome unless you pick the right kind. Go for red ones! They’ve got enough kick to be interesting without knocking your taste buds into next week.
- Pro Tip: Slap those leafy greens onto a paper towel before dressing your burger. Helps ’em dry off after their bath.
- Always go for the ripest tomato you can find. Give it a gentle squeeze. If it feels like a stress ball that’s been through a tough week, you’re golden.
Complementing Flavors: Sauces and Spreads
Now onto the saucy part, and I ain’t just talking about your uncle’s jokes at the family BBQ. Mustard, ketchup, mayo – the holy trinity of burger anointing oils. But hey, why not jazz it up a bit? Chipotle mayo? Sriracha? BBQ sauce? Your burger won’t know what hit it. Just remember, it’s a burger, not a soup; moderation is key, my friends.
Building the Ultimate Burger Stack
We’re architecting the skyscraper of burgers here. The foundation? Bun, obviously. Then, your precisely cooked patty – sizzling from the stove. Stack it up with the veggies so it looks like a garden on a bun, and paint each layer with your choice of sauce. Place that cheese-crowned patty right in the middle, and you’ve got yourself a masterpiece.
“A great burger should be like a first kiss: a little saucy, a bit messy, and utterly unforgettable.” – Anonymous
Remember as you get ready to slap on that cheese that the art of the melt is next. How’s that for a sizzle of anticipation? So, before you go reaching for that spatula, get your taste buds ready to explore the molten magic of cheese mastery following this topping tutorial. But that’s a cheesy saga for the next chapter…
FAQs: Savoring Stovetop Frozen Burgers
Okay, grillmasters-in-training, gather ’round the stovetop. It’s time to crack the frozen code with ya grill buddy, me—full of that sizzling wisdom. Got burning questions on cooking frozen hamburgers at home without starting an accidental BBQ on the balcony? Fear not, I’m flipping the answers right at ya—ready, set, beef!
How Long Does It Take to Cook a Frozen Burger?
Patience is a virtue, my carnivorous friend, but you don’t need to be a saint. It typically takes about 15-20 min to cook a frozen burger on the stovetop. Want ’em medium rare? Shave off a few minutes, but always check the internal temps—safety first!
Can You Cook Burgers Straight From Frozen?
Who’s got time to defrost? Not me—I’m too busy quoting ’80s movies and getting the scoop on the latest dad sneakers. So, the answer’s yes! Straight from the tundra and onto the skillet. Just flip ’em a few times and lower that heat to avoid charring your dinner into charcoal.
Troubleshooting Common Stovetop Burger Issues
Alright, picture this: your burger’s cooking, you’re buzzing with anticipation, but something’s off. Is it not cooking through, or did you accidentally create a burger-shaped hockey puck? Here’s a quick checklist:
- Is the skillet too hot? Take it down a notch.
- Flippin’ too often? Give those patties a rest, flip once or twice max.
- Charred on the outside, raw on the inside? You’re living on the edge! Cook ’em lower and slower.
Remember, the biggest trick up my spatula is to use a meat thermometer—aim for 160°F for a safe, savory feast. Burgers are like snowflakes, no two cook exactly the same. So, show ’em some love!
Finally, if your BBQ craving is as big as Uncle Jim’s tall tales, give these stovetop frozen burgers a go. I mean, it’s all about the journey, right? Even if it’s just to the kitchen and back. Thanks for hanging with me, stay sizzling, burger pals! 🍔🔥