
Selecting the Perfect Patties
Now, let’s get down to brass tacks. Imagine this: a juicy burger that’s the talk of the town, or at least your backyard barbecue. The road to burger royalty starts with choosing the right patty, my friends. And don’t even get me started on thickness – it’s like picking the perfect mattress for a good night’s sleep, but for your mouth! 🍔
The Meat Blend: Flavor Starts Here
You ever stand there in the grocery store, staring at the meat section like it’s one of those ‘Choose Your Own Adventure’ books? Well, picking your meat blend is an adventure. It’s the cornerstone of flavor! Go for a mix of chuck and brisket, or throw in some short rib if you’re feeling fancy. Just remember, fat equals flavor. Don’t skimp on the fatty bits, or you’ll have a patty drier than my Aunt Edna’s sense of humor.
Patting Patties to Perfection: A Thickness Guide
Thickness is key, folks. Too thin and your burger will dry out faster than a kiddie pool in the Sahara. Too thick, and you might as well carve it into a steak. Aim for about 3/4 of an inch – that’s the sweet spot for a juicy, flavorful burger that’ll cook evenly without testing your patience. And trust me, nobody likes a hangry guest.
Keeping It Simple: Seasoning Essentials
When it comes to seasoning, let’s not go overboard. A little salt and pepper go a long way, like a life jacket on a waterbed. You want to taste the meat, not a spice cabinet explosion. Sprinkle that seasoning with love, but don’t drench it like it’s a salad in need of dressing.
Alrighty, now that you’ve got your patties picked out, it’s time to move on to the main stage: the pellet grill. But hey, don’t rush off just yet! We’re about to dive deep into the smoky world of pellet grilling next, and you’re gonna want to catch every last savory detail…
Pellet Grills 101: A Smoky Revolution
Hey there, grill enthusiasts! Ever wonder what all the buzz is about with these fancy-schmancy pellet grills? Well, buckle up, ’cause I’m about to take you on a smoky spin down Pellet Grill Lane. These bad boys are the Swiss Army knives of the barbecue world, and here’s the lowdown on why they’ve become the talk of the cookout.
The Mechanics of Pellet Grilling
First off, let’s gab about how these pellet grills work their magic. Unlike your granddaddy’s charcoal grill, pellet grills are fueled by—you guessed it—pellets! These little compressed sawdust marvels are the secret sauce to consistent temperature and that irresistible wood-fired flavor. Just pour ’em into the hopper, and the grill’s auger system will feed them to the fire as needed. It’s like having an automatic pitmaster inside your grill, making sure those flames are just right.
Choosing Your Pellets: Flavorful Considerations
Now, don’t just grab any ol’ pellets. Your choice of pellet is like picking your team in a dodgeball game—you want the best on your side. Hickory, mesquite, apple, cherry – each one’s got its own personality and pairs with different foods like wine with cheese. Want a bold kick? Go mesquite. Looking for a sweeter touch? Apple’s your guy. It’s all about matching that pellet to your patty for a taste bud tango.
Preheat Protocol: Timing is Key
Remember, friends, patience is a virtue, especially when it comes to preheating. Give your pellet grill a good 10-15 minutes to reach the ideal temp. This isn’t just twiddling your thumbs time; it’s crucial for ensuring your burgers cook evenly. No one wants a burger that’s charred on the outside and raw in the middle, right? So hang tight, maybe sip on that cold one, and let the grill do its thing.
Alright, now that we’ve got the basics down pat, let’s talk about burger placement. Stay tuned as we dive into grill real estate and how to claim the choicest spots for your patties. And trust me, when it comes to grilling, location is everything!
Burger Placement: Maximizing Grill Potential
Hey there, fellow grill aficionados! So you’ve got your patty game on lock – trust me, I’m still drooling over here about the juicy details we just covered. But now? It’s time to get those bad boys on the grill. And lemme tell ya, where you place ’em matters more than my uncle’s opinion on… well, anything. 🍔
Mapping Out Your Grill’s Hot Spots
First things first, let’s play cartographer with your grill’s surface. Every grill’s got its own personality, with hot spots where the heat loves to party. You’ll want to suss out these areas during a dry run – heat that baby up and use the hand test. Hover your hand above the grill – but don’t go playing hero, we need those fingers for flipping. Now, simply feel where the heat’s huggin’ the most. These are your hot spots, friend!
Space Management: Avoiding the Squeeze
Next up, we’re talking real estate. And no, not the kind where you need a fancy suit. Space out your patties like you’re avoiding that chatty neighbor – generously. We’re shooting for even cooking, and piling them together like a clown car ain’t gonna cut it. So, remember, give those patties some breathing room!
Flipping Fundamentals
- Master the One-Flip Rule: Now, some folks flip their burgers like they’re trying to win a pancake contest. But the golden rule? One flip, yes, just one. Wait for that perfect crust, then give it a gentle flip. This ensures an even cook without turning your grill into a burger trampoline.
- Heavy Hands Off: And please, I’m beggin’ ya, don’t squash ’em with your spatula. It’s like squeezing a stress ball – sure, it feels good, but all those delicious juices? Yeah, you’re just pressing them into oblivion.
Now, as you masterfully navigate your burger placement, remember that every move you make is setting the stage for the next act – Temperature Mastery for Melting Goodness. That’s right, we’re on a journey to that blissful, cheesy, melt-in-your-mouth territory, and trust me, it’s worth every bit of effort. So stay tuned, grill gang, ’cause we’re just getting warmed up (see what I did there?).🔥
Temperature Mastery for Melting Goodness
Alrighty, folks, let’s turn up the heat and dive straight into the hot topic of burger grilling – temperature control. You know what I’m sayin’? Get this right and you’re not just making burgers, you’re crafting a mouthwatering experience. So, how do you hit the bullseye on that perfect burger temp?
Grilling Thermometers: Your Best Ally
First off, let’s talk about trusty sidekicks. No, not the ketchup bottle – I mean the grilling thermometer! This little gadget is your ticket to the big leagues of burgerdom. It’s all about precision, baby. Jab that probe into the patty’s heart and wait for the magic number – 160°F for beef to be safe and sound, but hey, if you like living on the edge, medium rare at 145°F can be your jam (just make sure your meat is fresh!).
The Mighty Sear: Crispy Edges, Tender Middle
Next up, the sear. Oh, the sear! It’s like the crisp edge of a brownie – everyone’s gunning for it. But how crispy is too crispy? Well, that’s a fine line, my friend. The trick is a high heat flash on both sides before you bring it down a notch. This locks in those juices and gives you a burger that’s charred on the outside, yet keepin’ it cool and collected in the middle.
Cheese Melting Magic: When and How
And now, for the grand finale – the cheese. And not just any slap of cheese, but a perfectly melted drape that hugs your patty like it’s reuniting with a long lost love. Timing is everything here. Wait until the last minute or two of cooking. Then, lay that cheese slice down and cover it with a dome or close the grill lid. Let the steam work its magic. The result? Cheese that’s so gooey and glorious, it’ll make you wanna write a love song.
Remember, mastering these temps and techniques takes practice, but once you get a hang of it, you’re gonna be the grill master on the block. And now that you’ve got the inside scoop on the heat, let’s shift gears a bit and talk about infusing these beauties with flavor that’ll knock your socks off. Stay tuned for the secrets of smoke infusion!
Smoke Infusion: Unlocking Aromatic Bliss
Ever wondered why some burgers make you do a happy dance while others are just, well, meh? My fellow grill aficionados, it’s all in the smoke! Getting that smoke infusion just right can feel like you’re out there doing a magic act 🎩✨. But don’t fret! You’re about to learn the tricks to making your pellet grilled burger the Houdini of the neighborhood cookout.
Types of Wood Pellets: Matching to Meat
Let me tell you, not all wood pellets are created equal. Hickory might serenade beef like an old-school love song, while applewood gives poultry the gentle kiss of smoky sweetness it craves. Pro Tip: Try cherry wood for a wild card; it’s like the jazz music of smoke flavors—it pairs well with just about anything!
- Mesquite: Bold, perfect for hefty burgers.
- Apple: Light and fruity, for a subtler touch.
Smoke Timing: Finding the Sweet Spot
When it comes to smoke timing, think of it like seasoning – a little goes a long way. Start smoking when you put the burger on, and let it steep in that hazy flavor. Around 10 minutes of heavy smoke can inject enough of that aromatic charm to start the flavor party right.
Controlling Intensity: Smoke it Right
Listen up, the goal here’s to infuse, not to choke out your patties in a smog! Here’s the lowdown: smoke at a lower temp to introduce the flavor without assaulting your burgers with a full-on smokehouse effect.
“Think of adding smoke to taste, like a spice, not a main ingredient!”
says every reputable patty flipper.
Alrighty, after you’ve given your burgers that smoky hug, you’re ready to baste. Don’t go anywhere though! Up next, we’ll dive into the basting battlefield and ensure your burgers stay juicier than a watermelon at a Fourth of July picnic 🔥🍔.
Harnessing the Power of Basting
Now, let’s talk turkey—well, burgers, actually—but you get my drift! If you’re not basting your burgers on the pellet grill, you’re like a guitarist without a pick: sure you can strum, but you’re not gonna rock. Basting keeps those patties as juicy as a summer peach. 🍑
But hold your horses, partner! What in the wild, wild world of culinary creations do we mean by basting? Easy there! It’s all about spooning or brushing on a glorious glaze of flavor-filled liquids. This, my friends, gives your burgers that “Mmm” factor that makes your tastebuds do the tango.
Basting Brush Techniques: Keep the Juices Flowing
- First off, grab your trusty basting brush. Now, stroke that burger like it’s your fluffy cat! Gentle, loving bastes will keep the meat moist and make it purr with flavor. No splashing or drenching—let’s not turn this into a backyard pool party!
- When you spot those first juices bubbling up, that’s your cue – swoop in with your basting mixture. It’s all about layering flavors one baste at a time.
The Best Basting Mixes: Enhance That Burger
Pssst… Want to know the secret sauce? Literally, it could be a secret sauce. But let’s not complicate things. Even a simple mix of melted butter with some garlic and herbs can catapult your patty to stardom. Maybe get wild with some smoky barbecue sauce or, heck, a splash of beer for a hoppy note—why the heck not?
Timing Your Bastes: Flavor at Every Turn
Some say timing is everything and they ain’t wrong. Baste too early, and the heat hasn’t had time to unlock the flavors. Baste too late, and you missed the bus to Flavor Town. Grill master’s tip? After the first flip, start your basting bonanza. And keep it coming every few minutes until you’ve got that gloriously glazed over look that says, “I’m ready for my closeup.”
Remember, kids, don’t baste with raw meat juices—unless you’re vying for a spot on the evening news! Safety first, flavor bomb second. Speaking of which, up next, we’re diving into Garnishing and Serving: The Finishing Touches. Get ready to top that smoky, juicy burger with panache and maybe a gherkin or two. Stay tuned, burger aficionados!
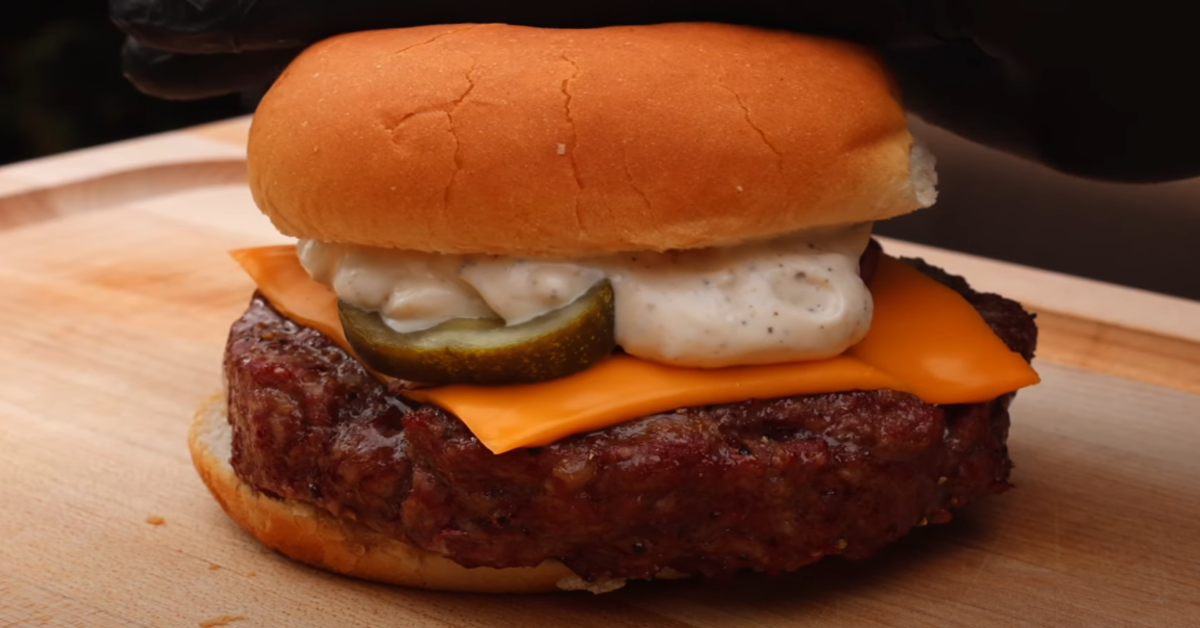
Garnishing and Serving: The Finishing Touches
So, ya got your patty grilled to perfection, and you’re almost ready to chow down. But wait just a hot minute—ain’t no burger complete without those snazzy finishing touches! Let’s roll up our sleeves and dive into the world of burger garnishing and serving. 🍔✨
A Bounty of Bun Options: Softness and Flavor
First thing’s first, the bun: it’s like the hug that keeps all your burger goodness together. You want it soft enough to bite through easily, but sturdy enough to handle all the juiciness without falling apart faster than your diet on Thanksgiving. A brioche bun offers a sweet, buttery embrace, while a classic sesame seed bun brings that nostalgic crunch. And hey, for you health nuts, a whole-grain option ain’t just tasty, it’ll make you feel virtuous too!
Toppings Galore: From Classic to Avant-Garde
Next up—toppings! You can stick to the classics (hello, lettuce, tomato, and onions), or get fancy and throw some avocado, artisan cheese, or heck—even a fried egg—into the mix. Feeling adventurous? A spoonful of spiced-up chutney could set your burger on a flavor adventure. And remember, it’s all about balance; mix up those textures and flavors like you’re the DJ of a bumpin’ taste party.
Serving Suggestions: Plating Your Masterpieces
Now let’s talk presentation. ‘Cause let’s be real, we eat with our eyes before anything goes in our mouths. A well-dressed burger on a plate garnished with some fancy pickles and a side of crispy fries? Chef’s kiss! Pro tip: slap a lil’ extra sauce on the side for dippin’—you’ll thank me later. And why not throw in a skewer to keep that tower of deliciousness from toppling over? It’s functional and it looks pretty darn cool.
Alright, as you’re basking in the glory of that beautiful burger, don’t forget we’re about to tackle some grillin’ FAQs next. You’re one quick hop away from being a full-blown pellet grillin’ genius!
Okay folks, you’ve flipped and seared, and smoked your way through the patty playbook, but hold onto your spatulas – we ain’t done yet! It’s FAQ time in the wild world of pellet grilled burgers, and lemme tell ya, I’m here to dish out the secret sauce of wisdom with a side of smart aleck! 🍔💨
FAQs Regarding Pellet Grilled Burgers
Pellet Grill Temperature for Burgers: What’s Ideal?
So, you’re scratching your head wondering “What’s the magic number, grill master?” Hear me out, I might not be a wizard, but when it comes to burgers, the sweet spot’s usually between 375-400°F (190-204°C, if you wanna get all metric on me). Start hot to get that patty party started and lock in the flavor like Fort Knox!
Troubleshooting Common Pellet Grill Burger Problems
- The Flare-up Fiasco: Keep a squirt bottle handy. A little spritz and you can play firefighter and keep those flames from charcoaling your chow.
- Stuck Patties Panic: Don’t go flippin’ out now! Just give ‘em a gentle nudge. If they’re stickin’, they ain’t ready for flippin’.
- Uneven Cooking Conundrum: Rotate, don’t just marinate in frustration. Shuffle those burgers around like a deck of cards to find their grilling groove.
Vegetarian and Vegan Burger Tips on a Pellet Grill
Don’t think I forgot about you, plant-powered pals! 🌱 For a veggie victory, go for high-protein patties to keep ‘em from crumbling faster than a cheap cookie. Low and slow is the way to go – keep that temp or around 350°F (that’s about 177°C) and watch those garden goodies transform into a smoke-kissed sensation!
In closing, remember – pellet grilling burgers is supposed to be fun, so don’t sweat the small stuff. Slap on an apron, pop a cold one, and keep those grill grates hot. Til next time, keep those burger buns toasty and your spatula at the ready! Thanks for grillin’ and chillin’ with me. Keep it smoky, folks! 🔥👨🍳